CallRail and AI Receptionist Integration Guide
CallRail is a call tracking and analytics tool that assists businesses see where their calls are coming from, so they can tune their marketing and make smarter decisions. AI Receptionist is a conversational AI answering service that answers calls, takes messages, and schedules appointments around the clock.
When combined, businesses and companies will be in a position to redirect the CallRail-originated calls on AI Receptionist depending on predetermined identifiers such as missed calls, after-hours, or weekends. This integration guarantees that no customer inquiry goes unanswered and maintains operations efficiently and professionally.
Here we are going to guide you on how to integrate CallRail with AI Receptionist across various scenarios, step-by-step.
This guide lays out real, step-by-step instructions on how to integrate Nextiva with AI Receptionist.
AI Receptionist and CallRail’s Integration Prerequisites
It is a good idea to get everything properly in place in advance to ensure the integration of CallRail and AI Receptionist is established successfully and without any disruptions. Make sure you’ve completed the following:
- An active CallRail account with administrator access.
- A AI Receptionist account created and accessible at dialmycalls.com.
- Your AI Receptionist set up and assigned its unique local phone number.
- Basic familiarity with CallRail’s Call Flow Builder.
How Does the Integration Work?
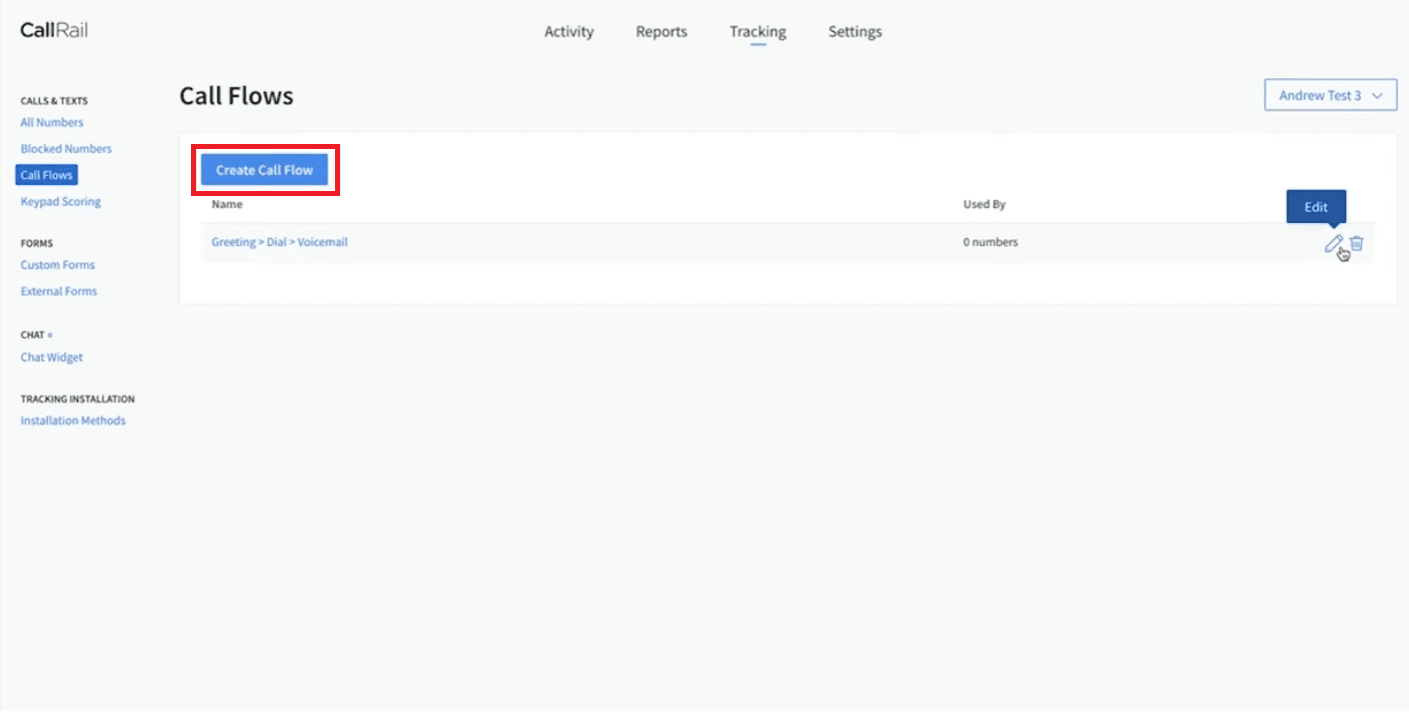
Integrating CallRail and AI Receptionist is not a difficult process leveraging CallRail powerful Call Flow Builder for call forwarding and routing features. By directing call flows to your AI Receptionist assigned phone number, you create a seamless bridge that ensures comprehensive call coverage. This is how it works:
Step 1: Set Up Your AI Receptionist Account
Visit dialmycalls.com, sign up, and create your AI phone agent. Once set up, you will be provided with a unique local phone number for your AI agent.
Step 2: Log in to Your CallRail Dashboard
Log in to your CallRail account with admin permissions to configure the call routing and forwarding.
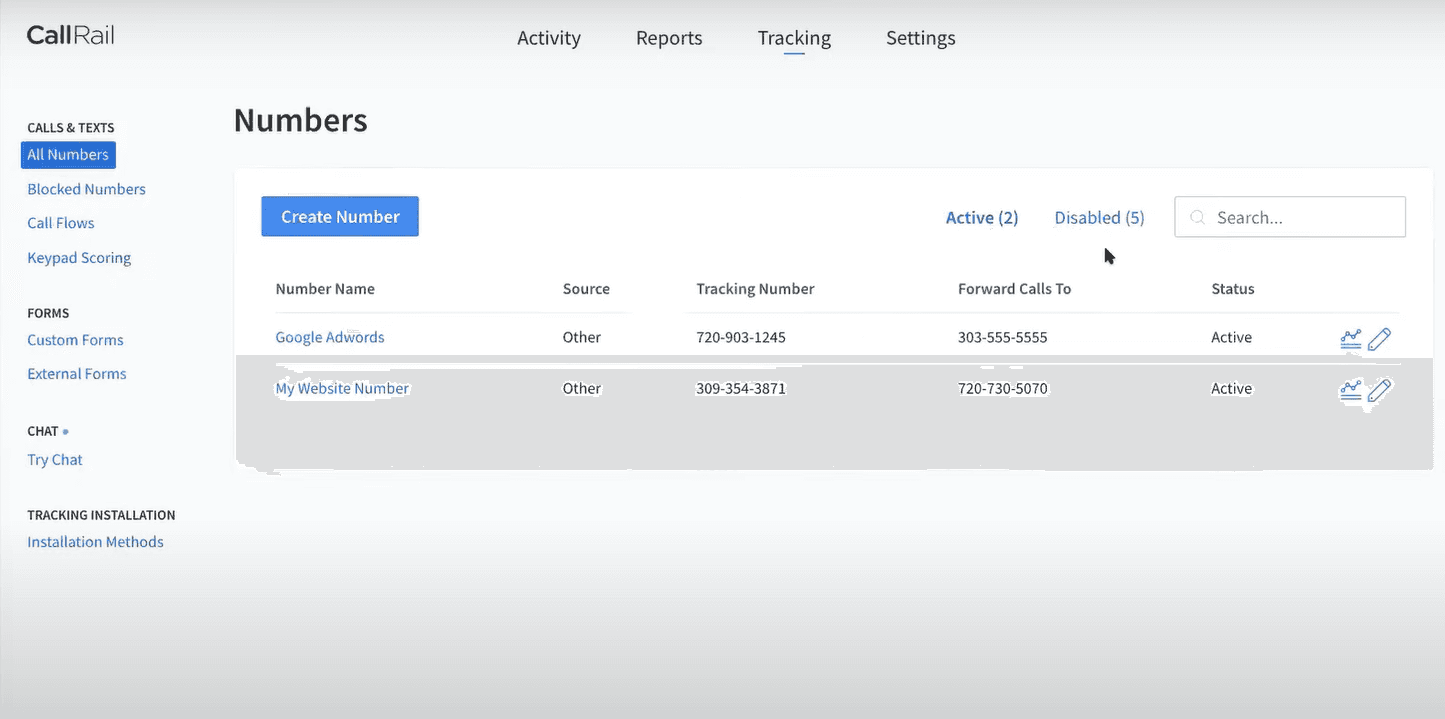
Step 3: Go to the Numbers and Access Call Flow Settings
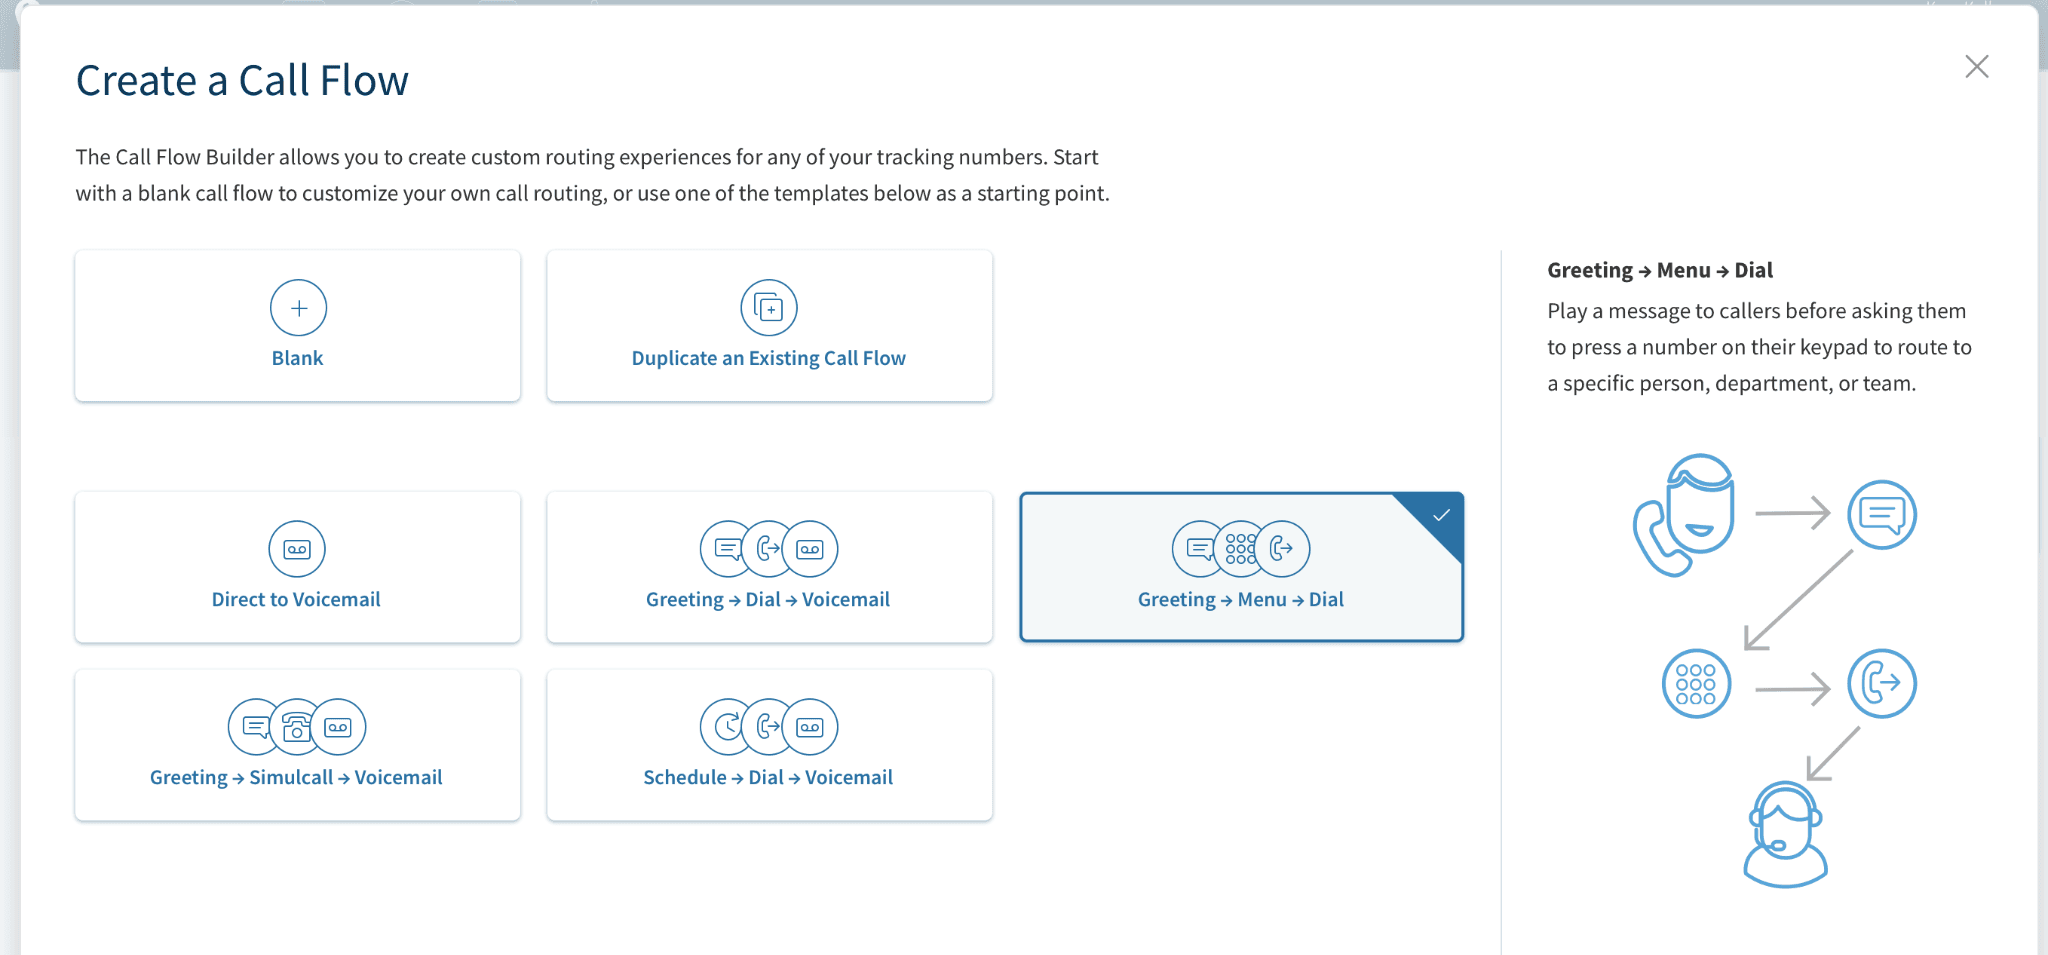
In your CallRail dashboard, In the left-hand menu go to the “Numbers” section. Locate the tracking number you want to integrate with AI Receptionist, then click on it to see the settings. There you will click on “Edit Call Flow” to start setting things up.
Scenario 1: Forwarding After-Hours & Weekend Calls
AI Receptionist ensures that no call falls into the abyss, even when your team is not available during the evenings, weekends or any holidays. It attracts leads, answers queries, and offers customer service 24/7 for customer satisfaction. Here’s how to configure it using Callrail Call Flow Builder:
Step 1: Add a “Schedule” Step
In the Call Flow Builder, click “+ Insert step here”. From the list of options, select “Schedule” and drag it onto your call flow. Drop it in the spot where you want calls to be routed based on your business hours.
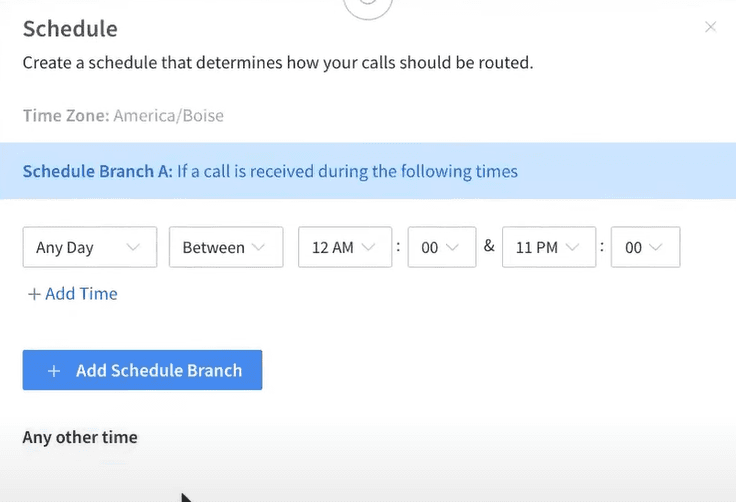
Step 2: Define Your Business Hours
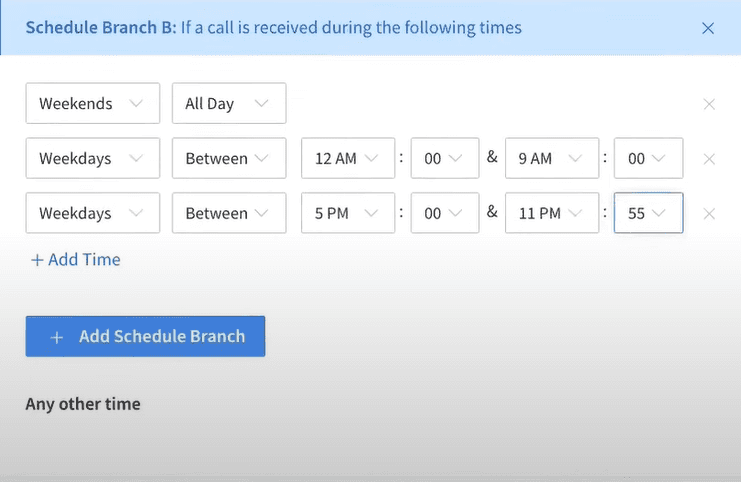
Click on the “Schedule” step you just added. In the panel that pops up, set your normal business hours, like Monday through Friday, 9:00 AM to 5:00 PM. Make sure to pick the correct time zone so everything routes the way it should.
Step 3: Define the “Any Other Time” Branch
The “Schedule” step automatically creates branches for “Within Business Hours” and “Any Other Time.” Locate the “Any Other Time” branch. This is the path calls will take when outside your defined business hours.
Step 4: Add a “Forward Call” Step
Click the ‘+ Insert step here’ (or equivalent “Add Step” button) on the “Any Other Time” branch. From the options, select the “Forward Call” step.
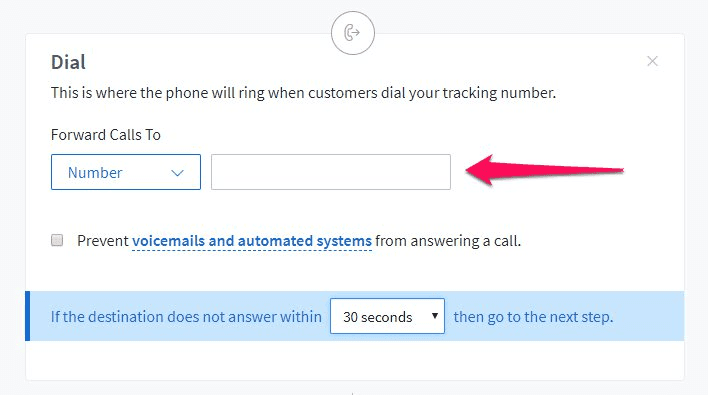
Step 5: Enter Your AI Receptionist Number
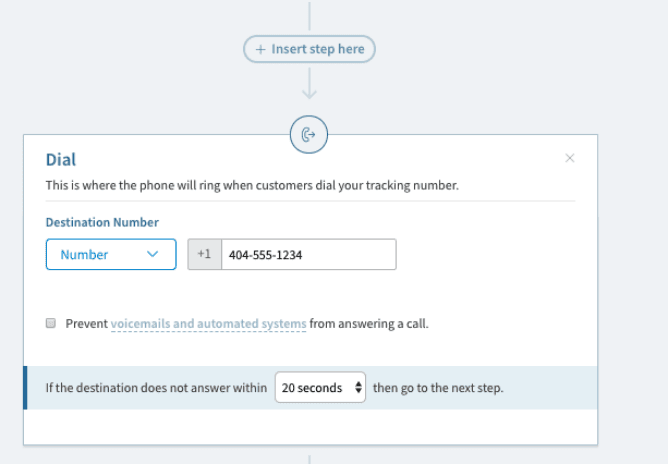
Click on the “Forward Call” step you just added. In the panel that appears, enter your assigned AI Receptionist number in international format into the “Destination number” field.
Step 6: Save Your Call Flow
When you are done with configuration, In the upper-right corner of the Call Flow Builder, Click Save. This will prompt you to assign the Call Flow to a tracking number. To enable the after-hours routing, ensure your Call Flow is assigned to the correct tracking number. Calls received outside business hours will now be routed directly to your AI Receptionist.

Scenario 2: Forwarding Missed or Busy Calls
Callers should not go into a generic voicemail when your human agents are occupied, already on another call, or do not pick up. Forwarding missed or busy calls to AI Receptionist means that no customer interaction will be halted, and all actions will be done swiftly and intelligently. Here is how:
Step 1: Locate Your Primary “Forward Call” Step (or relevant routing step)
Open the Call Flow Builder for your desired number. Identify the initial “Forward Call” step or any “Simulcall” or “Round Robin” step that directs calls to your primary team/agent. This is typically where your live agents would first receive calls.
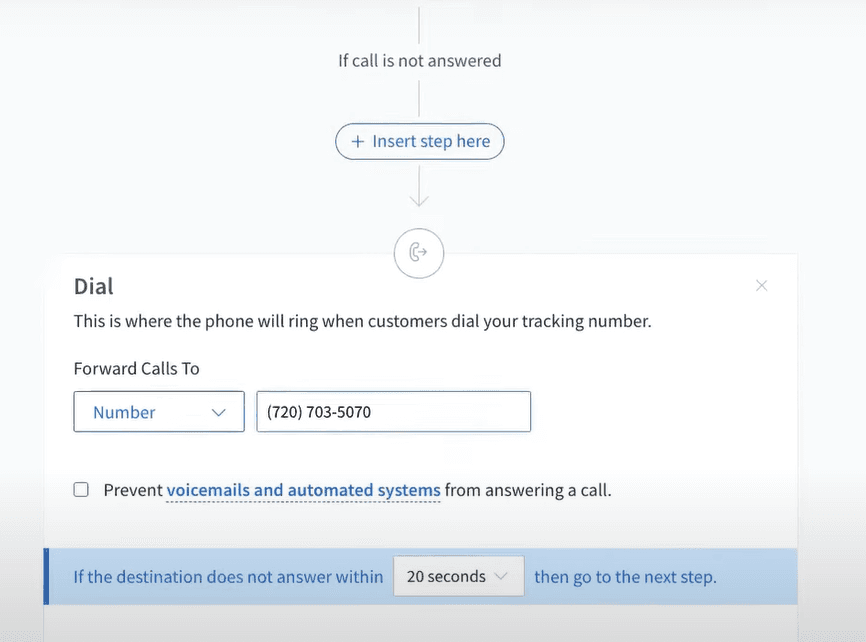
Step 2: Configure the “No Answer” Branch and Ring Duration
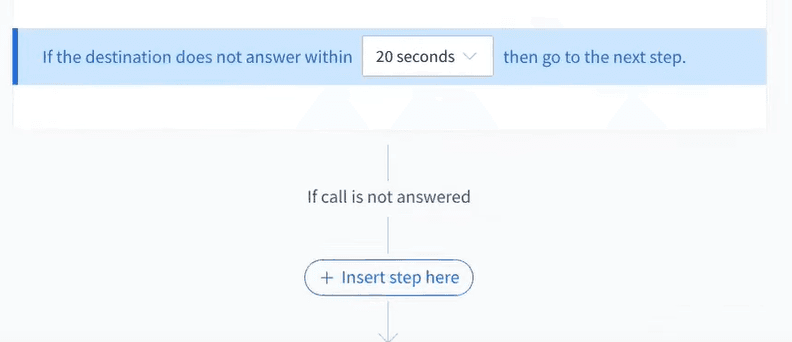
Click on the main “Forward Call” step. In the configuration settings panel, look for the “No Answer” options. Define how long the system should wait, like 20 seconds or 4 rings, before treating the call as unanswered.
Next, click “+ Insert step here” under the “No Answer” path to define what happens next.
Step 3: Add a “Forward Call” Step for Overflow
From the options that appear, select another “Forward Call” step. This will be the destination for calls that are not answered by your primary agents.
Step 4: Enter Your AI Receptionist Number
Click on the new “Forward Call” step you just added. The panel will open, type in your AI Receptionist phone number using the international format in the “Destination number” field.
Step 5: Save Your Call Flow
Click Save in the Call Flow Builder. Now, when your agents are unavailable within the set duration, those calls will automatically flow to AI Receptionist for instant assistance.
Scenario 3: Forwarding All Calls to AI Receptionist
In case you prefer AI Receptionist to be the default response that answers your callers, enabling full-time forwarding makes all incoming calls arrive directly to your AI agent. This is perfect when you need to automate triage, collect basic information, and offload when necessary. Here is how:
Step 1: Streamline Your Call Flow
In the Call Flow Builder for the selected tracking number, we want AI Receptionist to be the very first action. You may need to remove or delete any existing initial steps (like “Schedule,” “IVR Menu,” or other “Forward Call” steps) that precede your desired AI Receptionist routing. The goal is to make the AI Receptionist forward the immediate first step in the flow.
Step 2: Add an Initial “Forward Call” Step
Click the ‘+ Insert step here’ (or equivalent “Add Step” button) at the very beginning of your call flow. Select and add a “Forward Call” step as the immediate first action.
Step 3: Enter Your AI Receptionist Number
Click on this initial “Forward Call” step. In its configuration panel, input your AI Receptionist number in international format into the “Destination number” field. This ensures all incoming calls immediately go to AI Receptionist.
Step 4: Save Your Call Flow
Hit “Save” in the Call Flow Builder to lock in your changes. From now on, all calls to this CallRail tracking number will go straight to your AI Receptionist. Also, you’ll still be able to track everything in CallRail and keep an eye on how your AI agent is performing.

Troubleshooting Tips
To make your experience seamless with setting up your CallRail and AI Receptionist integration, here are some troubleshooting tips to solve the most frequent problems that may occur:
- Test Your AI Receptionist Number: First place a direct call to your AI Receptionist number to ensure it’s active and your AI agent is answering and working smoothly independently.
- Verify Call Flow Assignment: Make sure your Call Flow is correctly assigned to the CallRail tracking number after you publish it.
- Place Test Calls: Ensure test by calling your tracking number from a number that’s not linked to your CallRail account.
- Review Call Flow Order: If you’re using the Call Flow Builder, double-check that the “Forward Call” step to AI Receptionist is placed after the conditions it depends on. This makes sure calls are routed exactly how you want.
- Review CallRail Activity Log: After testing, check your CallRail “Calls” activity log. This log provides detailed information on how each call was routed.
- Voicemail Interplay: If calls are going to a personal or default voicemail unexpectedly, check your CallRail forwarding settings. Make sure AI Receptionist is set as the destination for “no answer” situations, and To prevent conflicts, disable or properly configure any CallRail voicemail settings.
Conclusion
Connecting AI Receptionist to CallRail lets you handle calls around the clock, whether it’s after-hours, overflow, or full-time coverage. With CallRail reliable routing and forwarding tools, you won’t miss a single call. AI Receptionist helps by answering quickly, qualifying leads, and assisting customers right away. This setup boosts your professionalism, keeps you responsive, and makes your business run smoother all day long. It’s a simple way to turn every call into a meaningful connection and keep your business always on, always ready, and always growing.

CallRail