Advanced Mass Email Service
What is a Mass Email Service?
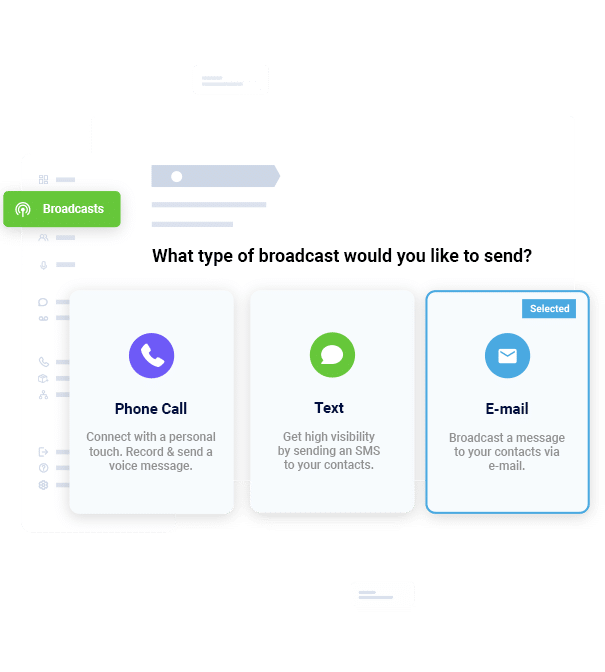
A mass email service allows users to send an email message to an entire list of contacts all at once with the click of a button. DialMyCalls’ new advanced bulk email service is the perfect solution for businesses or organizations that are looking for an all-in-one communication platform. Our advanced emailing allows you to customize emails, including the ability to add your own branding, file attachments, and send from your own domain!
How Does Our Advanced Mass Email Service Work?
Before you purchase our advanced emailing, please make sure that you have your own domain to utilize. You will NOT be able to use our advanced emailing service if you do not have your own email on your own domain.
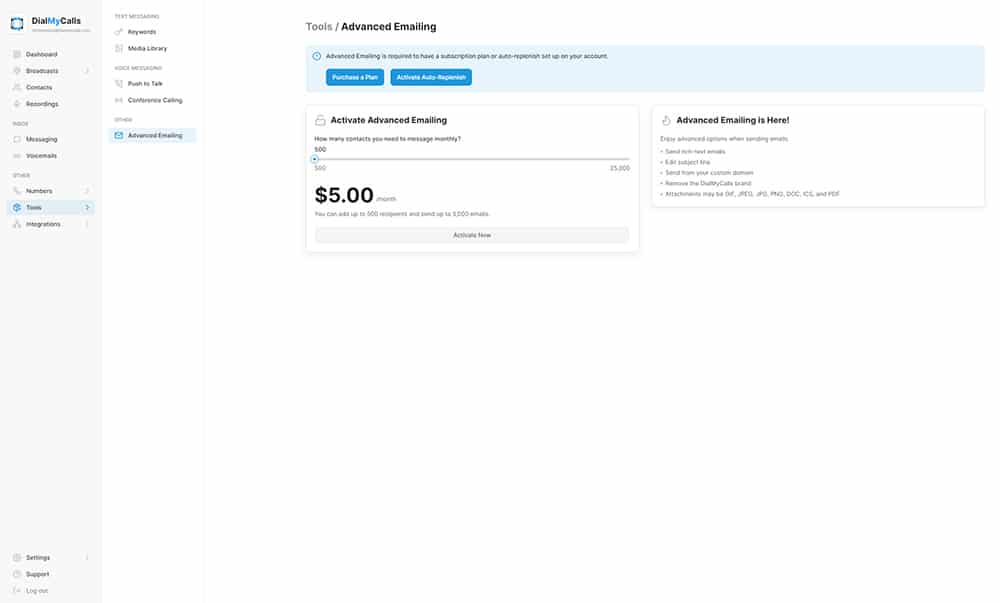
You will need to create a free account with DialMyCalls to begin using our advanced mass email service. Once you have an account, you can purchase a standard monthly plan, premium monthly plan or pay-as-you-go* credits, as well as one of our advanced emailing plans.
*If you choose to purchase pay-as-you-go credits, then you will need to set up auto-replenish to be able to purchase our advanced emailing feature.
From there, you can now add in all your contacts with their emails.
Next, you will need to set up your sender email. This step requires adding in records to your own email provider and verifying it within DialMyCalls.
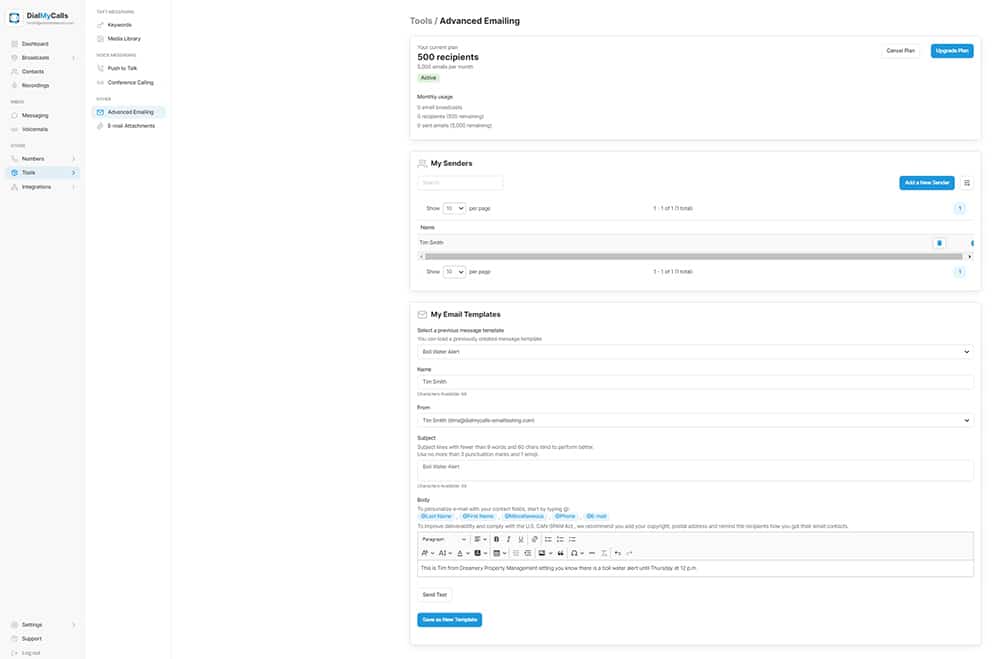
Once your “sender” email is activated, you will now be able to send out custom bulk emails from within DialMyCalls using your own email address. Create a custom html email and add attachments (up to 25mb) if you’d like. Once you have selected your contacts and created your email draft you can now send your bulk email, instantly!
What are the Benefits of the DialMyCalls Advanced Mass Email Service?
DialMyCalls is an industry-leading voice broadcasting and mass texting platform, which becomes even more robust by adding in an advanced mass email service. Customers can log into DialMyCalls and have an all-in-one bulk communication solution.
Add in all of your contacts and send them an automated call, text message and custom email with ease. We do recommend utilizing our automated calls and mass texting for your communication needs but you can send an advanced email all on its own. (A monthly plan or auto-replenish credits are required to purchase advanced emailing.)
DialMyCalls has simplified its user interface over the years, so we make it easy to manage your bulk emails with a mobile app, attachment management, html emails with variable messaging, and an email template management system.
Use Custom Email Domains
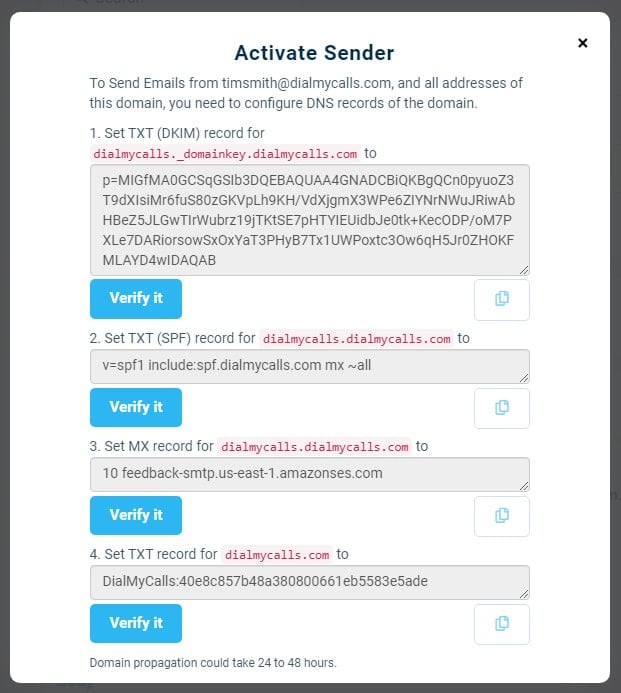
Instead of an email coming from support@dialmycalls.com you can now use custom email domains for bulk emailing. To utilize the custom email domain, you will need to verify the domain’s DNS records with your provider with the information below:
- DKIM Record
- SPF Record
- MX Record
- TXT Record
How To Edit MX and TXT Records With Popular Domain Registrars
Let’s take a quick look at how you can find and edit the MX Records and TXT records for three of the most popular domain registrars. Below you will find a complete guide on how to use DialMyCalls’ advanced emails with your own personal email registered with GoDaddy, Namecheap and HostGator:

GoDaddy
Complete the following steps to edit the MX and TXT records with GoDaddy:
Step 1: Log in to Your GoDaddy Account
Go to the GoDaddy website (https://www.godaddy.com/).
Click the “Sign In” button in the upper right corner of the page. Enter your GoDaddy username (email or customer number) and password to log in to your account.
Step 2: Access Domain Management
After logging in, you’ll land on your GoDaddy dashboard. To modify DNS records for a specific domain:
Click on “Domains” in the top navigation menu. This will display a list of your registered domains.
Step 3: Select the Domain
Locate and click on the domain name for which you want to modify MX and TXT records.
Step 4: Access DNS Management (Manage DNS)
In the domain management panel, look for an option related to DNS management. This is often labeled as “Manage DNS” or “DNS Settings.”
Step 5: Modify MX Records
To modify MX records for your domain, follow these steps:
To Add MX Records:
Look for an option to add MX records. It may be labeled “Add Record” or “Add MX Record.”
Provide the following details for each MX record you want to add:
Priority: Enter the priority value for the MX record (e.g., 0, 10, 20). Lower values have higher priority.
Points To or Destination: Enter the hostname or domain name of the mail server where you want to receive emails. Your email hosting provider should provide this information.
Save your changes. The new MX records will be added.
To Modify Existing MX Records:
If you want to modify existing MX records, find the list of current MX records on the DNS management page.
Click on the MX record you want to edit. You can then update the priority and mail server information as needed.
Save your changes.
Step 6: Modify TXT Records
To modify TXT records (used for various purposes, including SPF records, DKIM, or domain verification), you can follow these steps:
In the same DNS management section, look for an option to add or edit TXT records. It may be labeled “Add Record” or “Add TXT Record.”
Enter the necessary information for your TXT record, including the “Host” (usually the subdomain or @ for the root domain) and the “TXT Value” (the text content of the TXT record).
Save your changes. The new TXT record will be added or the existing one will be updated.
Step 7: Verify and Allow DNS Propagation Time
After making changes to your MX and TXT records, it’s essential to verify that they are correctly set up. You can use online DNS lookup tools to check your domain’s DNS records.

HostGator
Complete the following steps to edit the MX and TXT records with HostGator:
Step 1: Log in to Your HostGator cPanel
Go to the HostGator website (https://www.hostgator.com/).
Click the “Login” or “Log In” button in the upper right corner of the page. Enter your HostGator cPanel username and password to log in.
Step 2: Access Your cPanel
After logging in, you’ll land on your cPanel dashboard, where you can manage various aspects of your hosting account.
Step 3: Locate the MX Entry Icon
In your cPanel, search for the “MX Entry” icon. It’s usually located in the “Mail” or “Email” section. Click on it to access the MX Entry tool.
Step 4: Choose a Domain
If you have multiple domains associated with your HostGator account, select the domain for which you want to modify MX and TXT records from the drop-down menu.
Step 5: Modify MX Records
Now, you can add, modify, or delete MX records for your domain:
To Add MX Records:
Click the “Add New Record” button.
Specify the following information for each MX record you want to add:
Priority: Enter the priority value for the MX record (e.g., 0, 10, 20). Lower values have higher priority.
Destination: Enter the hostname or domain name of the mail server where you want to receive emails. Your email hosting provider should provide this information.
Click the “Add New Record” button to save the MX record.
To Modify Existing MX Records:
If you want to modify existing MX records, find the list of current MX records on the MX Entry page.
Click the “Edit” or “Change” button next to the MX record you want to modify. You can then update the priority and destination information as needed.
Save your changes.
Step 6: Modify TXT Records
To modify TXT records (used for various purposes, including SPF records, DKIM, or domain verification), you can follow these steps:
Go back to the cPanel dashboard.
Look for an option called “Zone Editor” or “Advanced DNS Zone Editor.” Click on it to access your domain’s DNS records.
Find the TXT records section. Here, you can add, edit, or delete TXT records as needed.
To add a new TXT record, click the “Add Record” button and enter the necessary details, including the “Name” (usually the subdomain or @ for the root domain) and the “TXT Data” (the value of the TXT record).
To edit an existing TXT record, locate the record in the list, click the “Edit” button, and make your changes. Then, save your changes.
Step 7: Verify and Allow DNS Propagation Time
After making changes to your MX and TXT records, it’s essential to verify that they are correctly set up. You can use online DNS lookup tools to check your domain’s DNS records.

Namecheap
Complete the following steps to edit the MX and TXT records with Namecheap:
Step 1: Log in to Your Namecheap Account
Go to the Namecheap website (https://www.namecheap.com/).
Click the “Sign In” button in the upper right corner of the page. Enter your Namecheap username (email) and password to log in to your account.
Step 2: Access Domain Management
After logging in, you’ll arrive at your Namecheap dashboard. To modify DNS records for a specific domain:
Click on “Domain List” in the left-hand menu. This will display a list of your registered domains.
Step 3: Select the Domain
Locate and click on the domain name for which you want to modify MX and TXT records.
Step 4: Access DNS Management (Advanced DNS)
In the domain management panel, look for an option related to DNS management. This is often labeled as “Advanced DNS,” “DNS Management,” or “Custom DNS.”
Step 5: Modify MX Records
To modify MX records for your domain, follow these steps:
To Add MX Records:
Look for an option to add MX records. It may be labeled “Add Record” or “Add MX Record.”
Provide the following details for each MX record you want to add:
Priority: Enter the priority value for the MX record (e.g., 0, 10, 20). Lower values have higher priority.
Mail Server or Points To: Enter the hostname or domain name of the mail server where you want to receive emails. Your email hosting provider should provide this information.
Save your changes. The new MX records will be added.
To Modify Existing MX Records:
If you want to modify existing MX records, find the list of current MX records on the DNS management page.
Click on the MX record you want to edit. You can then update the priority and mail server information as needed.
Save your changes.
Step 6: Modify TXT Records
To modify TXT records (used for various purposes, including SPF records, DKIM, or domain verification), you can follow these steps:
In the same DNS management section, look for an option to add or edit TXT records. It may be labeled “Add Record” or “Add TXT Record.”
Enter the necessary information for your TXT record, including the “Host” (usually the subdomain or @ for the root domain) and the “Value” (the text content of the TXT record).
Save your changes. The new TXT record will be added or the existing one will be updated.
Step 7: Verify and Allow DNS Propagation Time
After making changes to your MX and TXT records, it’s essential to verify that they are correctly set up. You can use online DNS lookup tools to check your domain’s DNS records.
Domain propagation could take 24-48 hours. Once active, you will be able to send bulk emails through DialMyCalls from your own email.
Once the domain propagation occurs, your custom sender email will be marked as “Active” in your DialMyCalls account.
Send Advanced HTML Emails
Are you tired of generic emails? Using our advanced email automation software will allow you to send feature-rich emails with ease using an integrated WYSIWYG editor. Send recurring emails by utilizing DialMyCalls’ bulk email templates in conjunction with our scheduling option to send out mass emails daily, weekly or monthly.
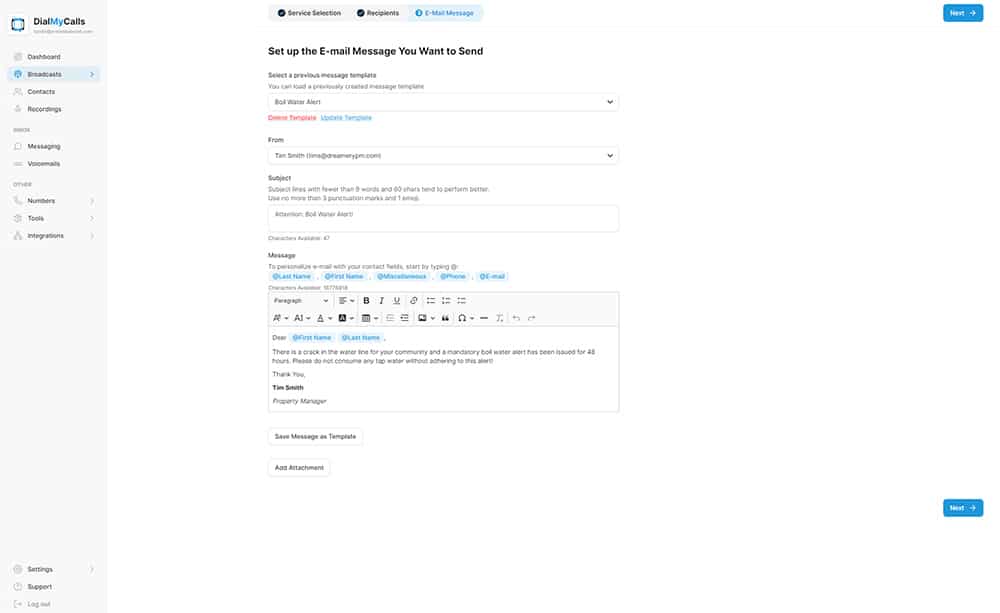
In addition to the WYSIWYG editor, DialMyCalls offers variable messaging which allows you to populate data from your contacts using several different variables from within your account.
Include Branding & File Attachments
Create unique email templates that include your company or organization’s logo within the email. Send photos and documents by using the bulk email attachment option. Please note the file size limit is 25MB per email.
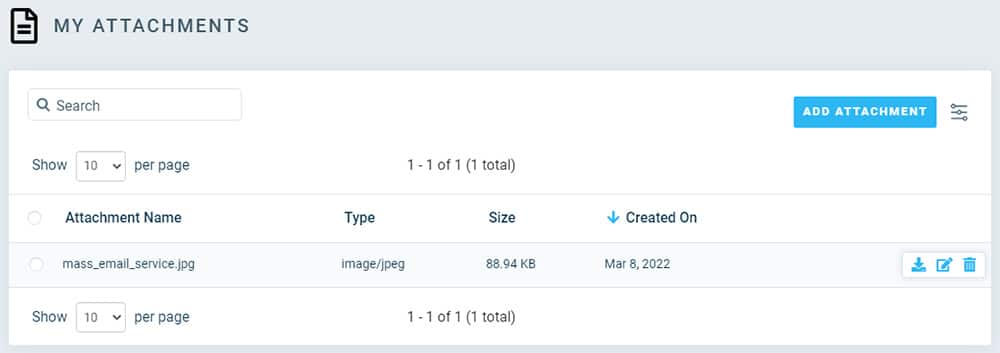
DialMyCalls has a separate section from within your account to manage your past email attachments. Spice up those email marketing campaigns by adding in branded images, documents and much more!
How to Send Advanced Mass Emails With DialMyCalls
Once you have purchased one of the advanced emailing plans and verified your own custom domain for emails, you can follow the steps below to quickly and easily send your contacts a bulk email message.
Advanced Mass Email Service (Video)
Who Can Use Our Mass Email Service?
DialMyCalls’ advanced emailing service can be utilized by a wide variety of organizations and businesses. From churches sending out updates to their congregation, to small businesses sending out marketing emails — the possibilities are endless when it comes to sending bulk emails.
Below are a few examples of how our new service can be used:
Setting Up a Mass Email Service for Updates
Our email automation software can be used to send updates to customers, employees, community members, and many more. Use DialMyCalls’ bulk email to send out an important update via email in a matter of seconds — ensure nobody misses vital information by sending out a mass email in addition to an automated call and SMS text message.
Furthermore, you can personalize these update emails by using variable messaging in your message. The days of sending out important emails one by one are over. Start using DialMyCalls’ advanced emailing today!
Using a Mass Email Service for Alerts and Reminders
Quickly and easily set up our bulk email service to send out appointment reminders, emergency alerts, and many more. Dentists can create a custom email template to send out automated appointment reminders while property managers can send out emergency alerts in regards to weather or boil water alerts.
Automate communicating with your patients, community, and many more by using DialMyCalls’ brand new bulk email solution. Alerts and reminders can also be sent out via automated phone call and mass text message!
Setting Up Mass Email Marketing for Small Businesses
Small business email marketing can increase sales tremendously when adding it to your marketing arsenal. Utilizing DialMyCalls will make it easy for businesses to quickly send out an email to every customer regarding upcoming promotions or to simply thank them for being a loyal customer.
With our new mass email service, businesses can create personalized emails in bulk using our variable messaging feature. Create an email template using message variables such as “First Name” and “Last Name” to send a personalized email to all of your contacts at once.
Contact Us to Set Up Your Mass Email Service Today
Are you ready to try out our advanced mass email service? Create an account with DialMyCalls today and start using our bulk email sender to help simplify all of your communication efforts!
If you have any questions regarding our new email campaign services, please contact us and our support team will be more than happy to assist you!