How to Integrate an AI Receptionist with Vonage
Vonage Business Communications is an effective cloud-based phone system that simplifies call management, team collaboration, and integrates with various CRMs for businesses. AI Receptionist is a conversational AI answering service that answers calls, takes messages, and schedules appointments around the clock.
When combined, companies will be in a position to redirect the Vonage-originated calls on AI Receptionist depending on predetermined identifiers such as missed calls, after-hours, or weekends. This integration guarantees that no customer inquiry goes unanswered and maintains operations efficiently and professionally.
Here we are going to guide you on how to integrate Vonage with AI Receptionist across various scenarios, step-by-step.
AI Receptionist and Vonage’s Integration Prerequisites
It is a good idea to get everything properly in place in advance to ensure the integration of Vonage and AI Receptionist is established successfully and without any disruptions. Make sure you’ve completed the following:
- An active Vonage Business Communications account with Admin or Super User access.
- A AI Receptionist account created and fully set up.
- Your AI Receptionist agent configured and assigned its unique phone number.
- Basic familiarity with navigating the Vonage Business Admin Portal.
How Does the Integration Work?
Integrating Vonage and AI Receptionist is not a difficult process leveraging Vonage powerful call forwarding and routing features. By directing specific call flows to your AI Receptionist agent dedicated phone number, you create a seamless bridge that ensures comprehensive call coverage. This is how it works:
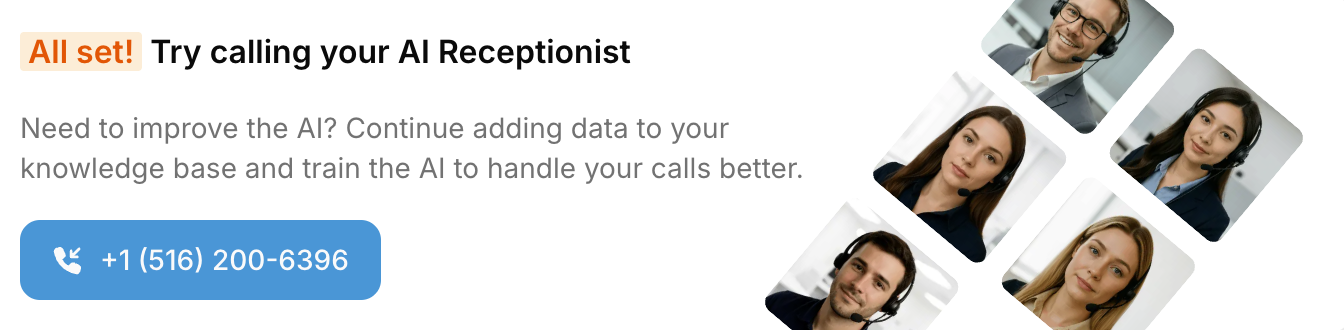
Step 1: Set Up Your AI Receptionist Account
Visit dialmycalls.com, sign up and create your AI phone agent. After that, you will be given a local phone number.
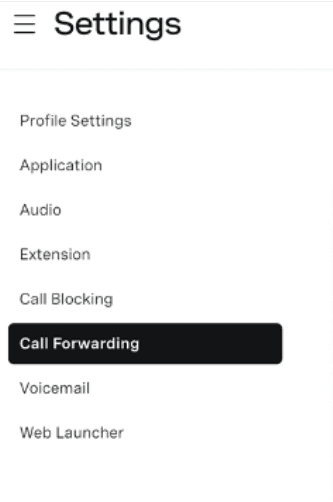
Step 2: Log in to Your Vonage Business Admin Portal
Sign in to your Vonage Business Communications account through the Admin Portal. Make sure you have admin or super user permissions, these are required to adjust call routing and forwarding settings.
Step 3: Find the Suitable Call Routing Settings
The next step is dependent on the type of call forwarding you want for your business . We will guide you through the correct and step by step process for each scenario below.
Scenario 1: Forwarding After-Hours & Weekend Calls
AI Receptionist makes sure that no call falls into the abyss, even when your team is not available during the evenings, weekends or any holidays. It attracts leads, answers queries, and offers customer service 24/7 for customer satisfaction. Here’s how to configure it using OpenPhone Call Flow Builder:
Step 1: Go to Virtual Receptionist Settings
Once you logged into your Vonage Business Admin Portal, go to Phone System and then go to Virtual Receptionist.
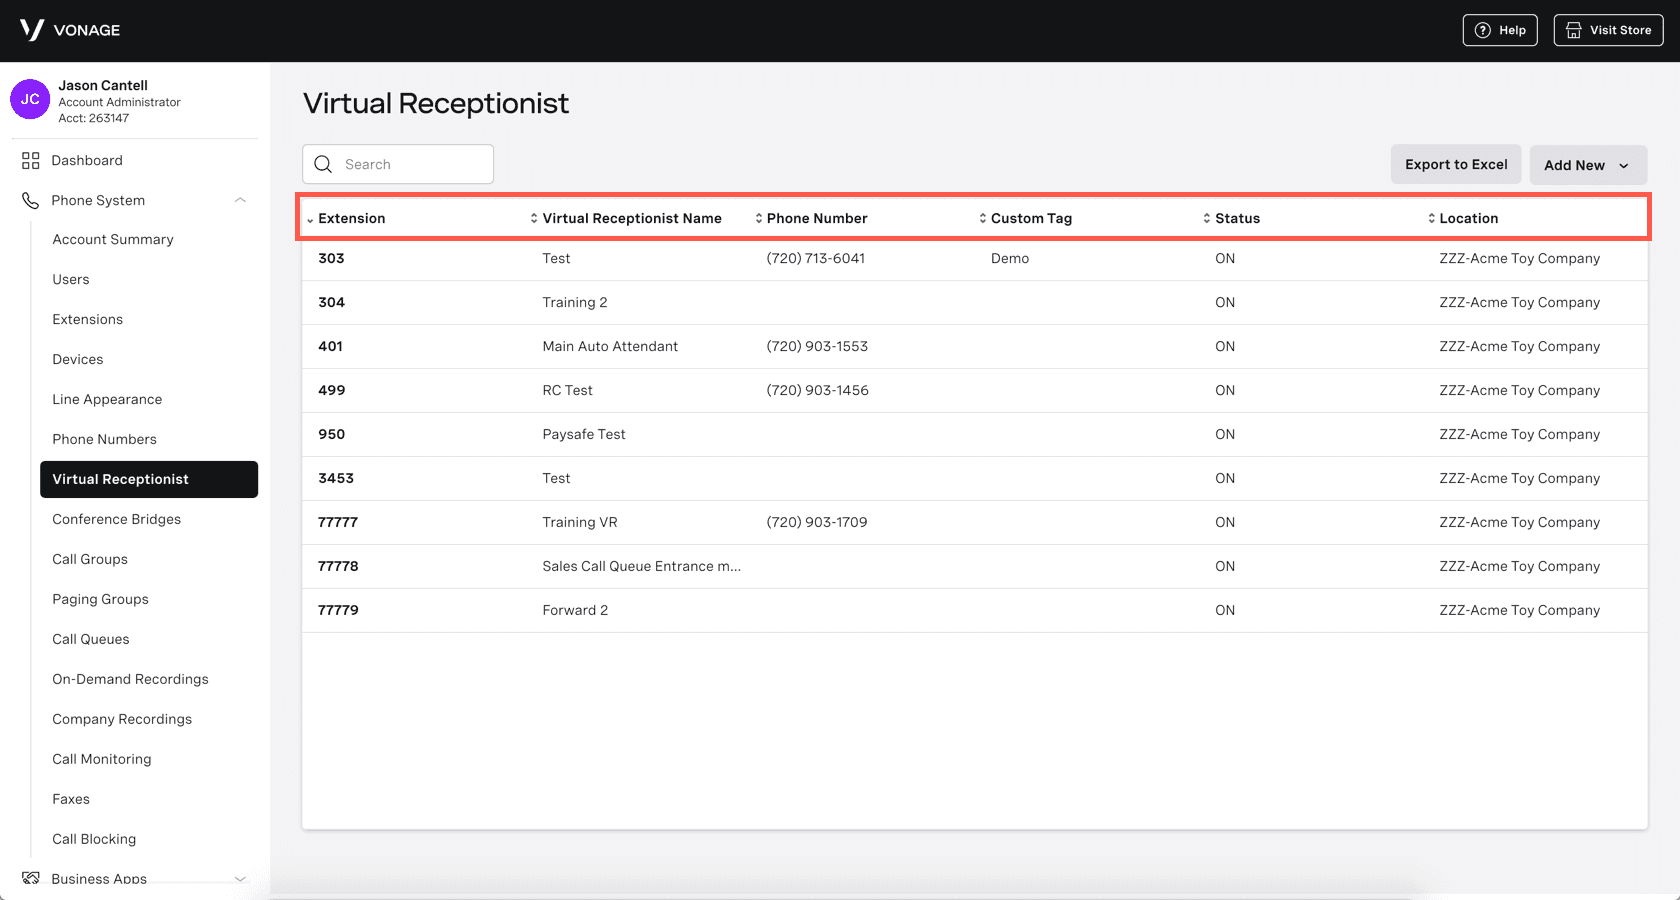
Step 2: Choose Your Receptionist Profile
Select the appropriate receptionist profile for your main business line. This is the profile whose call flow you’ll be adjusting and forwarding to AI Receptionist.
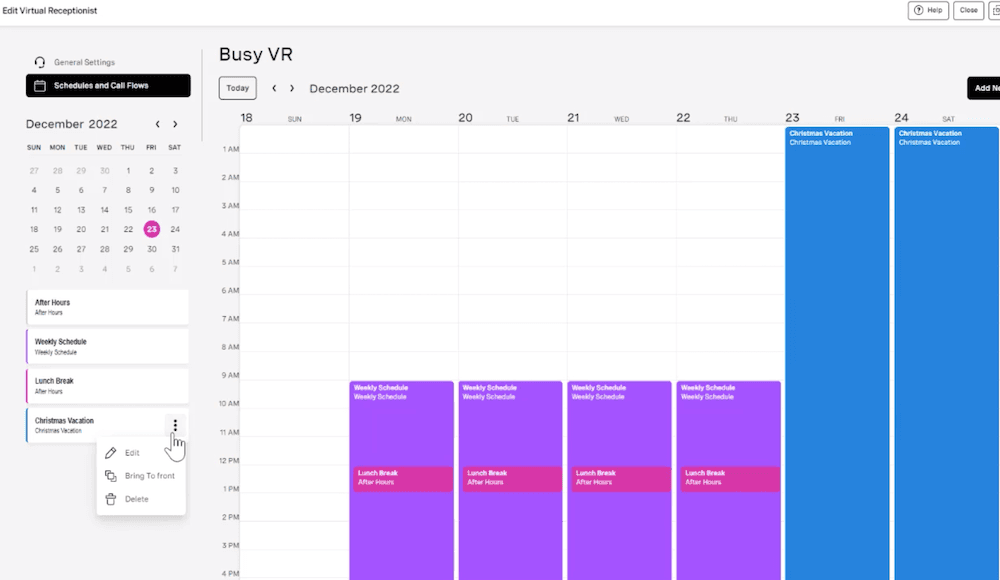
Step 3: Define Business and Closed Hours
Under the Schedules section, you can update your regular business hours, like Monday to Friday from 9 AM to 5 PM. Make sure to select the right time zone for accurate call routing. Also specify your closed hours, after-hours, weekends, and holidays too!
Step 4: Set Call Flow for Closed Hours
In the Closed Hours call flow section, locate the option to redirect calls. Select Forward to External Number.
Step 5: Enter Your AI Receptionist Number
Enter the unique AI Receptionist phone number from your AI agent into the designated field. Double-check it to prevent any misrouted calls.
Step 6: Save Your Changes
Click Save Changes to apply your new routing rules.
Scenario 2: Forwarding Missed or Busy Calls
Callers should not go into a generic voicemail when your human agents are occupied, already on another call, or do not pick up. Forwarding missed or busy calls to AI Receptionist means that no customer interaction will be halted, and all actions will be done swiftly and intelligently. Here is how:
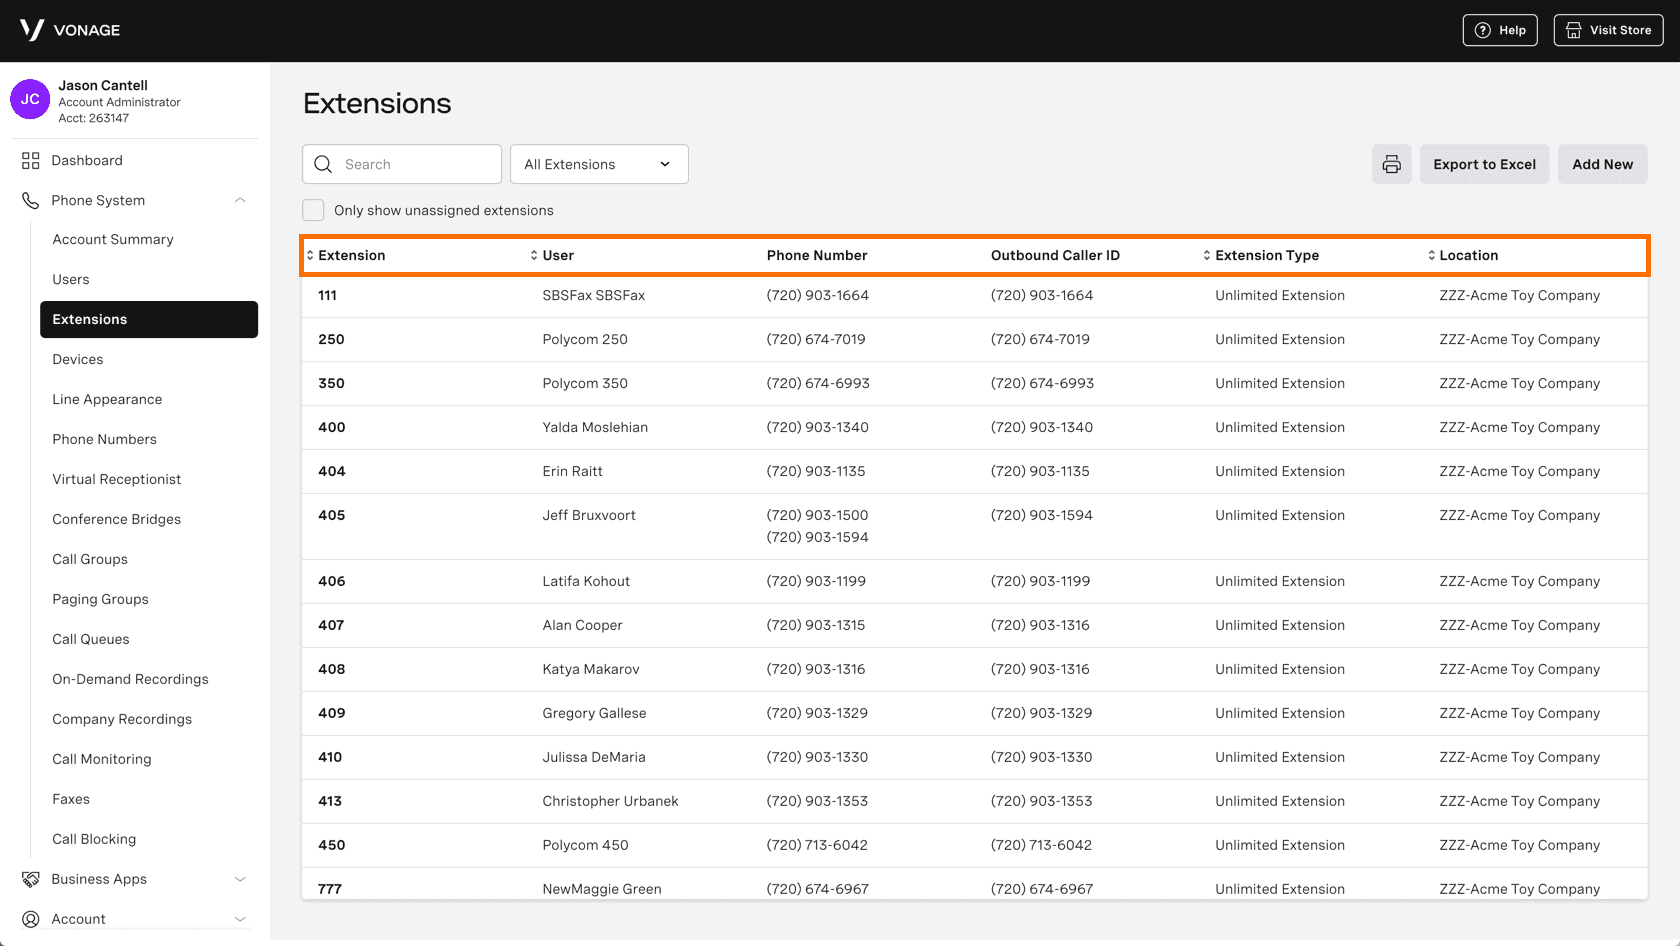
Step 1: Navigate to Extension Settings (Admin Access)
As an administrator or Super User, sign into your Vonage Business Admin Portal. Go to Phone System and then go to Extensions.
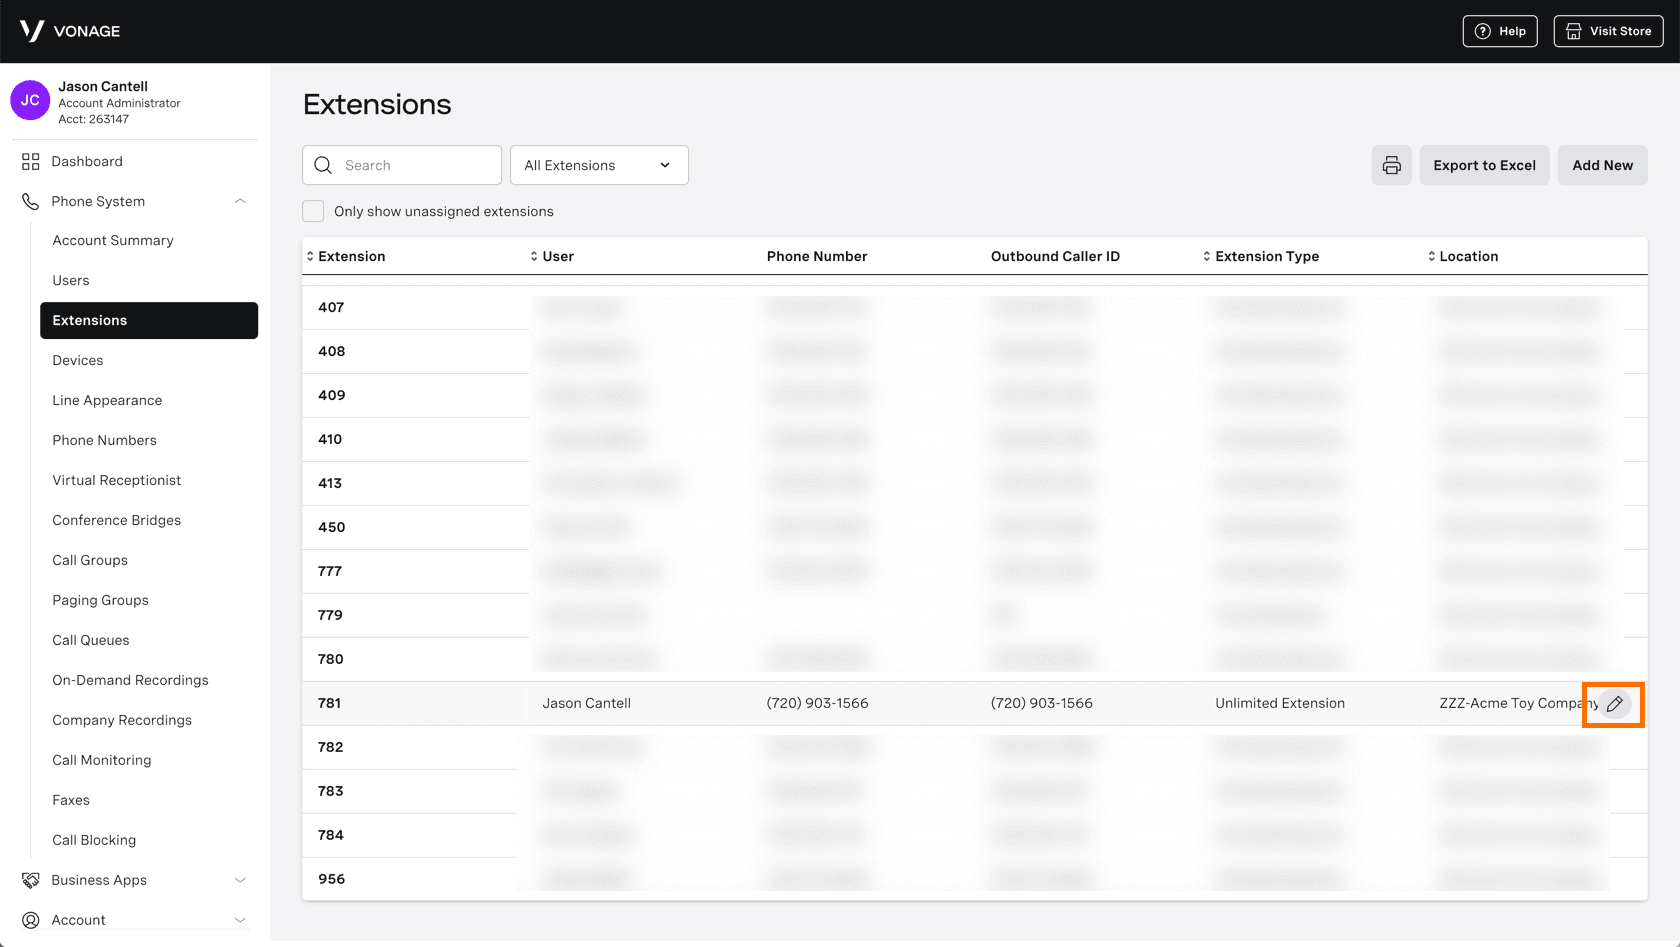
Step 2: Edit the Extension to Forward
Check for the extension you want to forward, it could be your main sales or support line or any other than that, After that click the pencil icon to open its settings.
Step 3: Enable Call Forwarding
Find the Call Forwarding section In the extension settings,. Toggle the Forward Calls option to ON. Then, select Send to Ext. or Number.
Step 4: Enter Your AI Receptionist Number
Enter your AI Receptionist external phone number here. Calls will forward to this if the original extension is busy or unanswered.
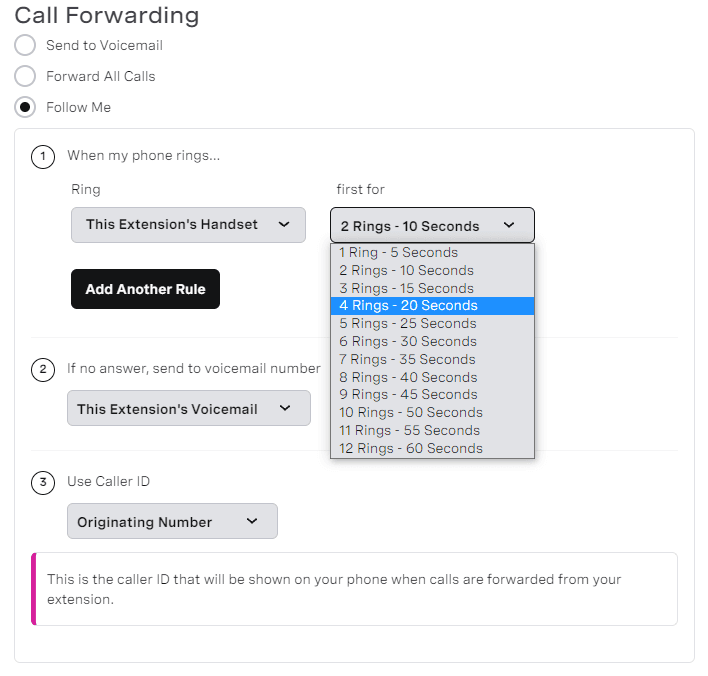
Step 5: Adjust Ring Duration (Optional)
Set your Vonage line to ring for 20–30 seconds before forwarding to AI Receptionist. This gives your team a good time to answer while ensuring the AI agent kicks in quickly.

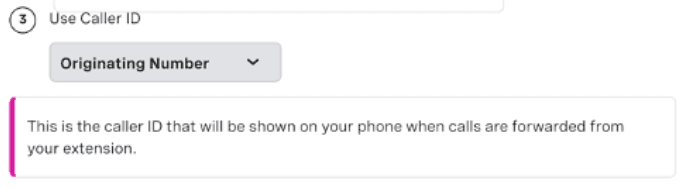
Step 6: Set Up Caller ID Display
Make sure to set the Caller ID to Originating. By this way, AI Receptionist will see the actual number of the caller instead of your internal Vonage number, which can help provide accurate context and follow-up.
Step 7: Establish Fallback Behavior (If Needed)
You can select a fallback option in case AI Receptionist doesn’t pick up. This could mean sending calls to voicemail, either of AI Receptionist or Vonage.
Step 8: Save Your Settings of Extension
Click Save to apply all changes to the extension. Now, calls received by this extension will be forwarded to AI Receptionist for instant assistance which was previously missed or come in while the line is busy.
Scenario 3: Forwarding All Calls to AI Receptionist
In case you prefer AI Receptionist to be the default response that answers your callers, enabling full-time forwarding makes all incoming calls arrive directly to your AI agent. This is perfect when you need to automate triage, collect basic information, and offload when necessary. Here is how:
Step 1: Access Call Forwarding Settings
Log into your Vonage Online Account or Admin Portal. Navigate to Settings and then go to Call Forwarding. This section allows you to manage general call forwarding rules for your numbers.
Step 2: Enable “Forward All Calls”
Locate and click on the Forward All Calls option. This will reroute all incoming calls from your Vonage number.

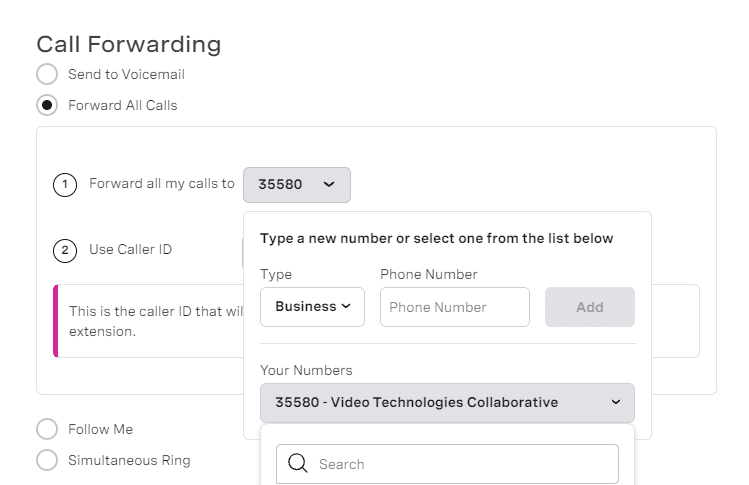
Step 3: Enter Your AI Receptionist Number
In the Forward All My Calls To field, enter your AI Receptionist agent’s dedicated phone number.
Step 4: Set Caller ID Display
Just as in conditional forwarding, set the Caller ID to Originating. This is vital for AI Receptionist to accurately identify and log the actual caller’s number.
Step 5: Save Configuration and Test
Save the configuration. Immediately make a test call to your business number to confirm that all calls are now being directly received by AI Receptionist. Your Vonage analytics will still track these forwarded calls.

Best Practices for Smooth AI Receptionist & Vonage Integration
To get the most out of your AI Receptionist and Vonage integration, keep these best practices in mind:
- Avoid Mobile App Forwarding: It’s best not to forward your Vonage number to the Vonage Mobile App. This helps you steer clear of duplicate calls and any confusion with voicemails.
- Review Your Billing: Take a moment to check your Vonage plan for any extra charges related to long-distance forwarding.
- Use the Right Caller ID: Always set your Caller ID to “Originating.” By this way, AI Receptionist can capture the actual caller’s number, allowing for accurate follow-ups and personalized responses.
- Choose the Right Ring Duration: pick the best ring time of 20-30 seconds. This will give your team enough time to pick up before calls are forwarded to AI Receptionist.
- Conduct Thorough Testing: To confirm that calls are routed correctly and everything runs smoothly, make sure to run test calls for all scenarios.
Final Checklist Before You Go Live
Before fully launching your integrated system, run through this quick checklist to ensure everything is perfect:
- Vonage Admin Portal configured according to your desired scenarios.
- The AI Receptionist number entered correctly in all relevant call flows.
- Caller ID consistently set to “Originating” for clear caller identification.
- Ring duration (if applicable) set appropriately for smooth transitions.
- Billing implications reviewed for any unexpected costs.
- Testing done for each scenario: business hours, after-hours, missed calls .
Conclusion
When you connect AI Receptionist to Vonage, you will gain the ability to deal with calls 24/7, whether you need after-hours, overflow, or full-time coverage. With the set of powerful routing and forwarding tools in Vonage, no call can be lost, and AI Receptionist provides AI-driven interaction, helping to prequalify leads and serve customers in real-time. This strong integrated package improves your professionalism, responsiveness and operational effectiveness throughout the day.

Vonage