Calendly Integration

Get Notified When a Calendly Invitee Cancels an Event Automatically With DialMyCalls and Zapier
In this article, we’re going to show you how to combine Calendly and DialMyCalls using Zapier. Zapier is a platform that makes automating different services super easy, saving you time and resources in the long run.
The example we’re going to use today involves automatically sending yourself a text message when a Calendly invitee cancels a scheduled event. This will let you know as soon as something changes so that you can free up your schedule and avoid wasting time preparing for an event that isn’t going to happen.
What You’ll Need:
- A Zapier account
- A DialMyCalls account
- A Calendly account
Step 1: Create Your Zap
The first step of getting your Zap up and running is actually creating it! To do this, head over to your Zapier Dashboard:
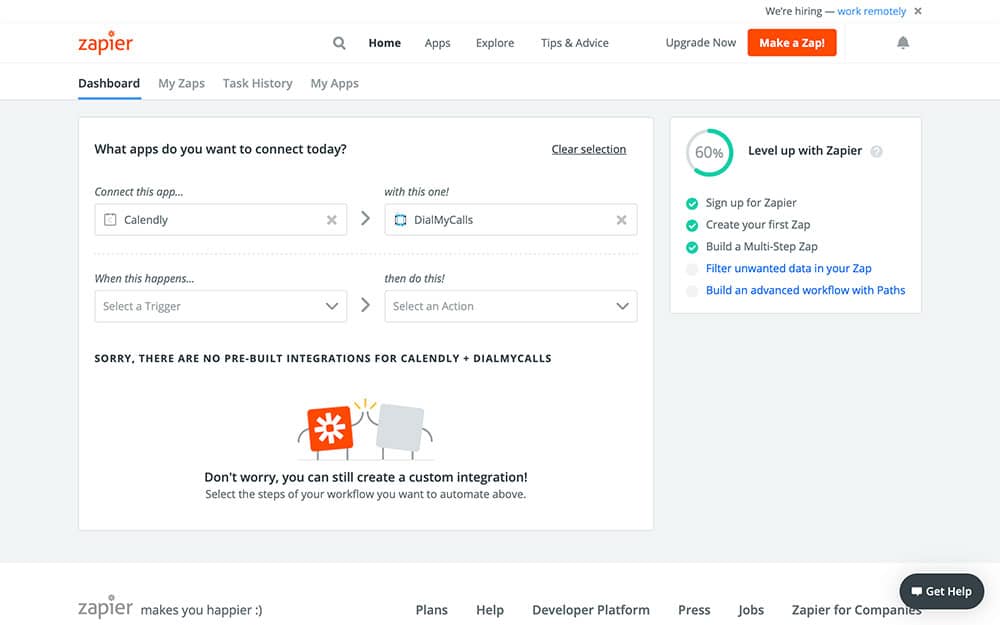
The main section on this screen, What apps do you want to connect today?, is where we’re going to turn our attention. As you can see in the above image, we’ve already entered Calendly and DialMyCalls into their respective fields.
To do this, just type each app’s name into the same fields as we have above. Puting them in this order, with Calendly first, will ensure that Calendly is our Trigger app (the one that starts the Zap) and DialMyCalls is our Action app (the one that acts when the Zap runs).
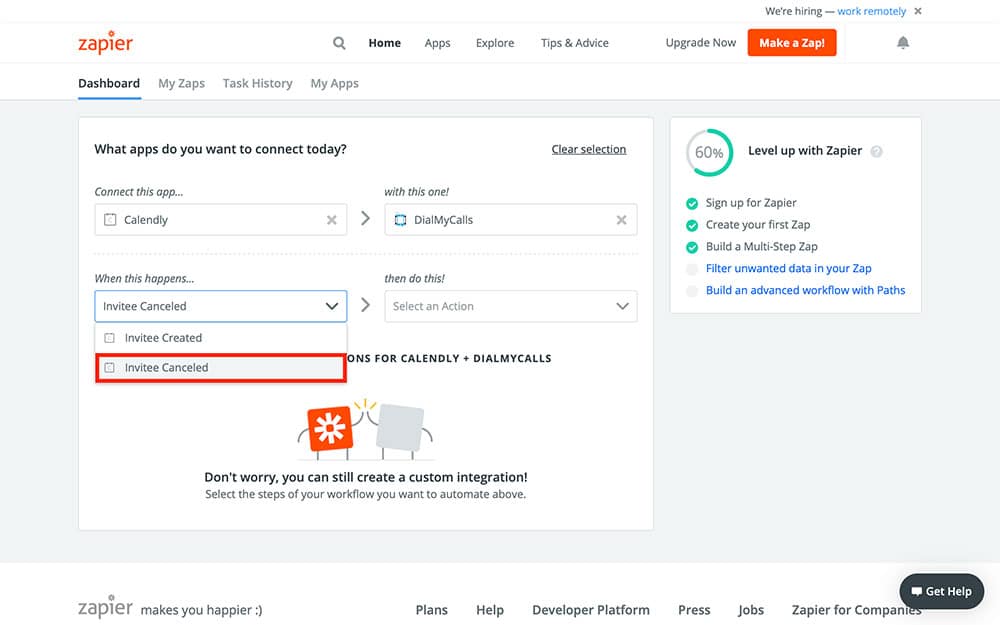
In the next two fields, starting with When this happens…, select Invitee Canceled from the dropdown menu:
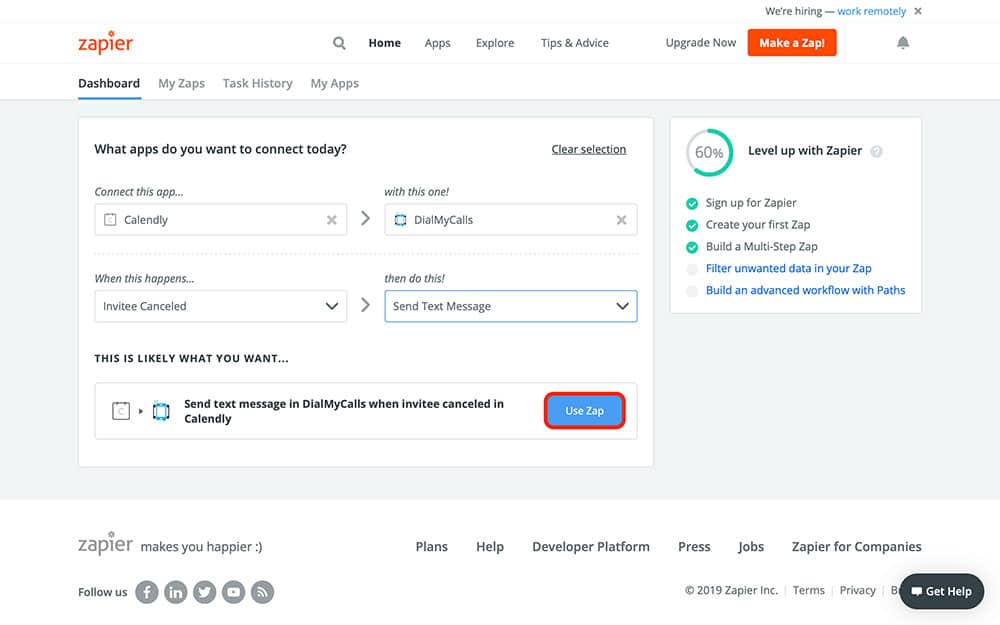
In the final field, then do this!, choose Send Text Message from the dropdown menu. After that, all that’s left to do is select the blue Use Zap button:
Step 2: Connect Your Calendly Account
Once you press the Use Zap button, Zapier will automatically redirect you to this page:
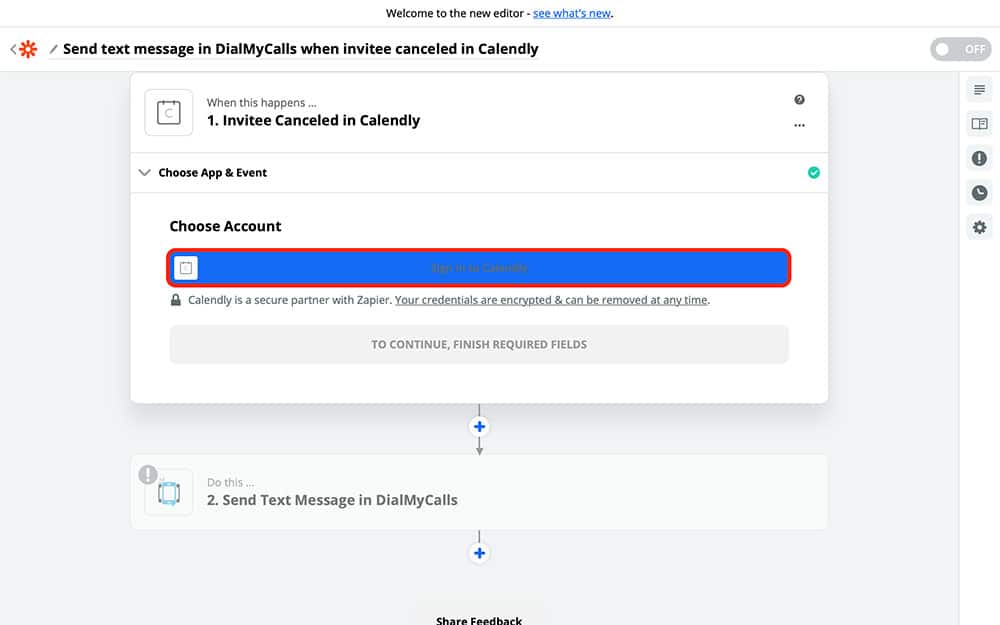
This is where we’re going to start the nitty-gritty of how the Zap works. First, you’ll need to connect your Calendly account to Zapier. If you’ve used Calendly with Zapier before, you should see your account already listed as an option; you can go ahead and continue to the next step. Otherwise, click the blue field outlined in red above. After that, Zapier will bring you to a new tab in your browser:
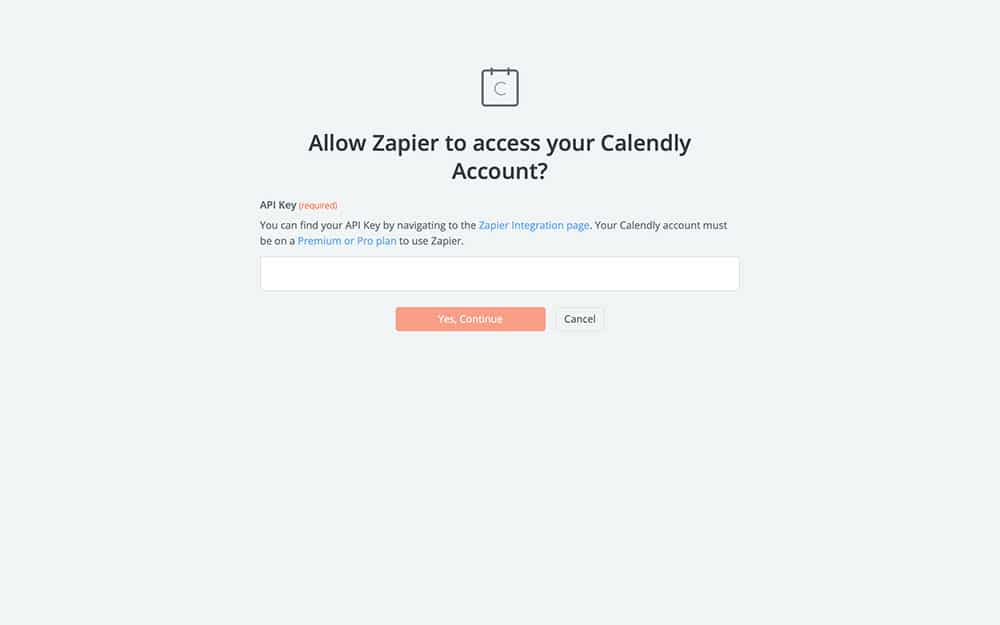
Every Calendly account has a unique API Key, which is what allows you to integrate it with other services like Zapier. All we’re going to do is copy your unique API key into the field shown above.
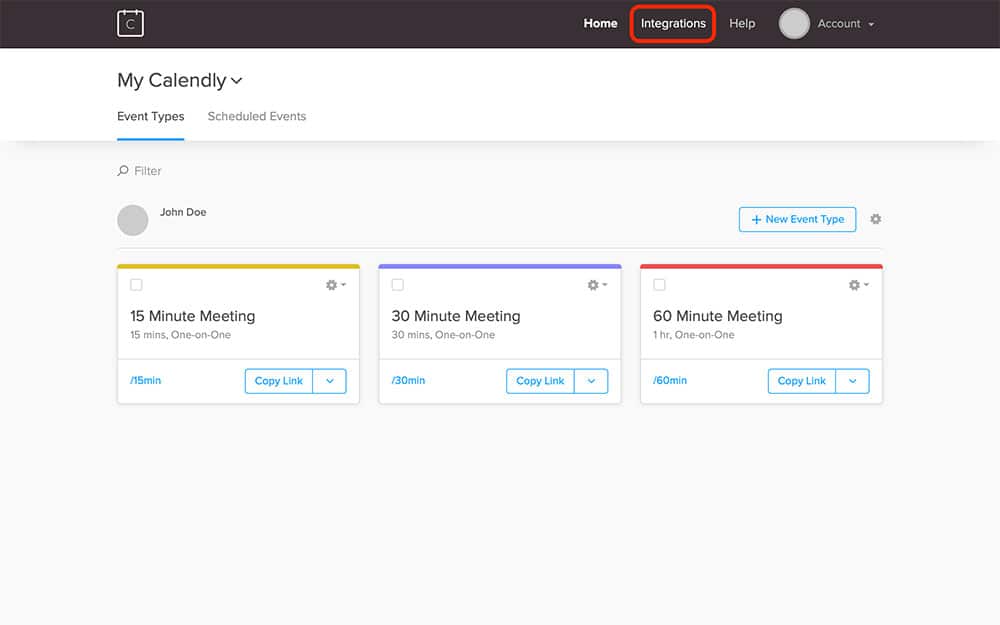
To find your Calendly API key, log in to Calendly in a new tab. Once there, you should see an option called Integrations in the top right of your screen:
Clicking it will bring you to the page with your API key:
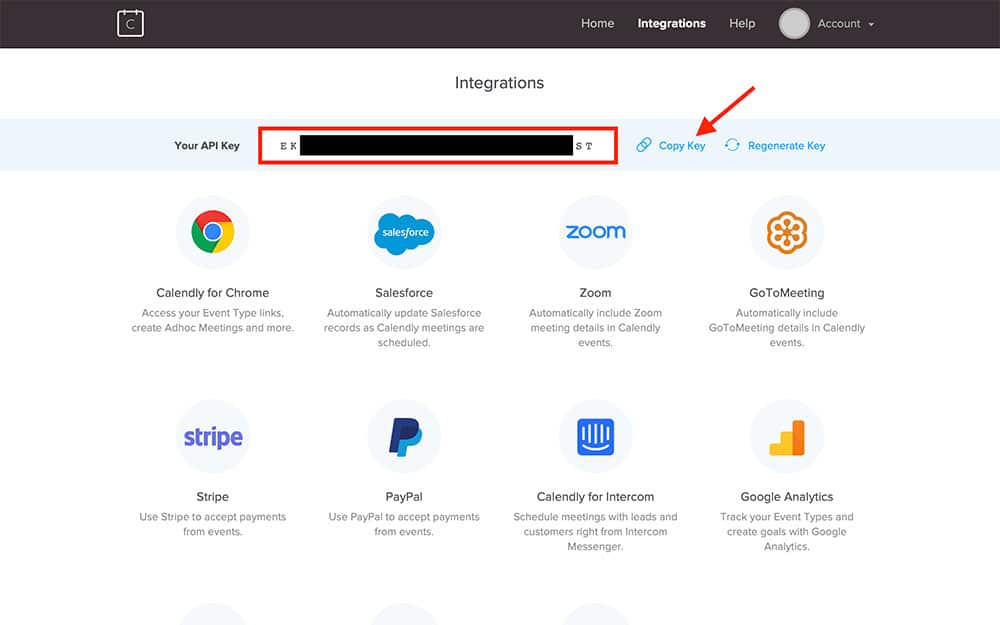
As indicated by the red arrow above, go ahead and copy your API key by pressing Copy Key, go back to your Zapier tab with the empty API Key field, and paste your key into it:
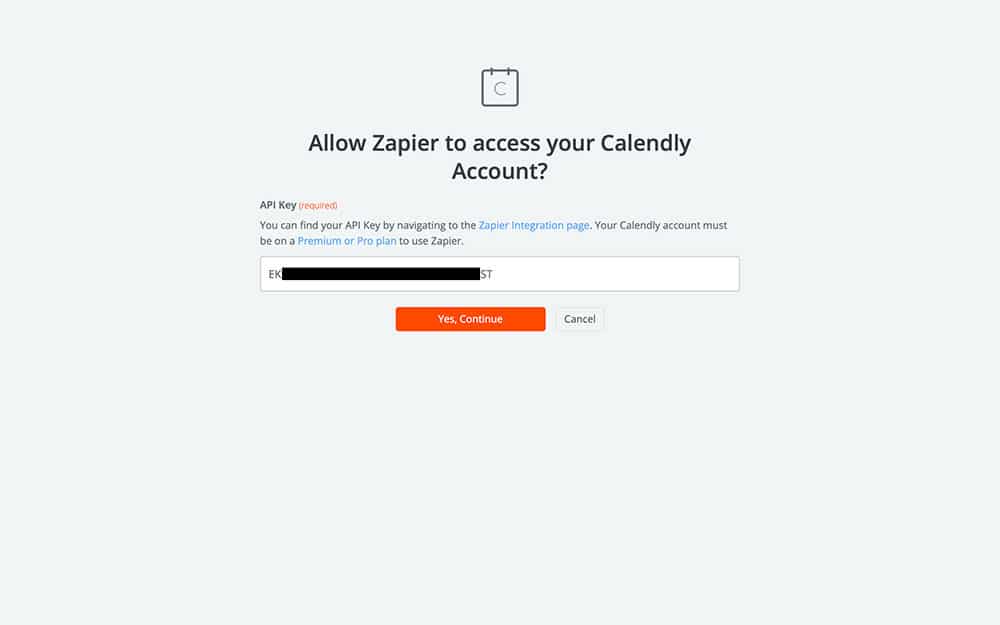
Once you’ve pasted it, go ahead and press Yes, Continue. This will take you back to the main Zapier page, where you should now see your connected Calendly account:
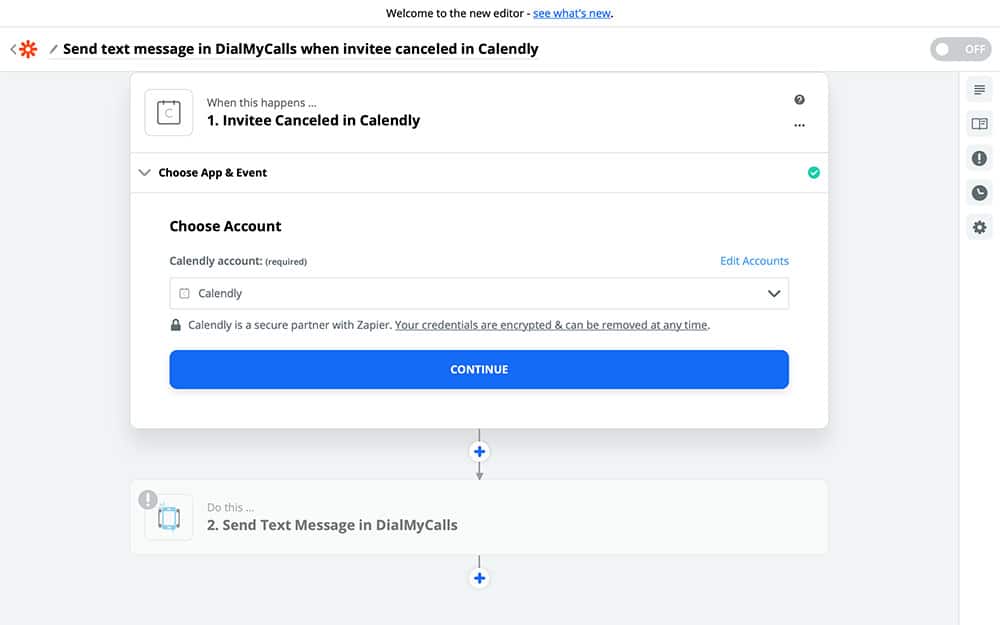
If everything looks as it should, go ahead and press Continue.
Next, Zapier is going to ask you if you want to test your Zap so far. This is just to make sure that you’re connected to the right Calendly account and seeing the correct information. You can test the Zap if you like, or skip it:

And that’s it! Your Calendly account is now connected to Zapier and ready to be used in this Zap.
Step 3: Create Your DialMyCalls Action
With your Calendly account connected, it’s time to start creating your DialMyCalls Action. This is what your Zap is going to do every time it runs. After completing the previous step, you should see the following screen:
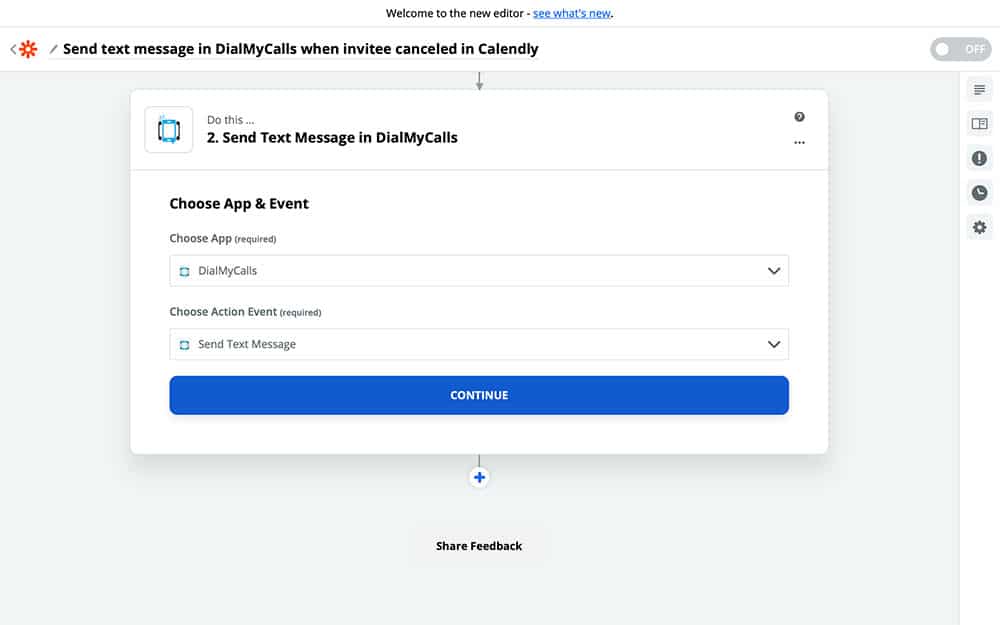
As long as you have DialMyCalls selected, as seen above, you can press that blue Continue button. Zapier will then ask you to select your DialMyCalls account. If you’ve used DialMyCalls with Zapier before, you’ll see it listed as an option like below:
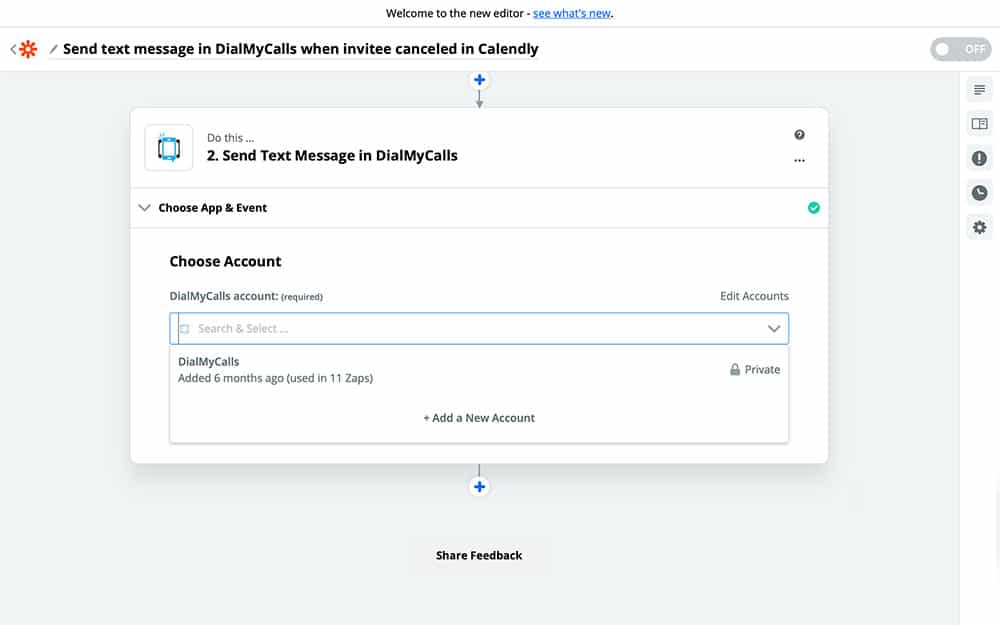
If you haven’t used DialMyCalls with Zapier before, then you’ll need to set it up with Zapier, similar to the way that we connected Calendly. Once you have your DialMyCalls account connected and selected, you can Continue to the next step.
The next screen will look something like this:
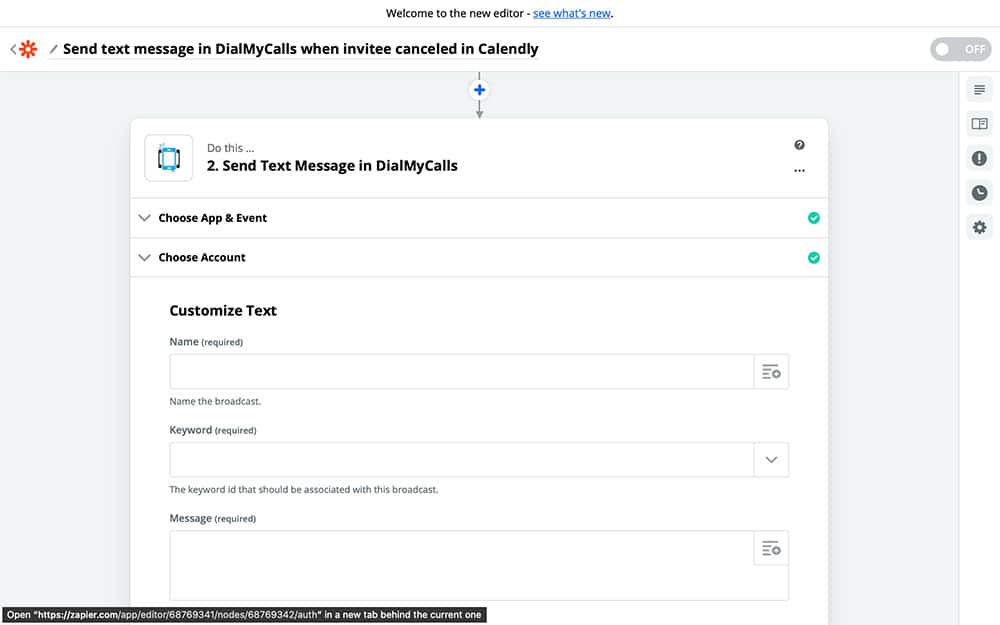
This is your Action template. As we fill it in, your Zap will begin to take shape and function as intended. In our case, we’re going to use this Zap to send a text message, so everything we will fill out in this template will set up what our text message looks like and who it’s going to be sent to.
First, we need to give our text message a name. To do this, open the dropdown menu by the Name field and choose EventType Name:
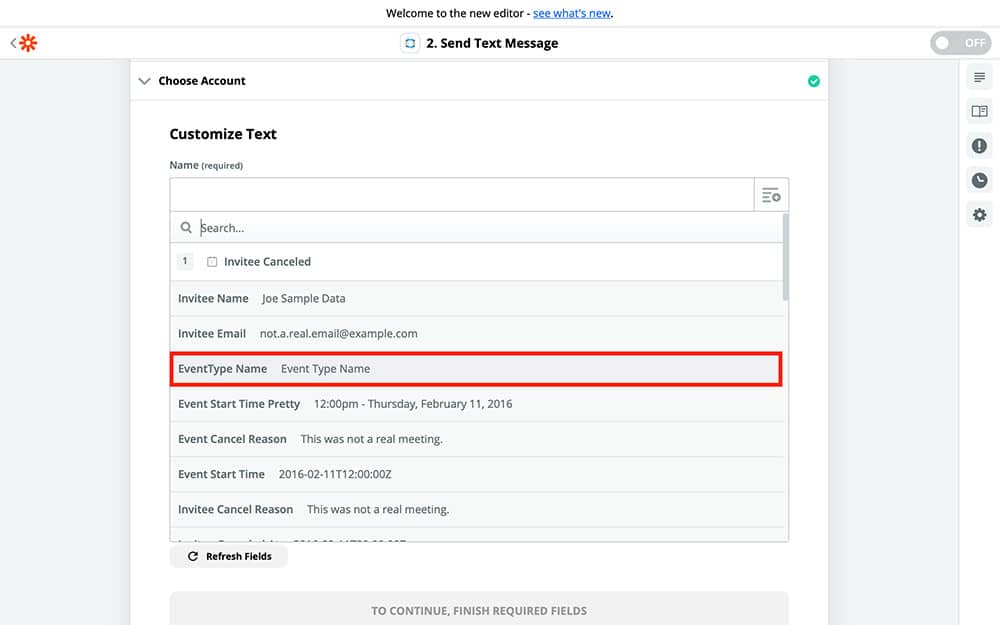
Staying in the Name field, we’re going to type “Canceled,” after the EventType Name variable:
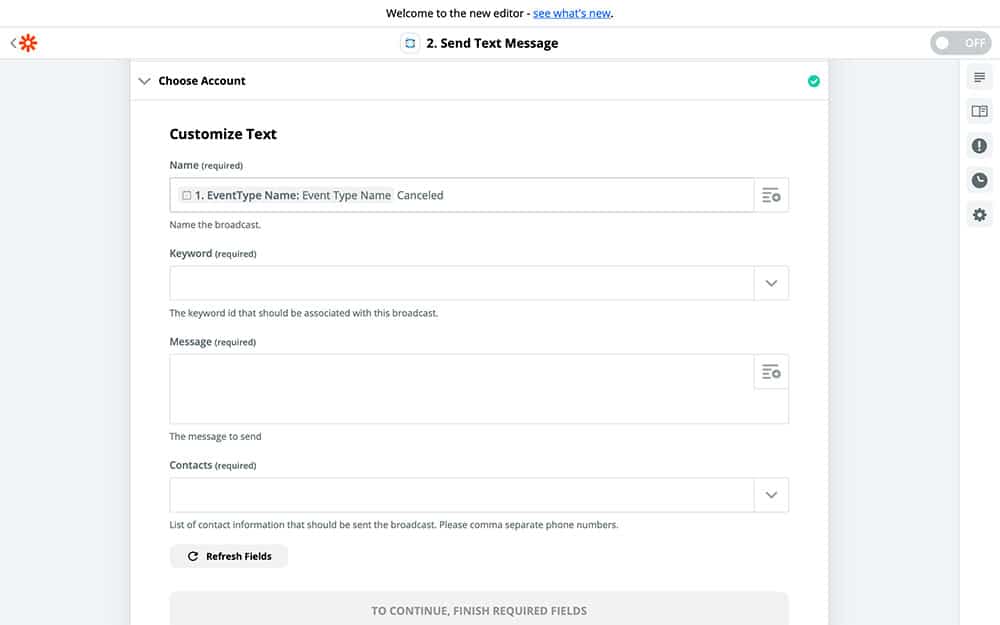
This lets our recipient (a.k.a. you!) know what this notification is about as soon as you get it, separating it from any other notifications about the Calendly event you might receive.
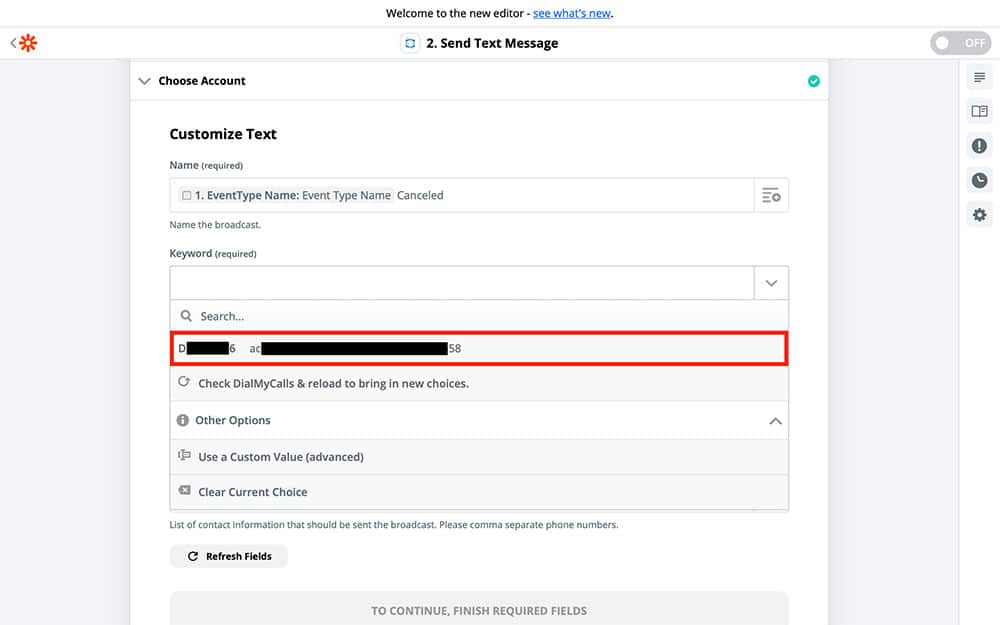
Next up is the Keyword field. Your DialMyCalls keyword is unique to your account and helps let your recipients know who the text message is coming from. Every DialMyCalls user gets a free keyword by default, though you can upgrade your account to customize your keyword. Go ahead and choose your preferred keyword from the dropdown menu:
Now it’s time to create your Message. As you can probably guess, this is what the message is going to say once you receive it. You can fill it in with something as simple as, “This event has been canceled,” though that doesn’t really take full advantage of what Zapier has to offer. You can combine a written message with variables from the dropdown menu to provide you with exact information about which event has been canceled, who has canceled it, and even why they canceled it.
Here’s an example of a message we created to help you create your own:
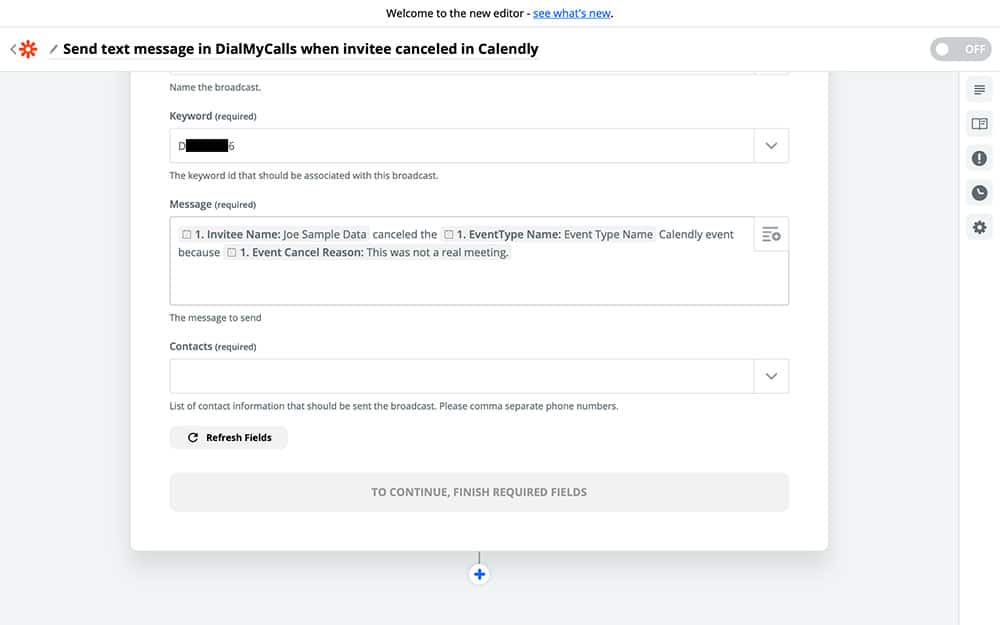
You can copy the one we’ve created above or create your own. Another simple way to create a message is by making a bullet list, like “Person canceling: John Smith, Reason: Too Busy,” and so on.
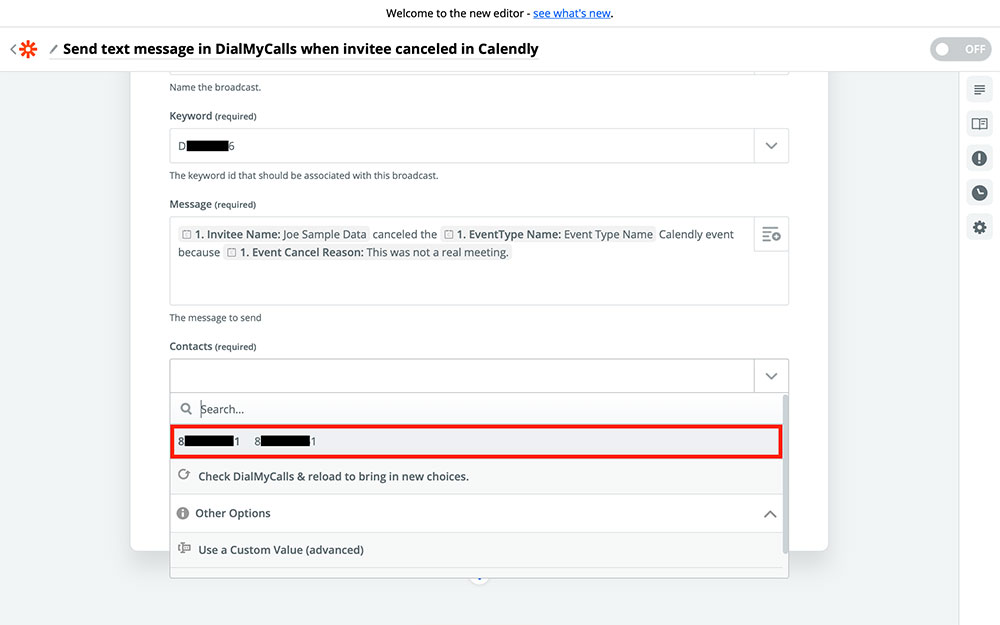
Once you’re happy with your message, all that’s left to do is make sure that the message will be sent to you. This way, anytime someone cancels a Calendly event, you’ll instantly receive the message you just created to let you know that the event has been canceled. To choose your phone number from the Contacts field, your number will need to be added to DialMyCalls if it isn’t already. If your number is added, you can choose it from the dropdown menu:
Now your template should be ready to go! Go ahead and give it a quick look over to make sure each field is filled in correctly:
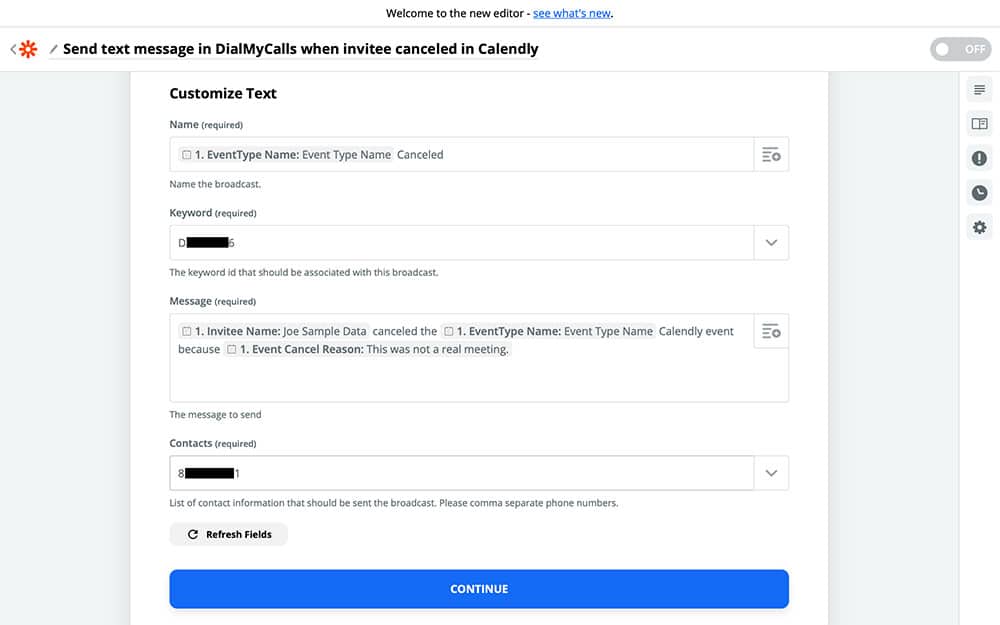
Once you’re happy with it, go ahead and Continue.
Step 4: Turn On Your Zap
Once you finish the last step, you should be looking at the following page in Zapier:
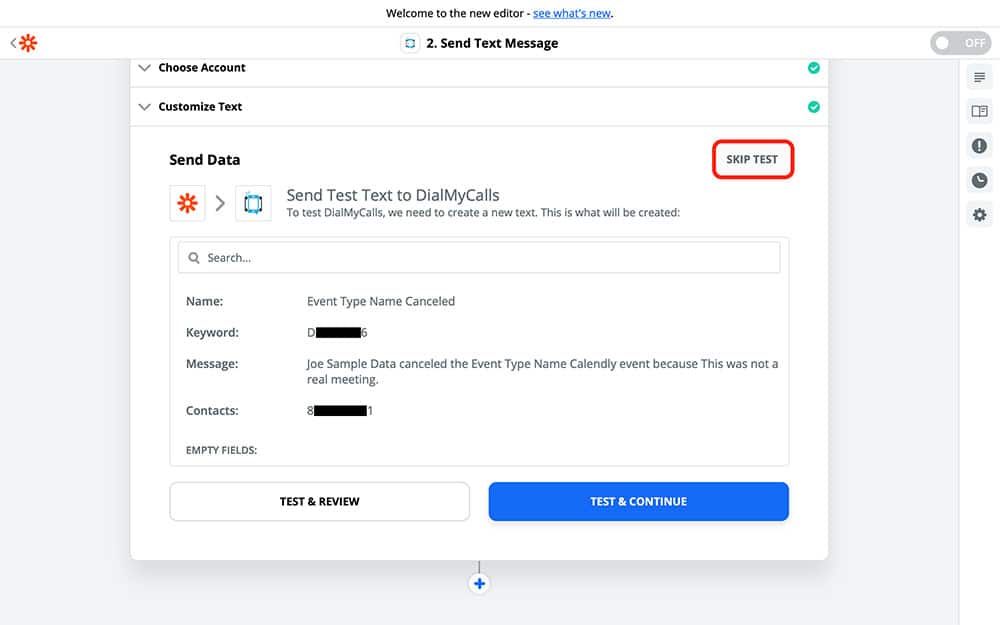
Once again, Zapier will ask you if you want to test your Zap. If you do choose to test it, Zapier will send the template version of the message to your phone number (or whichever phone number you entered in the Contacts field). Otherwise, you can select SKIP TEST to continue.
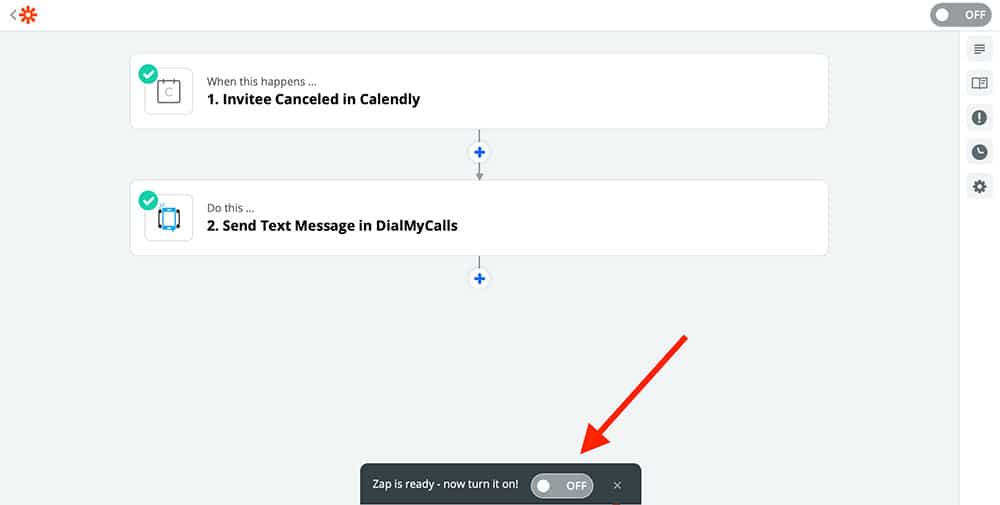
After that, all that’s left to do is turn your Zap on! Just press the switch at the bottom and give your Zap a fitting name:
DialMyCalls + Calendly Integration Conclusion
Here’s a quick recap of everything we did:
- Created a new Zap
- Chose Calendly as our Trigger app and DialMyCalls as our Action app
- Connected our Calendly account to Zapier
- Completed our DialMyCalls Action text message template using variables
- Turned our Zap on and gave it a unique name
Now that your DialMyCalls + Calendly Zap is up and running, you’ll have an easier time keeping your calendar straight and managing your Calendly events. Any time someone cancels a Calendly event that you’re a part of, you’ll be the first to know by receiving a text message notification!
You can create other Zaps with Calendly and DialMyCalls that work the same way, letting you know when events are created, when they change, and more. This way, you’ll always be in the loop, saving you a ton of time in the long run. And best of all, it’s all automatic.
This Calendly Integration is only a sample of what can be accomplished through Zapier. Don’t hesitate to explore what else the service has to offer, and get creative with your automations! If you don’t already have a DialMyCalls account, sign up for free today!