Eventbrite Integration

How To Send Text Message Notifications To Your Eventbrite Attendees
In this article, we’re going to show you how you can easily send SMS Text Message alerts to people (attendees) who registered for your events through Eventbrite. It’s important to make sure you get their permission before sending messages to them. To automatically send the text messages through DialMyCalls we’ll be using Zapier which is a platform that makes automating different services super easy, saving you time and resources in the long run.
The example we’re going to use in this article involves adding new Eventbrite attendees to your DialMyCalls contacts. This allows you to keep all of your event-goers on an easy communication list, so you can send them text message updates, notifications, and confirmations about the event they’re attending.
It’s an invaluable way to alert attendees about important event cancellations, changes or last minute issues. Text messages are generally read within 1 minute so you’ll know people will get your message quickly unlike email.
Eventbrite + DialMyCalls Integration (Video)
What You’ll Need:
- An Eventbrite account
- An event in Eventbrite
- A DialMyCalls account
- A Zapier account
Step 1: Create Your Zap
Assuming you have all of your accounts in order, you’re ready to begin creating your Zap! The first step we’re going to do is connect the two services to one another – Eventbrite and DialMyCalls – using Zapier. To do this, login to Zapier and go to your dashboard.
Once there, you should see something that looks like the following:
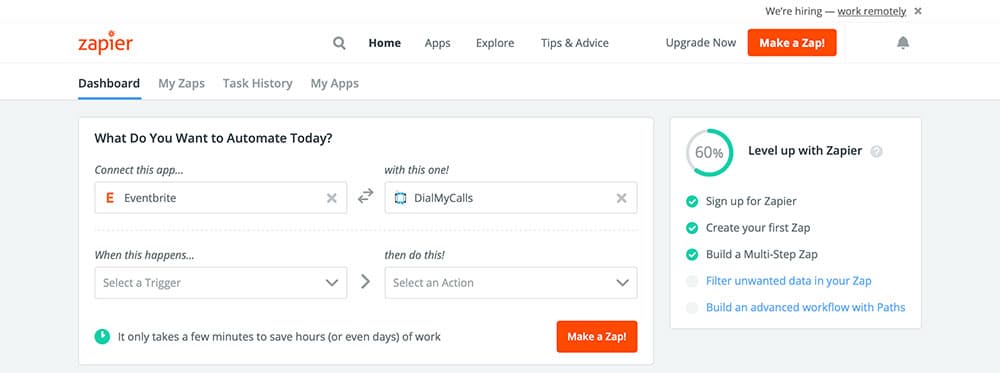
While there’s a lot going on in this screen, we’re going to turn our attention directly to the first box, What Do You Want to Automate Today? As you can see in the screenshot above, we already have Eventbrite connecting to DialMyCalls. You’re going to set yours up to do the same thing by typing “Eventbrite,” into the first field – Connect this app… – and “DialMyCalls”, in the second field – with this app!
Once you have both selected, choose the orange Make a Zap! in the bottom right corner to move on to the next step.
Step 2: Create Your Eventbrite Trigger
Once you press the Make a Zap! button, Zapier will bring you to the following screen:
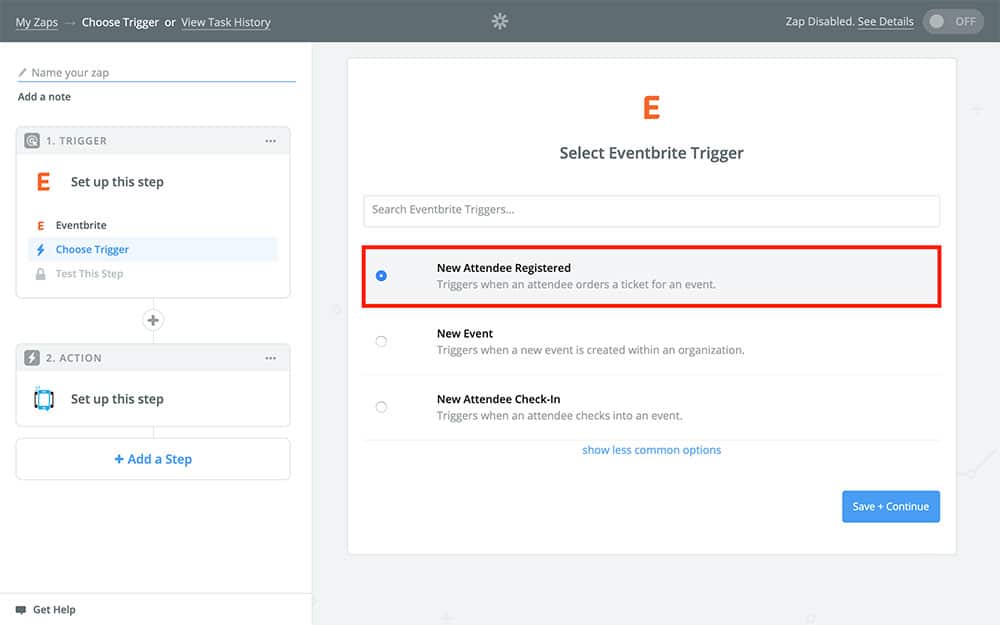
This is where we’re going to create our Zap’s Eventbrite Trigger. The Trigger is what tells your Zap when to run. In our case, we want this Zap to run every time a new attendee registers for our event. So, choose New Attendee Registered like in the screenshot above, and Continue.
Next, you’re going to need to connect your Eventbrite account to Zapier, if you haven’t done so before. Just click the Connect Account button to do so, and follow the on-screen prompts. Once you have it selected, Continue:
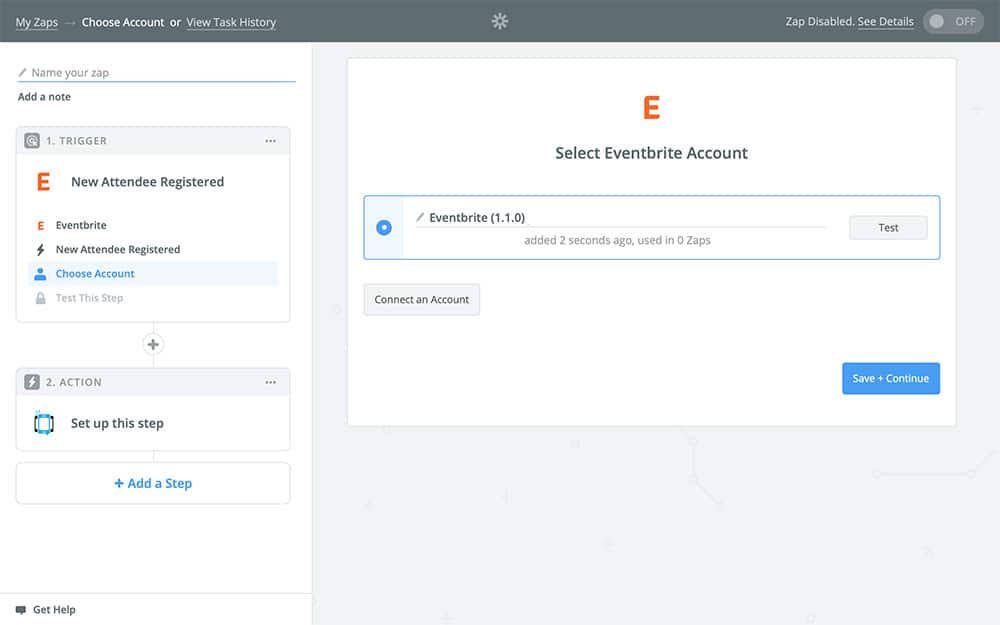
You should now see the following:
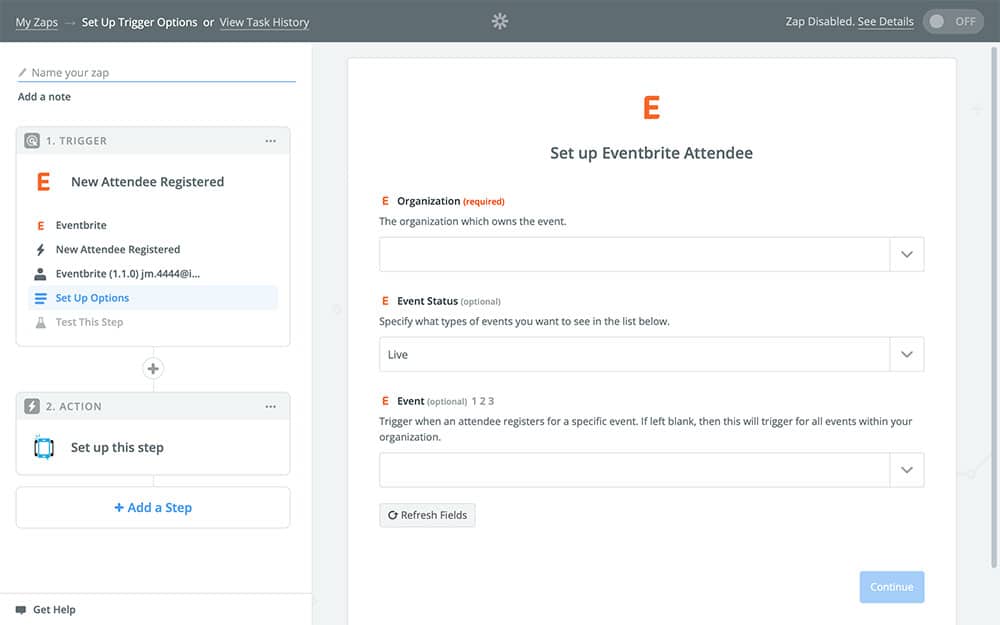
This is your Trigger template, and it’s where you’re going to specify the exact conditions that cause your Zap to run. You only have to fill in the Organization field, but the more specific you are, the better. If you only fill in the first field, then anyone who attends an event being hosted by that organization is going to be added to your DialMyCalls contacts. Likewise, if you only fill in the first two fields, then all attendees that register for a certain type of event with that organization will be added to your contacts, and so on.
You can use the dropdown menus to pull information directly from Eventbrite, that way your fields correspond exactly with your Eventbrite info. Once you have the template filled out to your liking, you can Continue.
Next, you’re going to pick the sample that we’re going to use when creating the rest of this Zap. The sample is just a template attendee that Zapier will use to make creating your Zap easier – they won’t actually be used when your Zap runs for real. We always use randomly generated samples, though you can pull one from your existing attendees if you like:
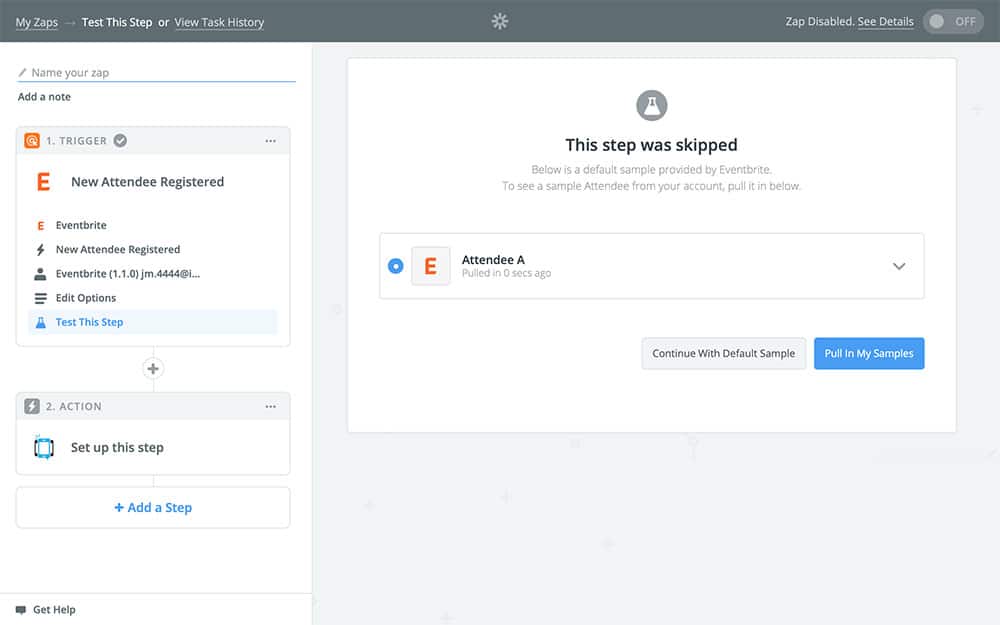
Once you have your sample selected, you’re ready to Continue to the next step!
Step 3: Create Your DialMyCalls Action
We’re in the homestretch now! This is the part where we’re going to establish what our Zap does when it’s told to run. In our case, that’s going to be adding our new attendee to our DialMyCalls contacts.
First, though, you’ll need to choose DialMyCalls as your Action app:
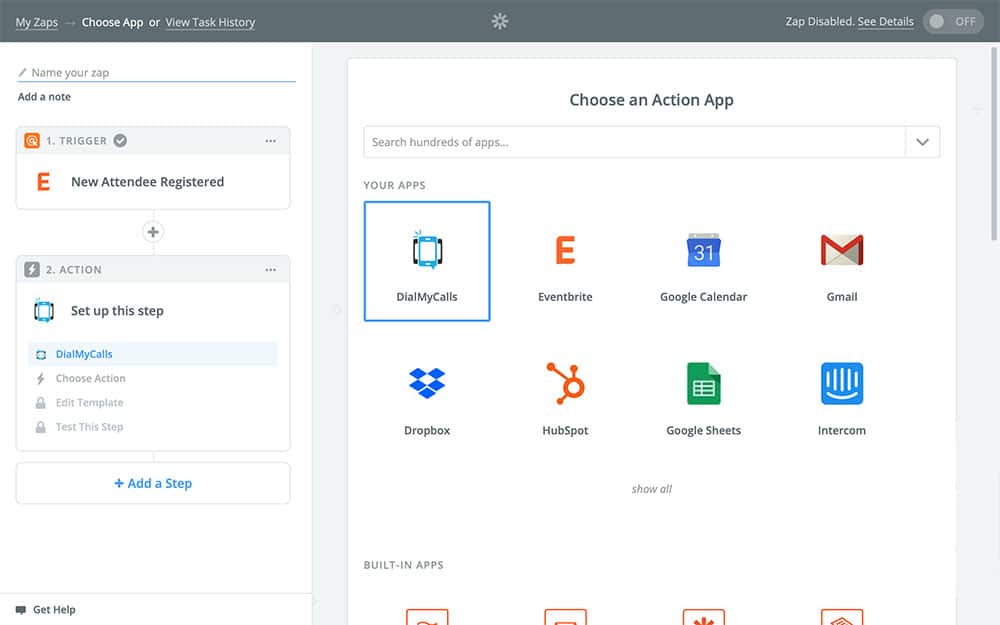
Since we chose to connect it to Eventbrite when we were first creating our Zap, it should already be selected, like in the screenshot above. If not, though, you can easily select it by searching for it in the search bar at the top of the page. Once you have it selected, Continue.
Next is where we’re going to choose our Action:
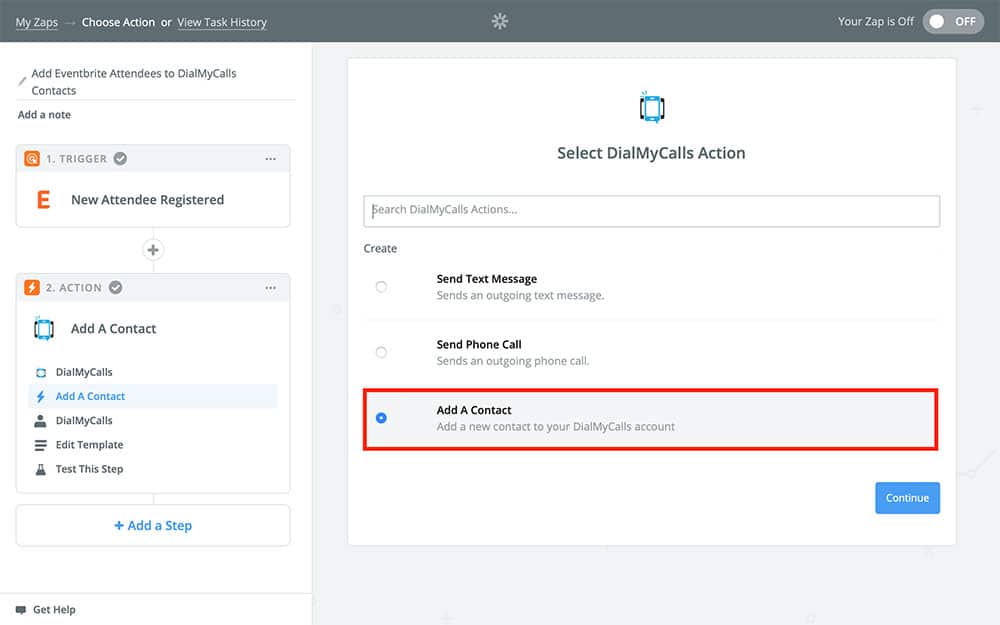
As we mentioned, we want our Zap to add new attendees as contacts, so choose Add A Contact from the available options. If you don’t see it as an option, you can search for it using the search bar. Once you have it selected, Continue.
Just like when creating our Trigger, you’re going to need to connect your DialMyCalls account to Zapier. If you’ve already done this, you should see it listed as an option, like below:
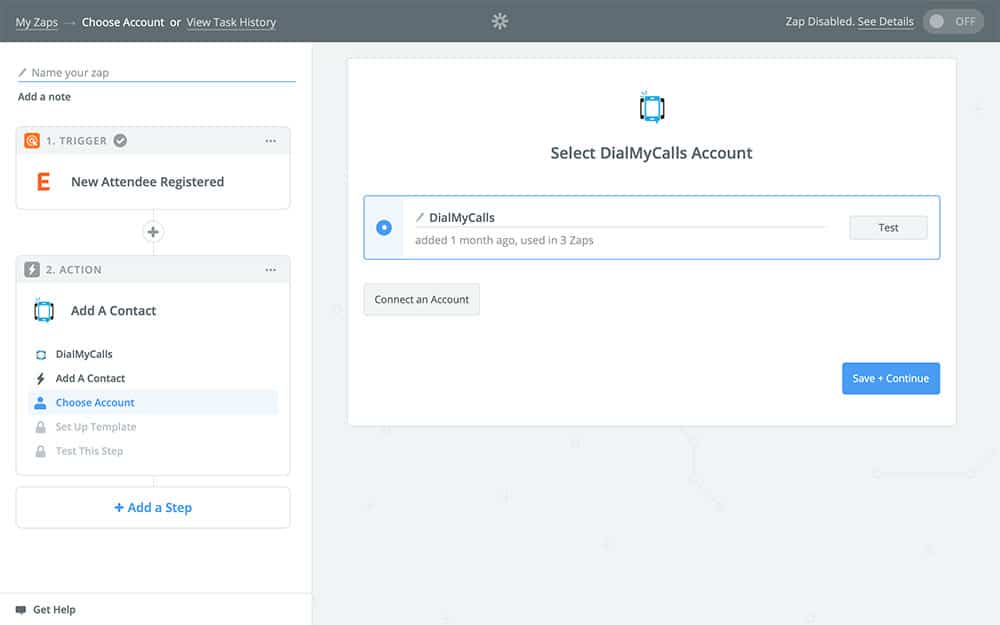
If you don’t see it, no worries! Just choose the Connect an Account button, and follow the prompts until you have the two apps linked to one another. Once you’re ready to go, Continue.
Next is the fun part – the Action template:
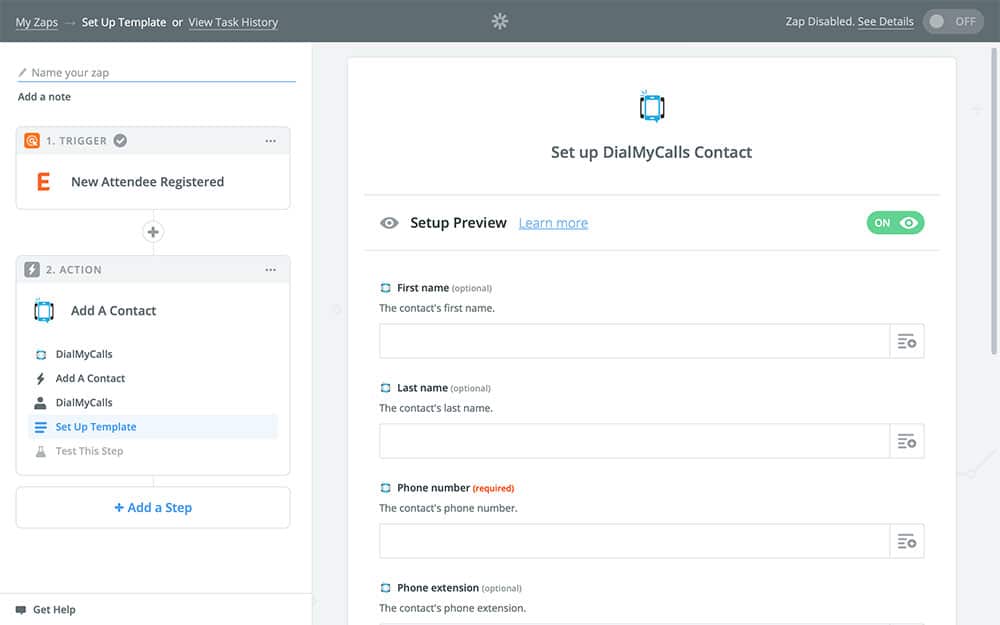
Like our Eventbrite template from earlier, this is where we’re going to decide exactly what our Zap does once it is told to run. You only have to fill in the fields listed as (required), but it’s best to fill in as many as you can. This way you have the most information on the contacts being added to DialMyCalls as possible.
Next to each field you’ll see a dropdown button. These dropdown buttons give you options and variables pulled from your Eventbrite and DialMyCalls accounts, as well as other sections of this very Zap. This is one of the best features of Zapier, as it gives you a wide margin of flexibility in deciding how your Zap is going to work.
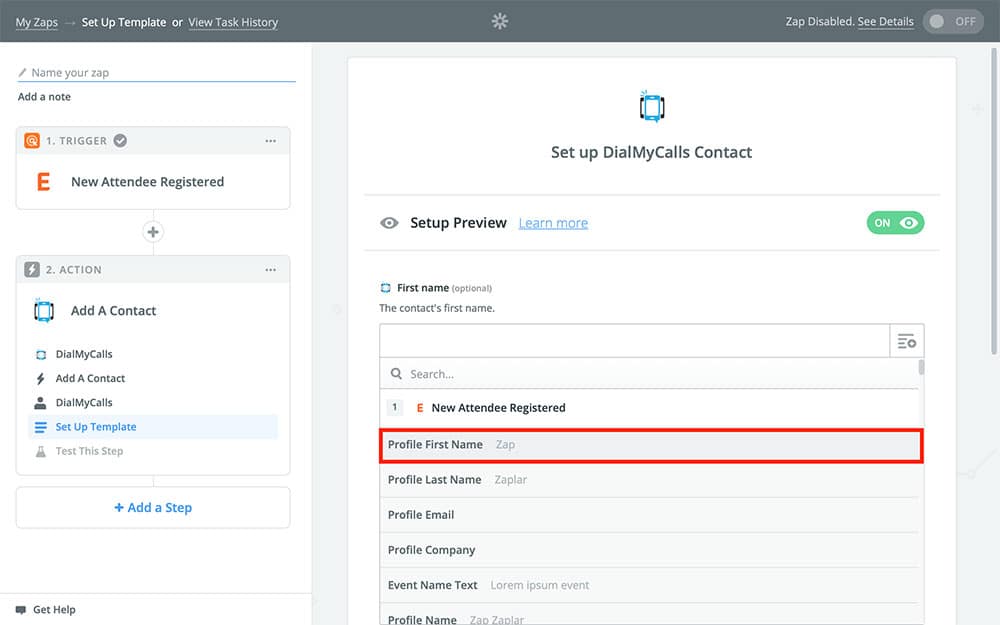
For the first two fields – First name and Last name – you’re going to choose the dropdown menu for each one and pick the corresponding option, like so:
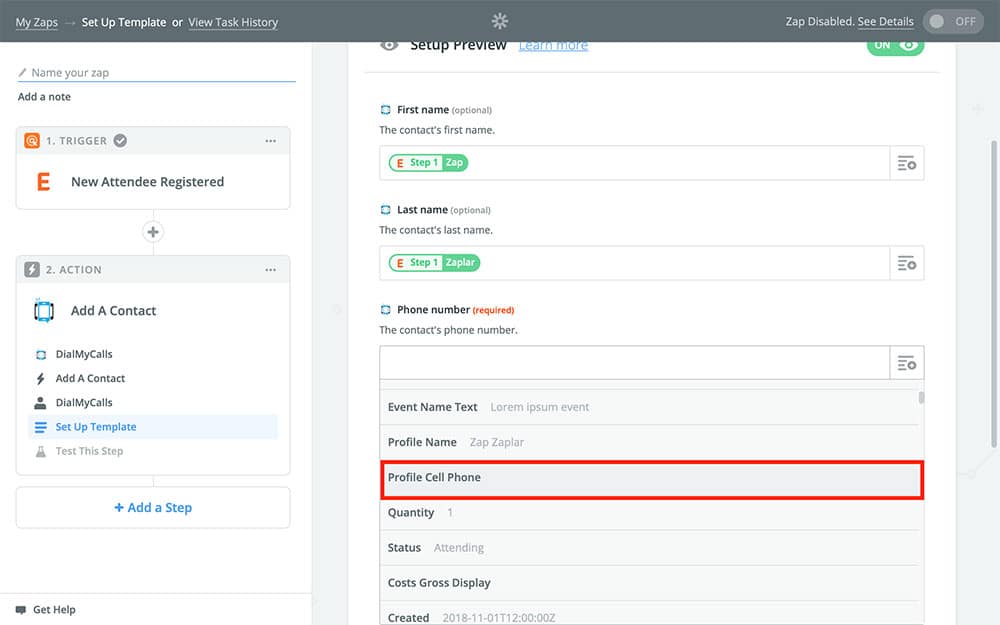
Similarly, for the Phone number field, you’ll pick the Profile Cell Phone option from the dropdown menu:
These are the main fields that you’ll need to fill in, though you can fill in more if you like. You’re completed template should look something like this:
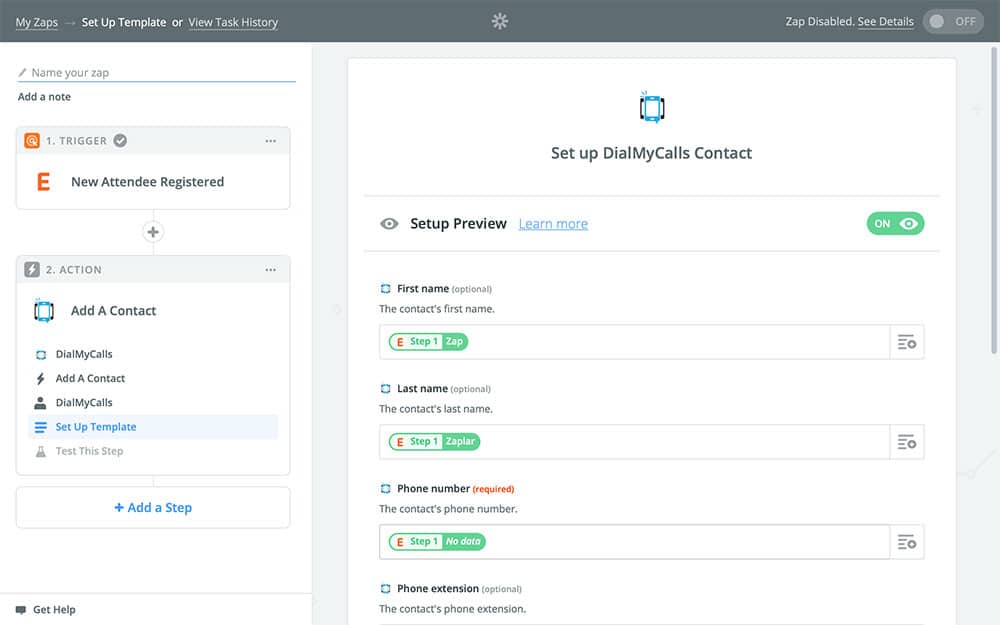
Once you’re happy with your template, you can Continue to the next step.
Zapier will ask you to test your Zap, which you can do if you like, but you can just as easily skip the test if you like. Keep in mind that if you do choose to test the Zap, your sample attendee will be added to your DialMyCalls contacts. So after testing it you’ll need to remove your sample contact from your actual contacts afterward.
And after that is the final step – turning your Zap on! All you have to do is give your Zap a name and hit the green switch:
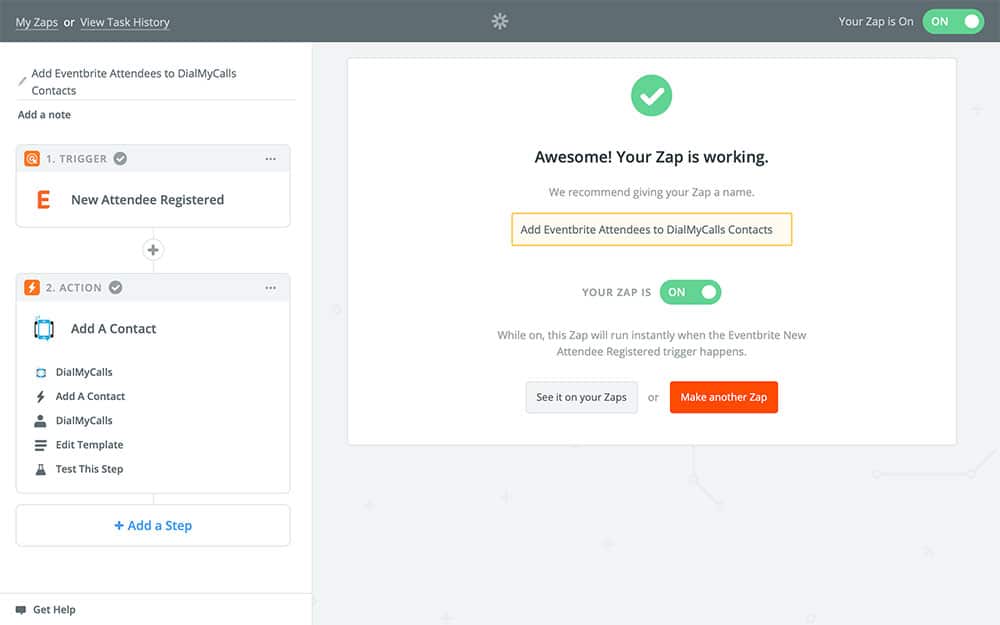
Just be sure to keep in mind that once you turn your Zap on, it’s going to add any of your new attendees to your DialMyCalls contacts from here on out – unless you turn it back off, of course. So be sure you’re totally happy with it before finishing!
DialMyCalls + Eventbrite Integration Conclusion
Here’s a quick recap of everything we did:
- Created a Zap that connects Eventbrite to DialMyCalls
- Set our Zap to run every time a new Eventbrite attendee registers with our preset conditions
- Set our Zap to add the new attendee to DialMyCalls as a contact using the name and phone number
Setting this Zap up will allow you to do things like keep your event goers updated on their event’s status, notify them when events cancel or change dates, remind them when an event is about to start, inform them of other events they may be interested in, and a ton more things! You can even create new Zaps with DialMyCalls to automate how you interact with these event goers!
Now that your Zap is setup you’ll be able to easily broadcast text messages out to your Eventbrite contacts within seconds from within your DialMyCalls account. You can access DialMyCalls through our website or even or mobile apps letting you send your SMS text message notifications to event attendees from wherever you are.
This Eventbrite Integration is only a sample of what can be accomplished through DialMyCalls + Zapier. Don’t hesitate to explore what else the service has to offer, and get creative with your automations!