Zoho Integration

Keep Your Zoho Contacts Backed Up With Zapier And DialMyCalls
In this article, we’re going to show you how to combine Zoho and DialMyCalls through Zapier. Zapier is a platform that makes automating different services super easy, saving you time and resources in the long run.
The example we’re going to use in this article involves automatically adding new Zoho contacts to DialMyCalls. This provides you with an automatic backup of your Zoho contacts and a way to send mass texts to these contacts via DialMyCalls, should the need ever arise.
Zoho + DialMyCalls Integration (Video)
What You’ll Need:
- A Zapier premium account
- A Zoho account
- A DialMyCalls account
Step 1: Create Your Zap
It’s time to create your Zap. Go ahead and log in to Zapier and head over to your Dashboard:
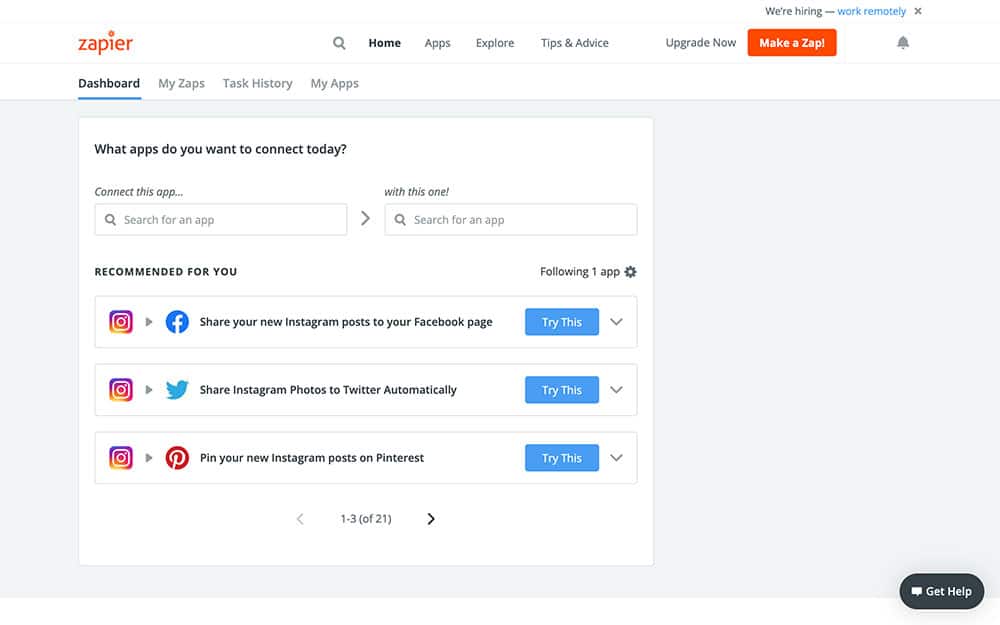
See the orange Make a Zap! button in the top right? Push it! This will bring you to the Zap creation screen, which is where things start to get interesting.
Step 2: Create Your Zoho Trigger
After pressing the Make a Zap! button, Zapier will take you to the following screen:
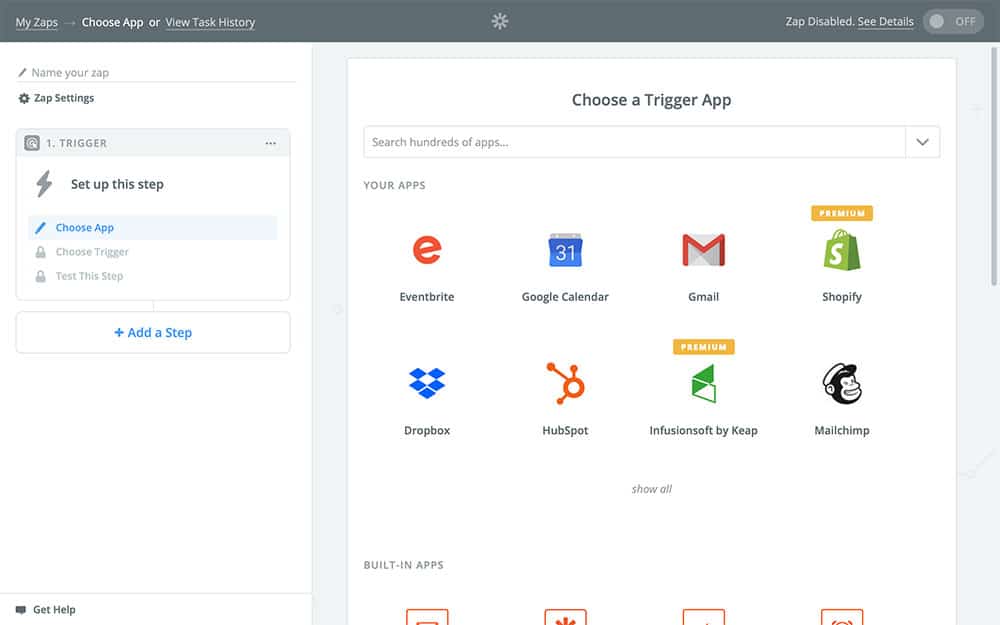
This is where you’re going to select the first app, Zoho. In the search field at the top, type in “Zoho CRM,” and select it when it appears:
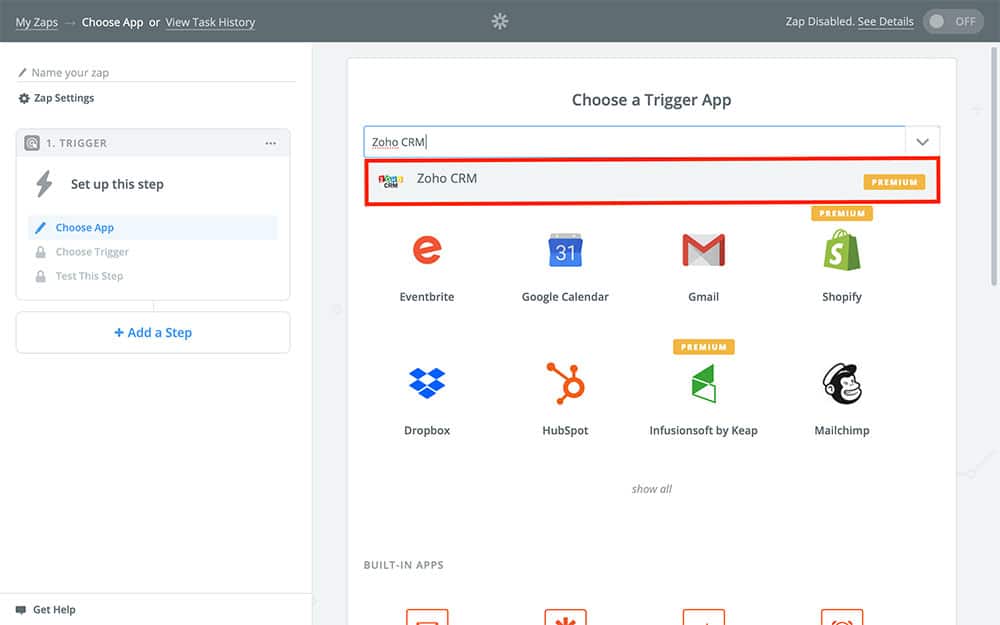
It’s important to pick Zoho CRM and not one of the other Zoho options since they won’t work with the Zap we’re making today. You’ll notice that Zoho CRM has a yellow banner that says “PREMIUM.” This means that you need to have a Zapier premium account to be able to use Zoho – so make sure you have one of those! After you select Zoho CRM, press the blue Continue button.
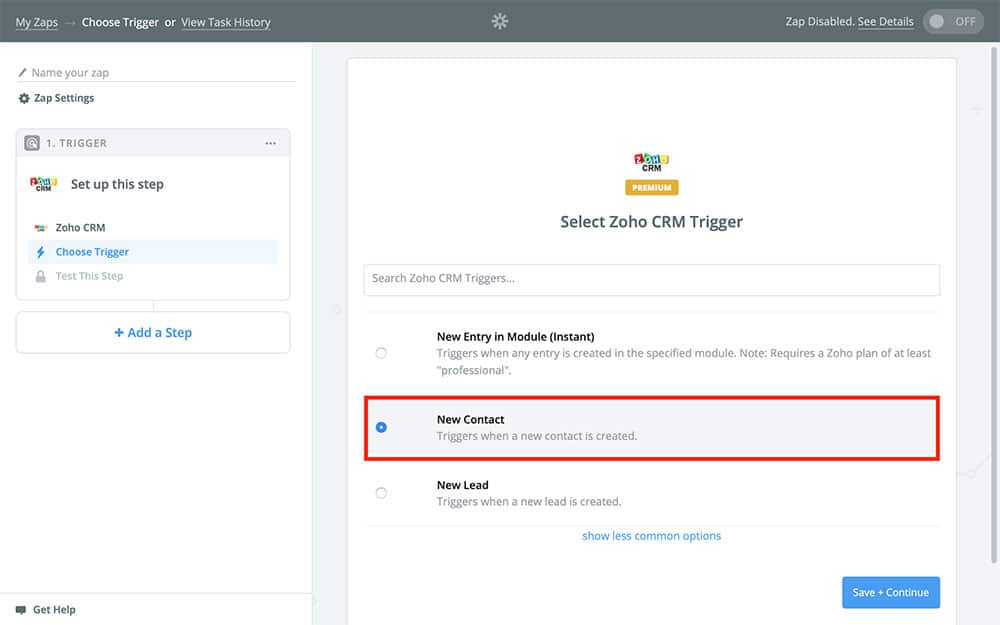
Next, you’re going to pick your Zoho Trigger. Your Zap’s Trigger is what tells it when to run – every time it happens, this Zap will do its thing, automatically. In our case, we want this Zap to run every time we get a new contact in Zoho, so pick New Contact:
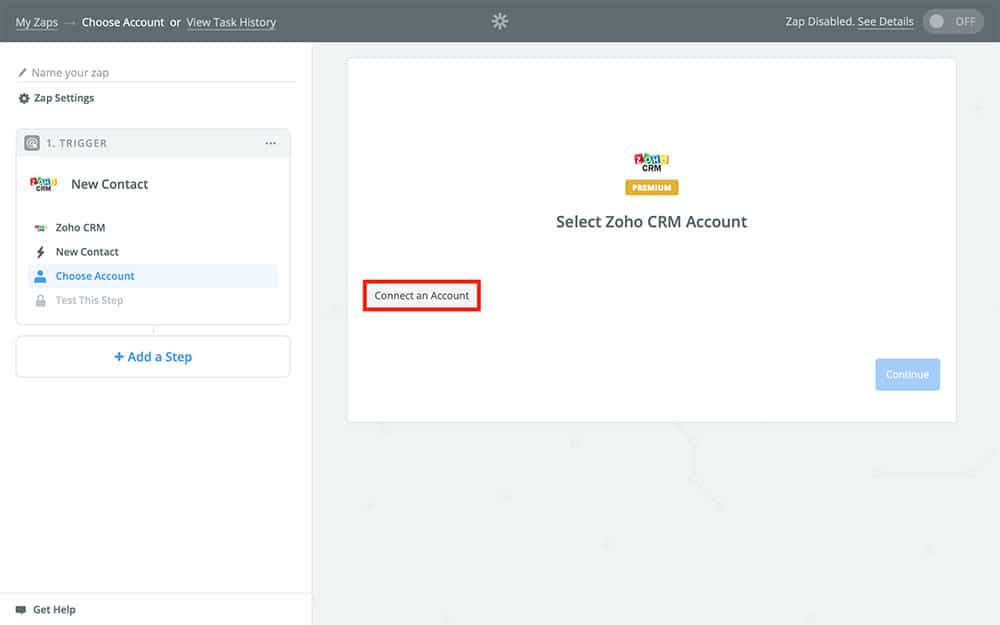
Next, you’re going to need to connect your Zoho account to Zapier. If you’ve already used Zoho with Zapier, you can just press the Continue button. Otherwise, select Connect an Account:
That should open a new tab where you’re asked to select your Zoho Domain:
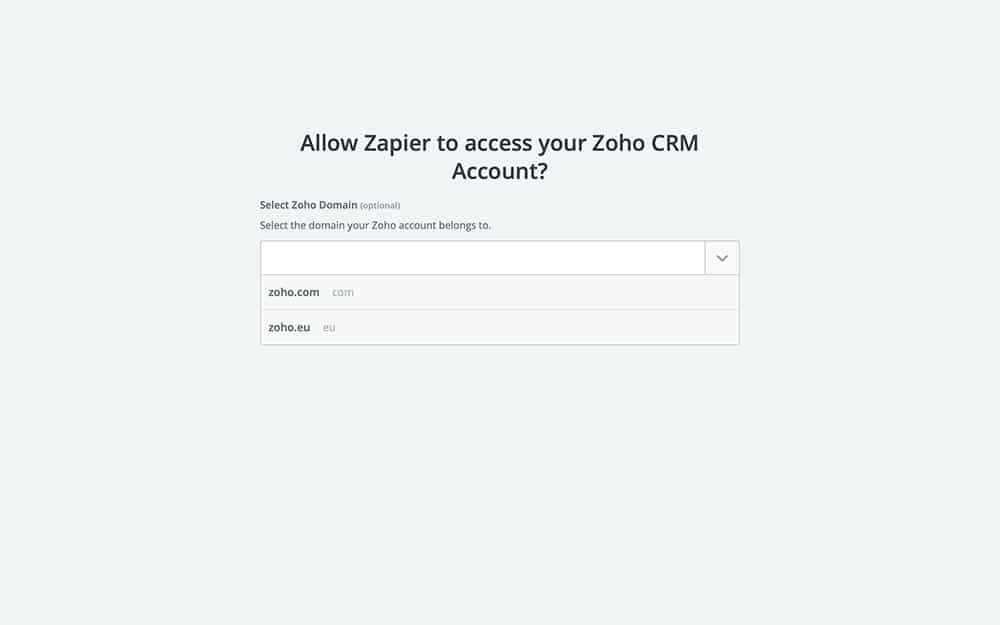
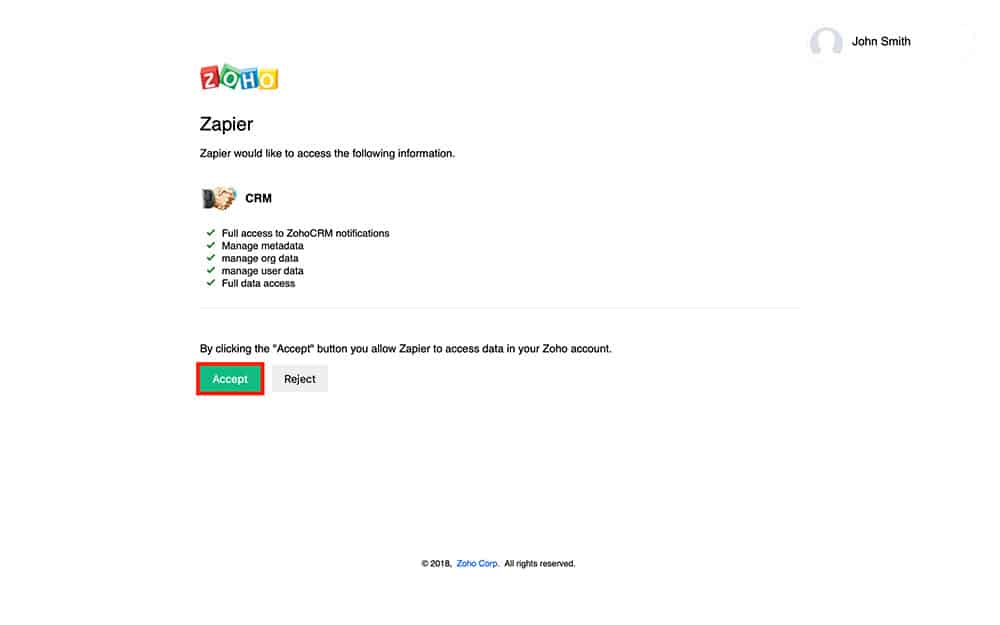
Choose the one that corresponds to your Zoho account. Once you do that, Zoho is going to ask if you want to give Zapier permission to access your Zoho account. You’ll need to do this for the two apps to work with one another, so choose Accept:
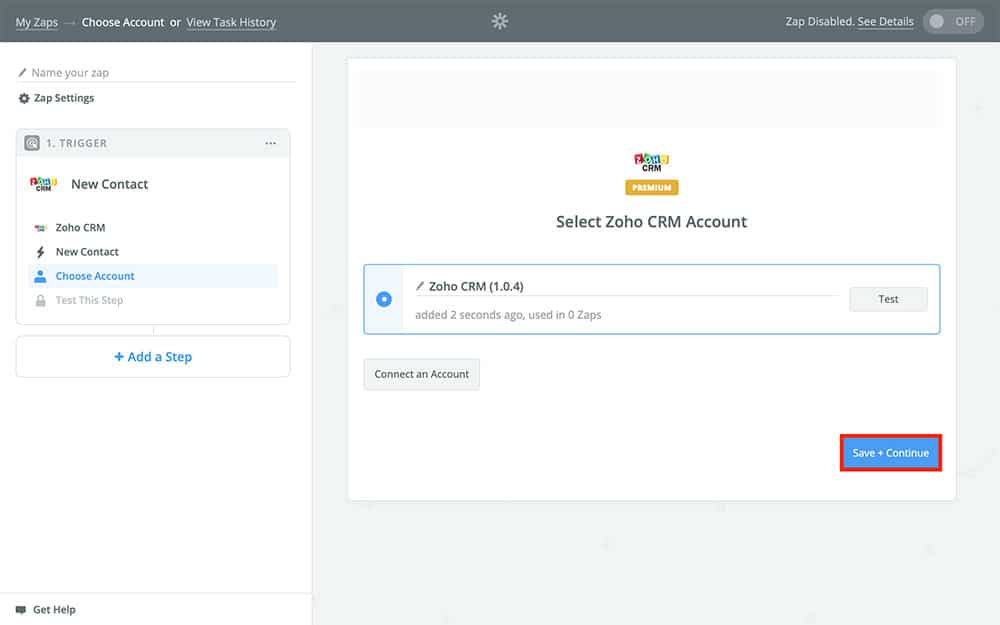
After you do that you should be automatically redirected back to Zapier, but this time, you’ll see your Zoho account:
Next, Zapier is going to ask you for a sample. A sample is just a real or randomly generated contact from your Zoho account that will be used as a placeholder later in this Zap. It won’t actually be used when the Zap runs, though, so it doesn’t matter which sample you choose:
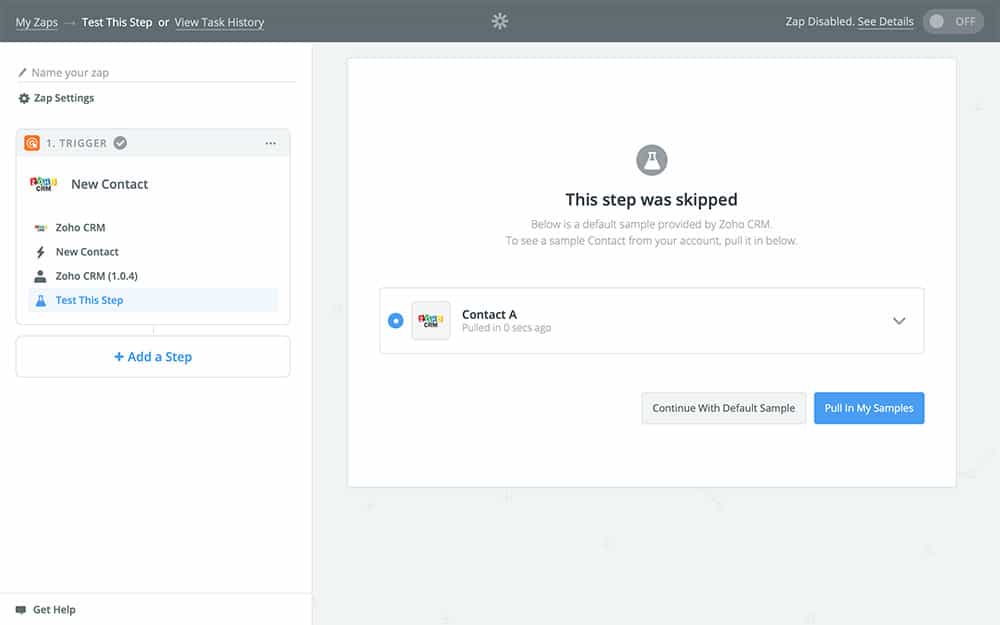
And that will finally bring you here:
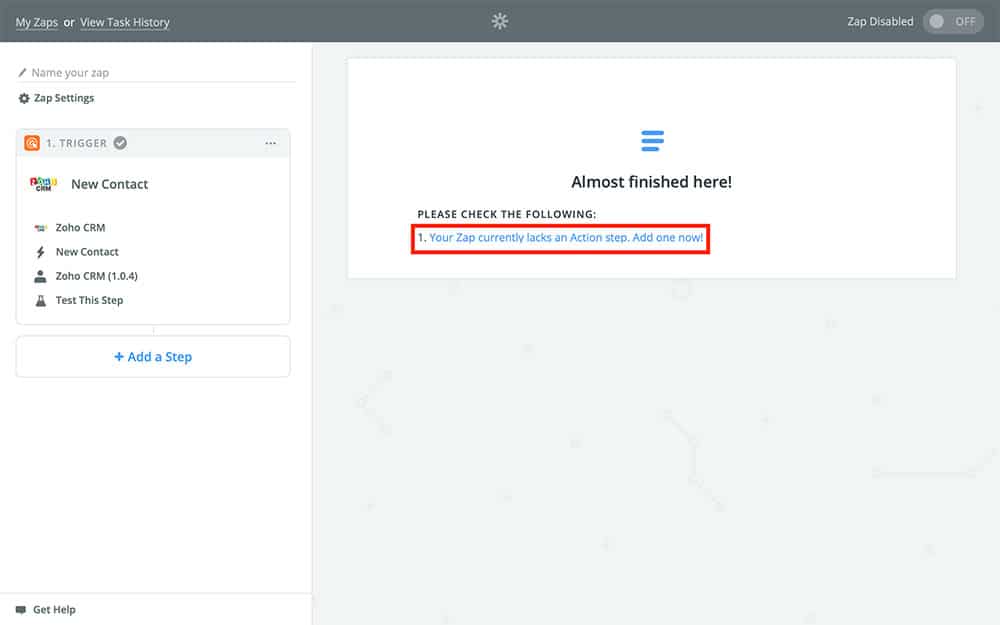
You might’ve noticed that so far, our Zap doesn’t actually do anything. That’s where Action steps come in. Select the blue text (boxed in red above) to add an Action step to your Zap.
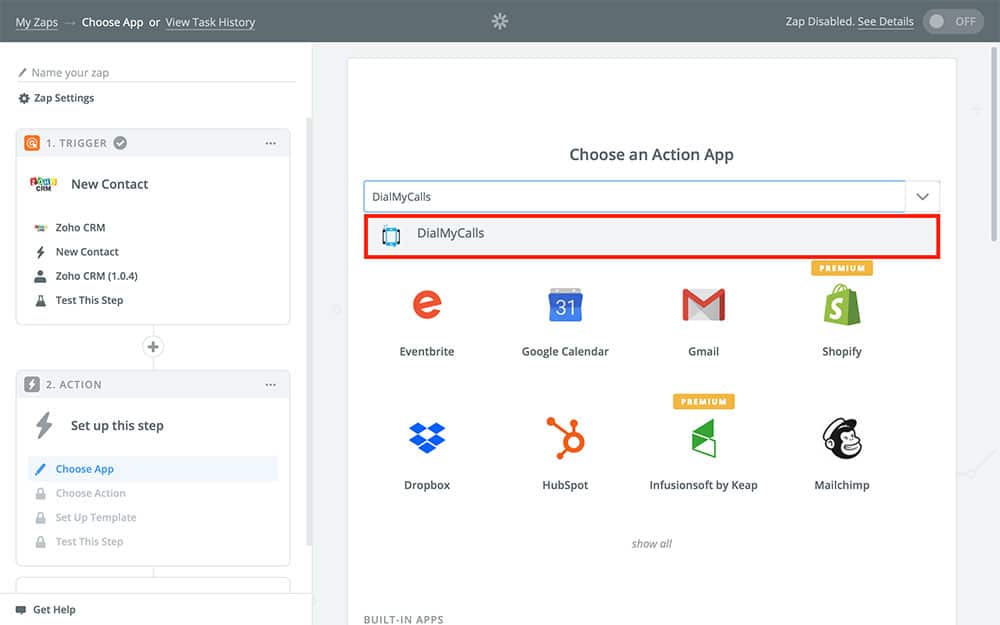
Step 3: Create Your DialMyCalls Action
Now it’s time to create your DialMyCalls Action. Your Action is what your Zap is actually going to do when it runs. To get things rolling, type “DialMyCalls,” into the search field and select it when it appears:
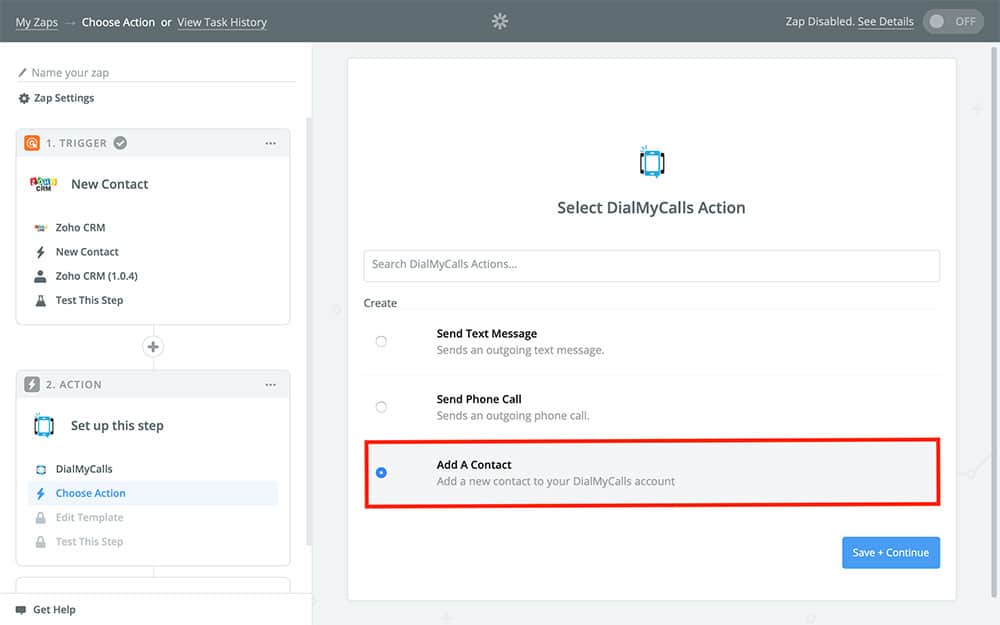
Next, since we want to keep our Zoho contacts backed up to DialMyCalls, you’re going to choose Add A Contact for your Action:
After that, just like with Zoho, you’re going to need to connect your DialMyCalls account to Zapier. If you’ve already used DialMyCalls with Zapier, you should see it already listed. Otherwise, you’ll need to click the Connect an Account button and follow the onscreen instructions:

And that will bring you to the Action template:
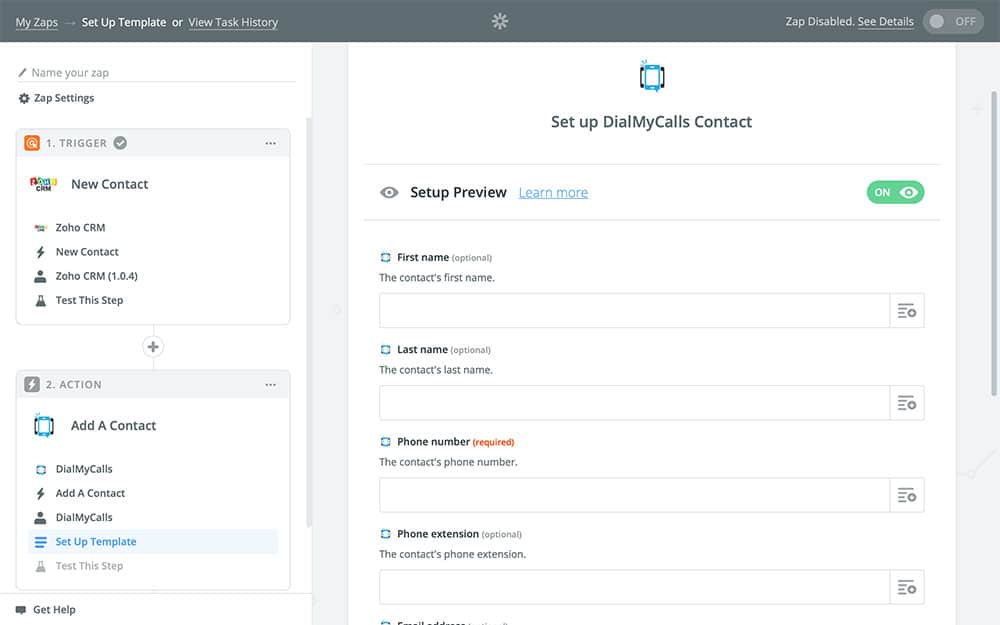
This is where you’re going to specify exactly how your Zap is going to perform its Action. As you can probably tell, each field will make up a different part of the contact that gets added each time this Zap runs. If you just type in each field manually, however, the different fields will be exactly the same each time the Zap runs – which is why we’re going to use variables.
You can find variables for each field in the dropdown menu to the right. These variables will change every time your Zap runs depending on the contact being copied from Zoho to DialMyCalls. In other words, they’re pretty cool.
For the First name field, choose the corresponding First Name variable from the dropdown menu:
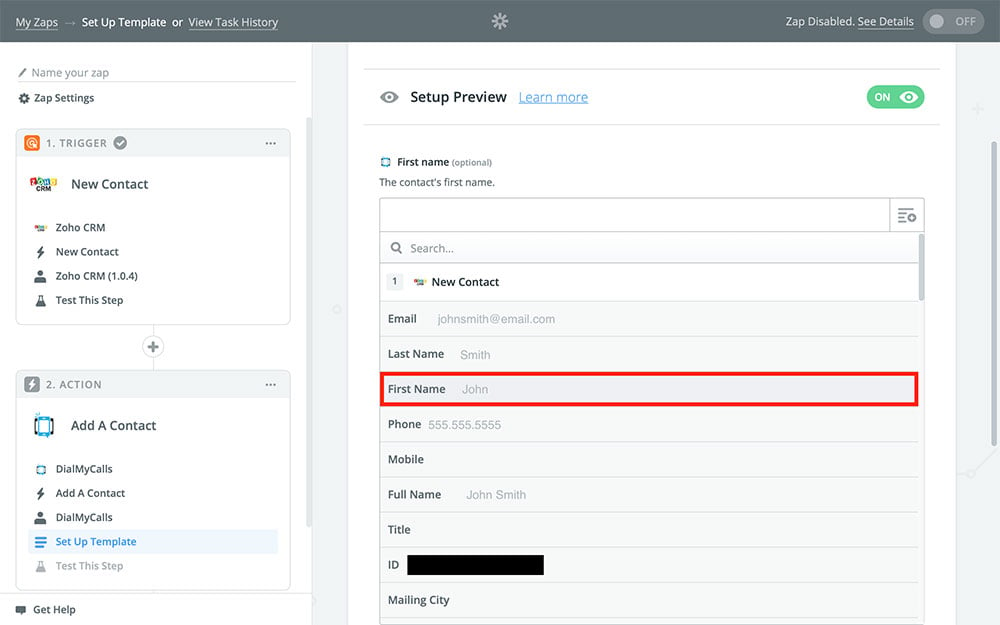
You’ll notice that the variable is in a green bubble – this is how you can tell it apart from regular text that doesn’t change. For example, if you put “Doctor First Name variable,” in the First name field, all of your contacts would have the word “Doctor,” in front of their name – not so helpful, really, unless all of your contacts happen to be doctors!
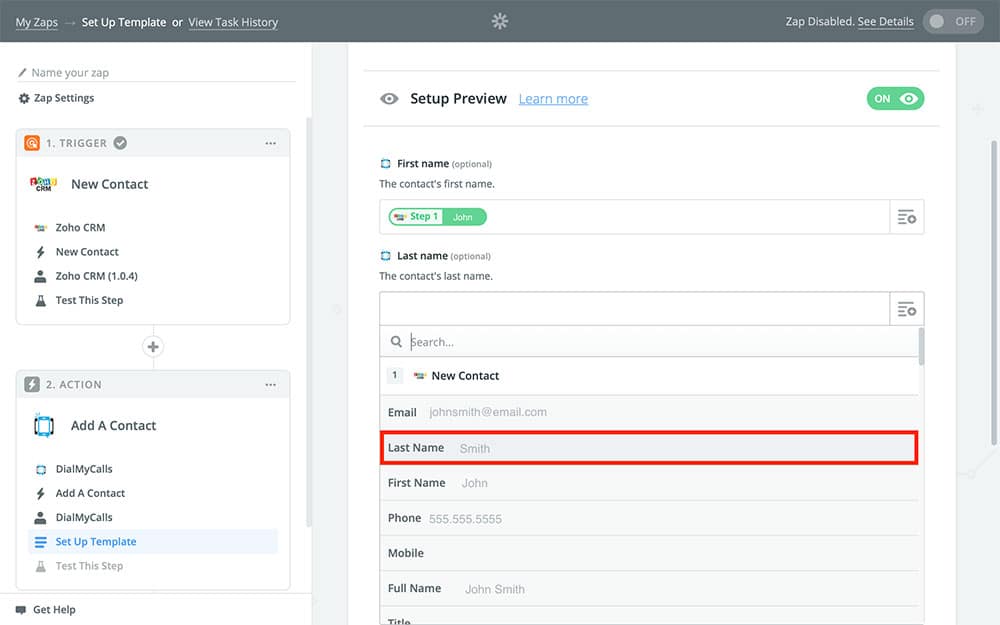
For the Last name field, we’re going to do the exact same thing, using the Last Name variable instead:
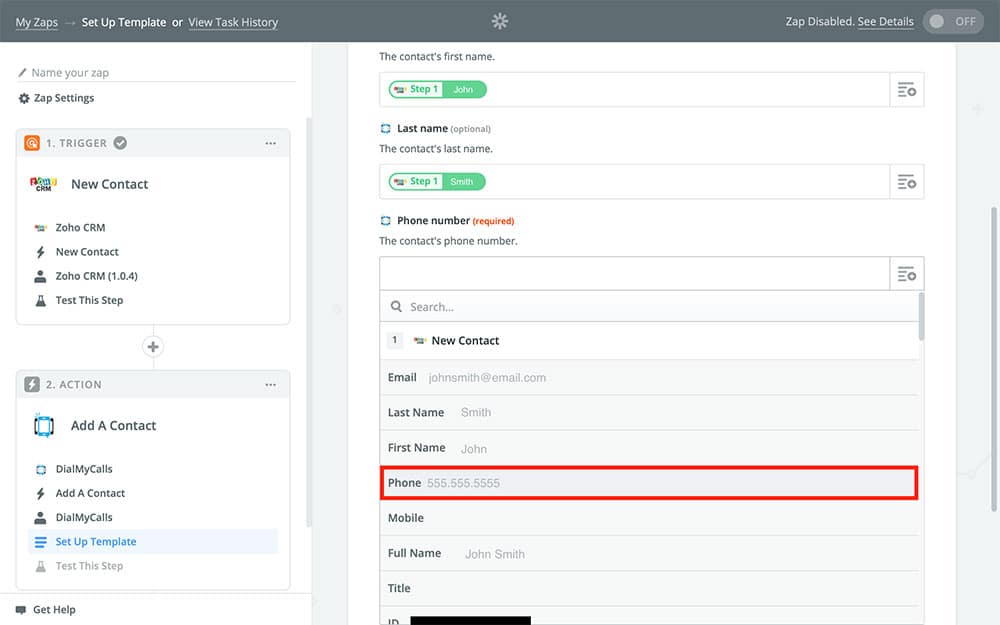
And the same for Phone number:
And, lastly, for Email:
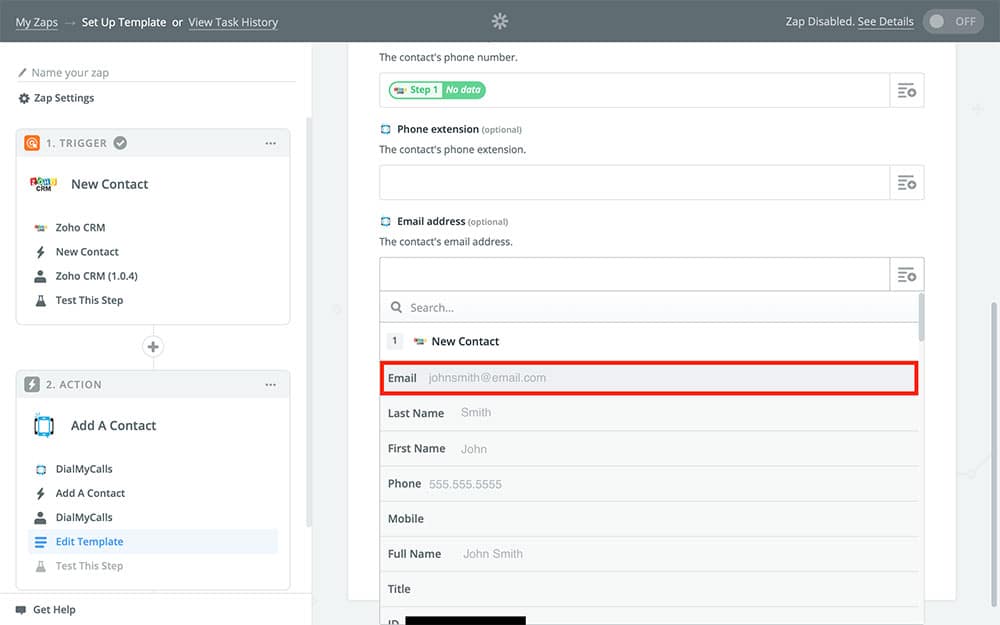
After that, if you’re happy with your template, you can Continue to the last few steps! The next thing Zapier is going to ask you is if you want to test your Zap:
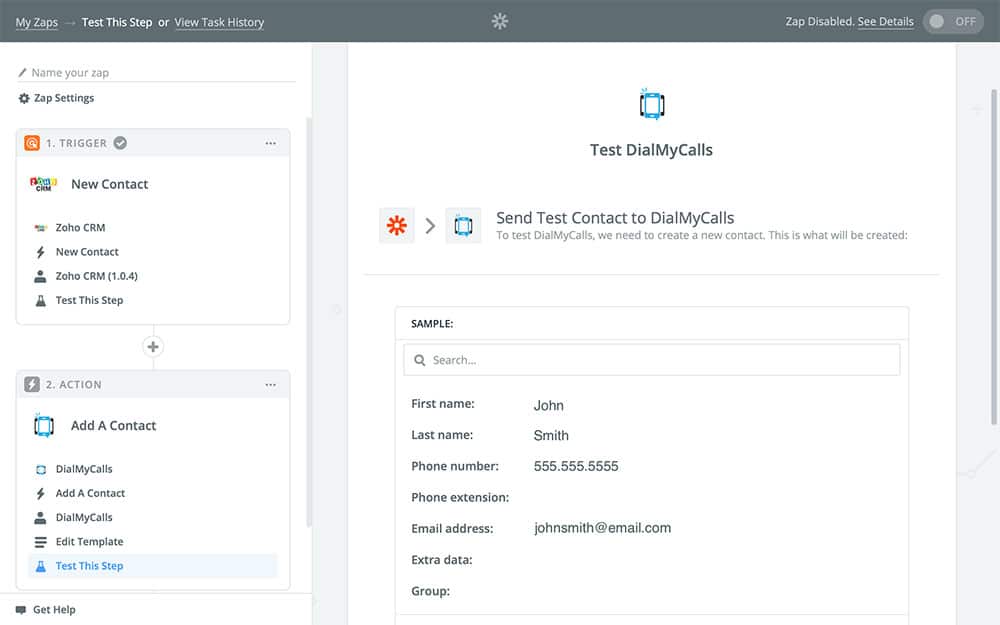
You can do this if you like, just keep in mind that the sample contact used in this Zap will be made into a contact on DialMyCalls. We usually recommend just skipping the test, but it’s up to you!
All that’s left to do is give your Zap a name and turn it on:
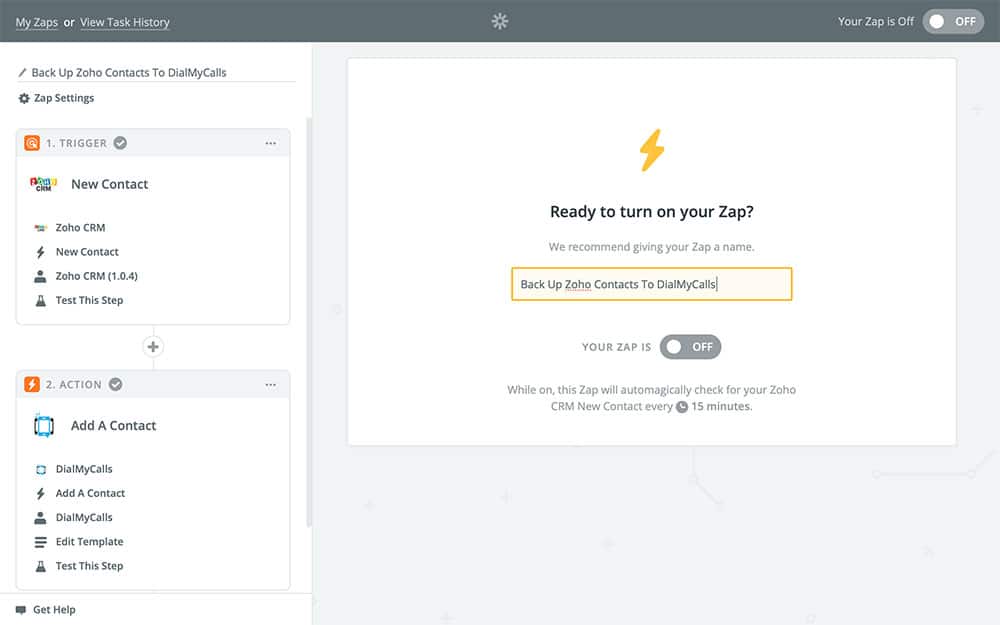
Just keep in mind that once you flip that green switch all of your new Zoho contacts are going to be copied to DialMyCalls from here on out – until you switch this Zap back off, of course.
And that’s it!
DialMyCalls + Zoho Integration Conclusion
Here’s a quick recap of everything we did:
- Created a new Zap
- Chose Zoho as our Trigger app
- Set our Zap to run every time we get a new contact on Zoho
- Connected our Zoho account
- Set DialMyCalls as our Action app
- Told our Zap to create a new contact for our Action
- Copied the information from our new Zoho contact to a new DialMyCalls contact
Now that you’ve created this DialMyCalls + Zoho Zap, you’ll have copies of all of your Zoho contacts created automatically. This means that you’ll still have access to these contacts if you delete them in Zoho or completely delete your Zoho account altogether. It also gives you the ability to use DialMyCalls’ mass texting capabilities, which you can use to message your Zoho contacts quickly and easily.
This Zoho Integration only a sample of what can be accomplished through Zapier. Don’t hesitate to explore what else the service has to offer, and get creative with your automations!