Intercom Integration

Send SMS Text Messages & Automated Phone Calls To Your Intercom Contacts
In this article, we’re going to show you how to combine Intercom and DialMyCalls using Zapier. Zapier is a platform that makes automating different services super easy, saving you time and resources in the long run.
The example we’re going to use in this article involves adding Intercom users that have converted to leads as contacts on DialMyCalls, and then we’re going to send them a welcome message using DialMyCalls. This allows you to manage your contacts better with less work, while also engaging with new Intercom users right off the bat.
Intercom + DialMyCalls Integration (Video)
What You’ll Need:
- An Intercom Account
- A DialMyCalls account
- A Premium Zapier Account
Step 1: Create Your Zap
The first step is the simplest: Create your Zap! A “Zap” is just Zapier’s word for an automation. In our case, we want to create a Zap that connects Intercom to DialMyCalls. To start, log in to Zapier and go to your Dashboard:
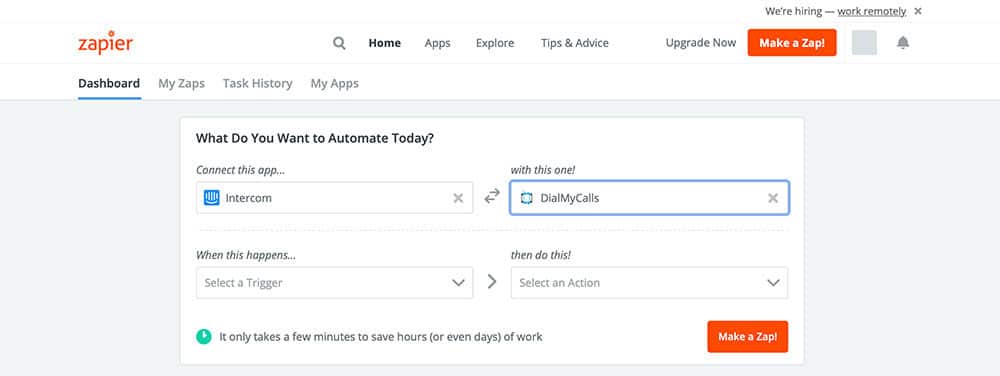
At the top of the screen, you’ll see a box that says What Do You Want To Automate Today? This is where you’ll initiate your Zap. Like in the screenshot above, enter “Intercom,” in the Connect this app… field and “DialMyCalls,” in the with this one! field. Once you’ve done this, select Make a Zap! In the lower right corner.
This will take you to the Zap editor, which is where we’ll start building our Zap!
Step 2: Creating Your Intercom Trigger
As the name implies, your Intercom “trigger” is what’s going to tell your Zap when to run. Every time your trigger occurs, your Zap will do its thing. In our case, we want to run our Zap every time one of our Intercom leads converts to a user. Optionally, you could also set this up to work anytime you get a new user in Intercom, regardless of whether or not they were a lead previously.
After clicking Make a Zap! you’ll find yourself at the following screen:
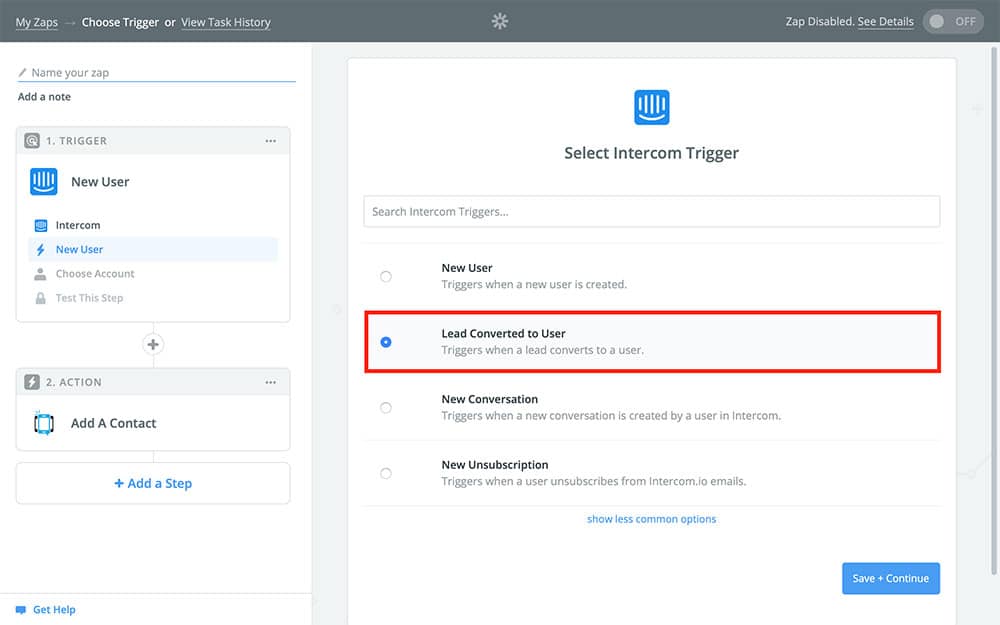
As we mentioned, we’re going to pick Lead Converted to User and then Continue. The next screen will ask you to connect your Intercom account. If you’ve used Intercom with Zapier before, you should see it listed as an option like below:
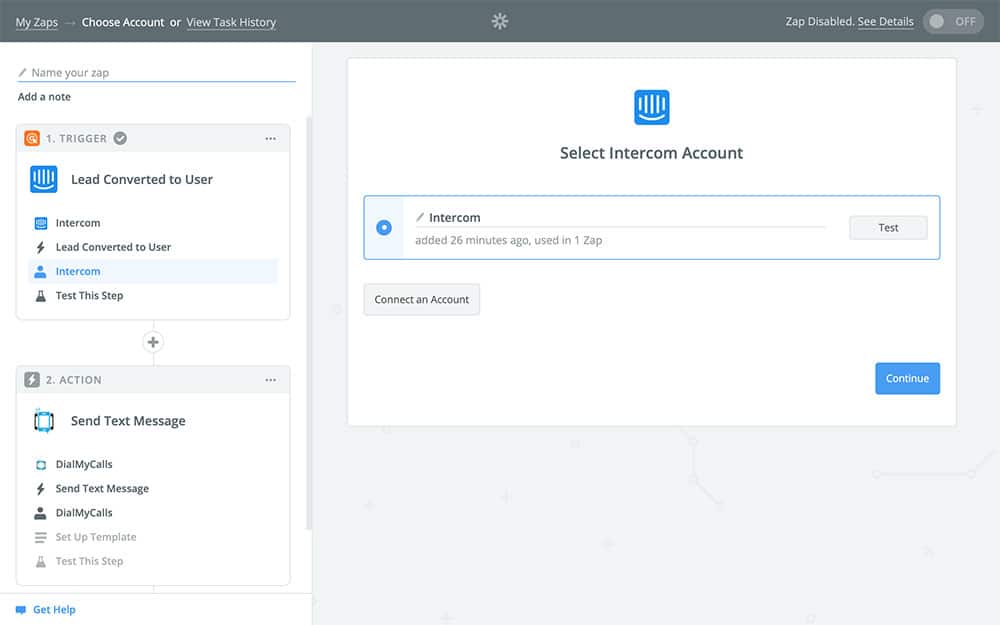
If you haven’t used Intercom on Zapier before, then you’ll need to go through the steps to connect it. Once you have it selected, Continue.
Next, Zapier is going to ask you to choose a sample. The “sample” is an existing or randomly generated user from Intercom that we’re going to use to set up how our Zap works. The sample won’t actually be used in the Zap, it’s essentially just a placeholder. You can choose to use an existing user from Intercom or let Zap make a fake one like below:
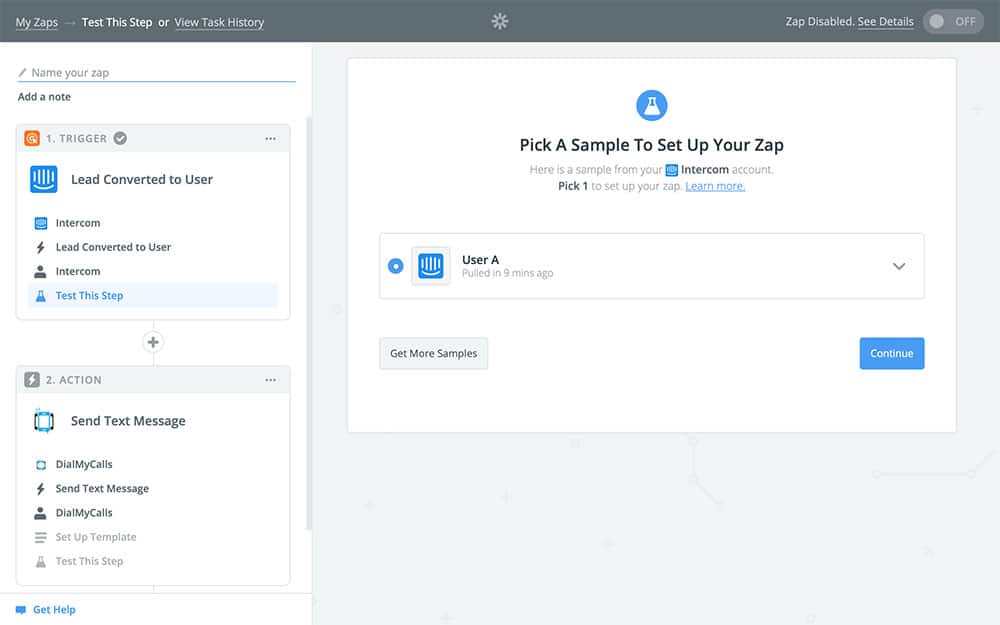
Once you have your sample, you can Continue to the next step: creating our first action!
Step 3: Add New Intercom User As A DialMyCalls Contact
Now that we established when our Zap is going to run, we’re going to decide what the Zap actually does once it’s running. This is where things start to get interesting!
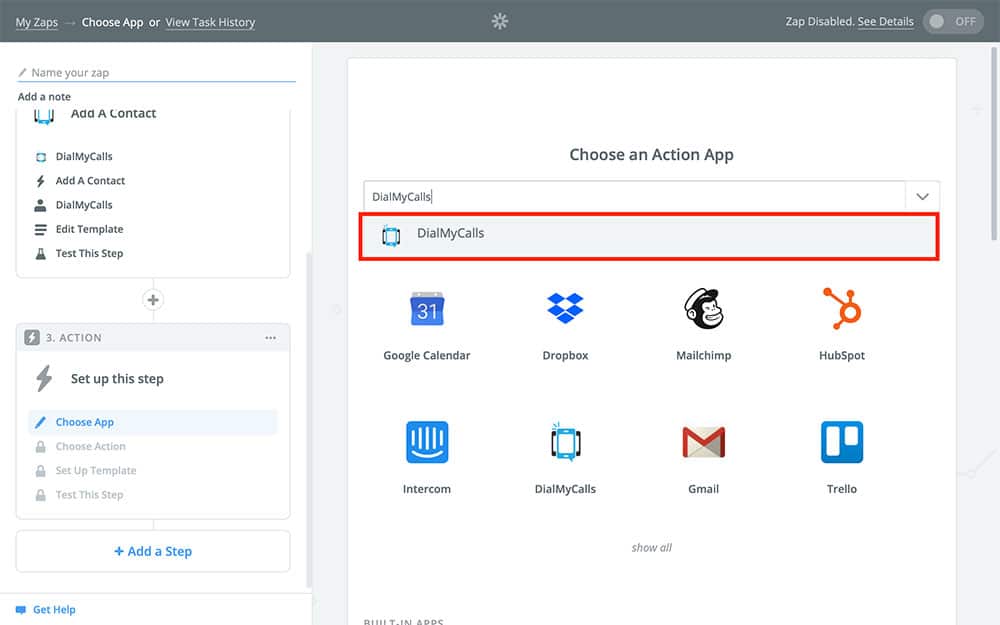
After finishing the last step of creating your trigger, you should be looking at the following screen:
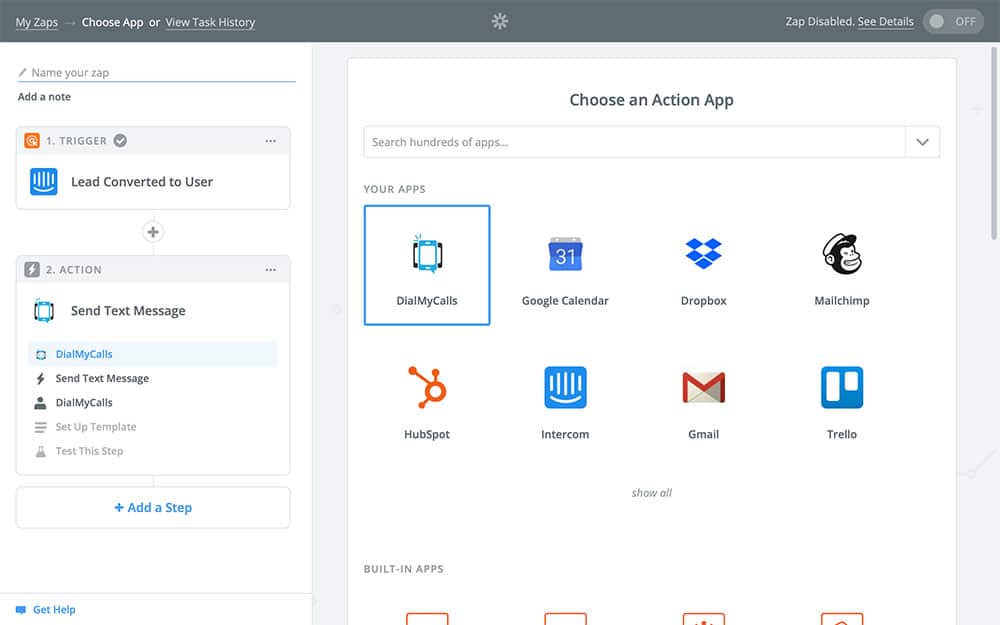
Since we chose to connect to Intercom to DialMyCalls in the very beginning you should see it already selected. In case you don’t, though, you can type it in the search field at the top and select it that way. Once you have it selected, Continue.
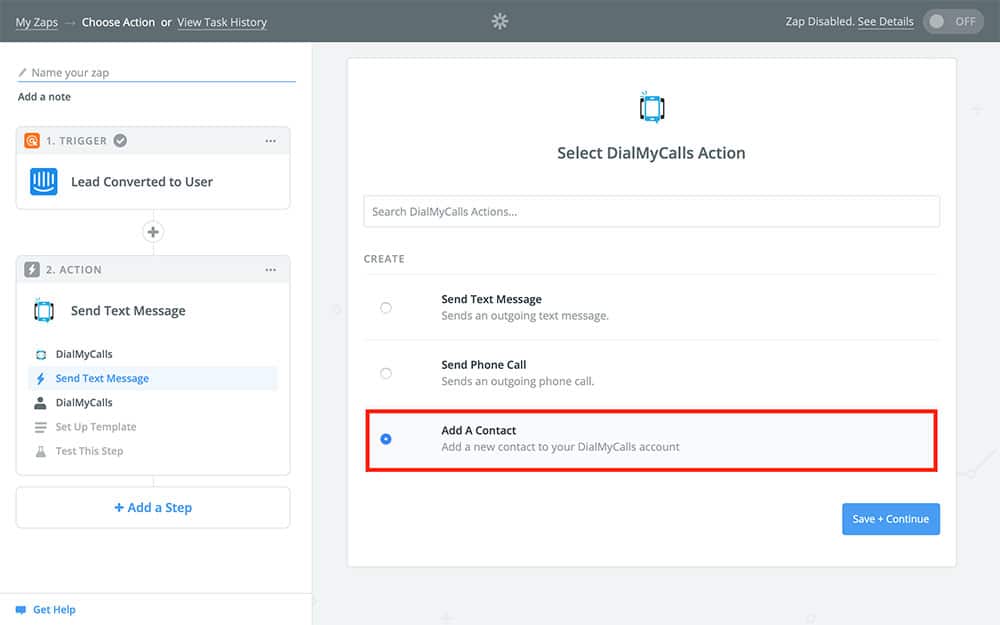
The next screen is where we’re going to choose what DialMyCalls actually does. The first thing we’re going to do is add the new Intercom user as a contact in DialMyCalls. So, choose Add A Contact like so:
On the next screen, you’re going to connect your DialMyCalls account to Zapier. Like before, if you’ve already done this you’ll see your account listed as an option; otherwise, you’ll need to connect it now. Once you have your account selected, Continue.
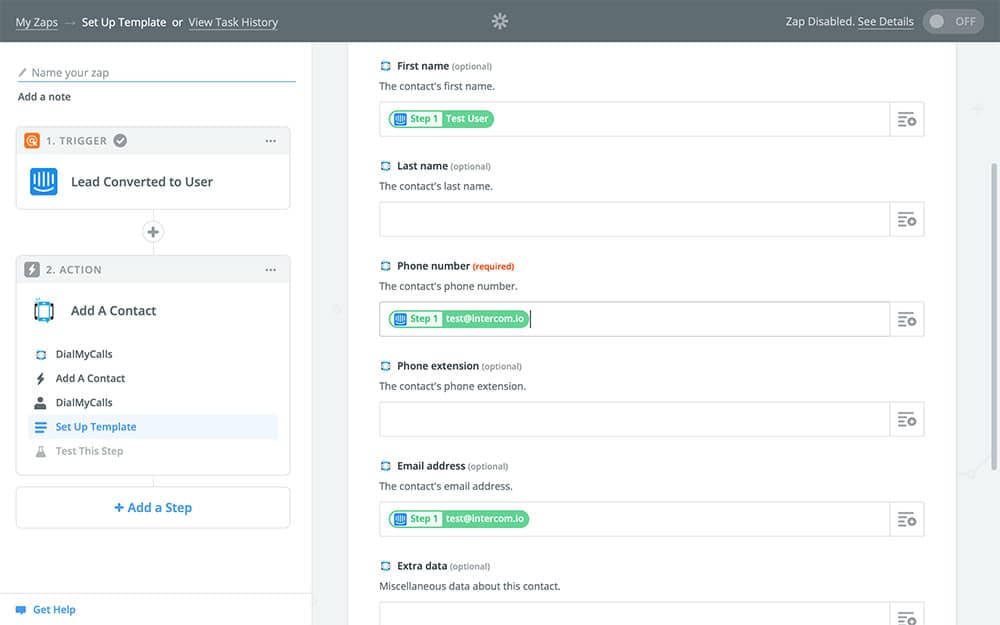
The next screen is the template:
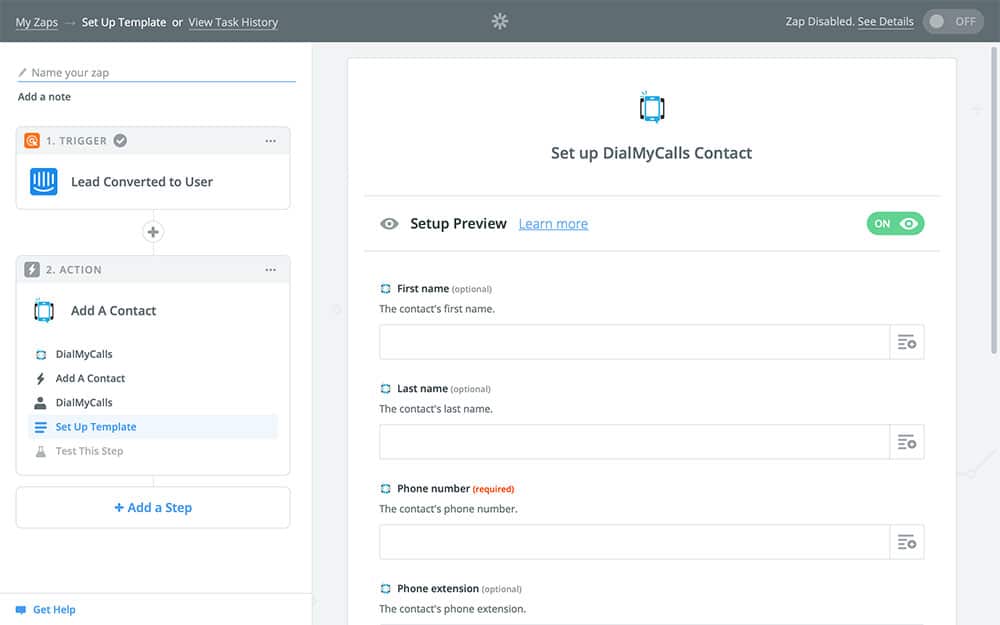
Most actions in Zapier will have a template that you need to fill out. The template is where you’ll decide exactly how your Zap is going to work. In this case, all of the blank fields that you see are what’s going to make up your new DialMyCalls contact. As you’ll notice, the only required field is the Phone number. You could choose to only fill this field in if you want, but there are a few others that you can fill in using the information from Intercom.
The way you fill in these fields is through variables. If you click the dropdown menu to the right of the First name field, you’ll see something similar to the following:
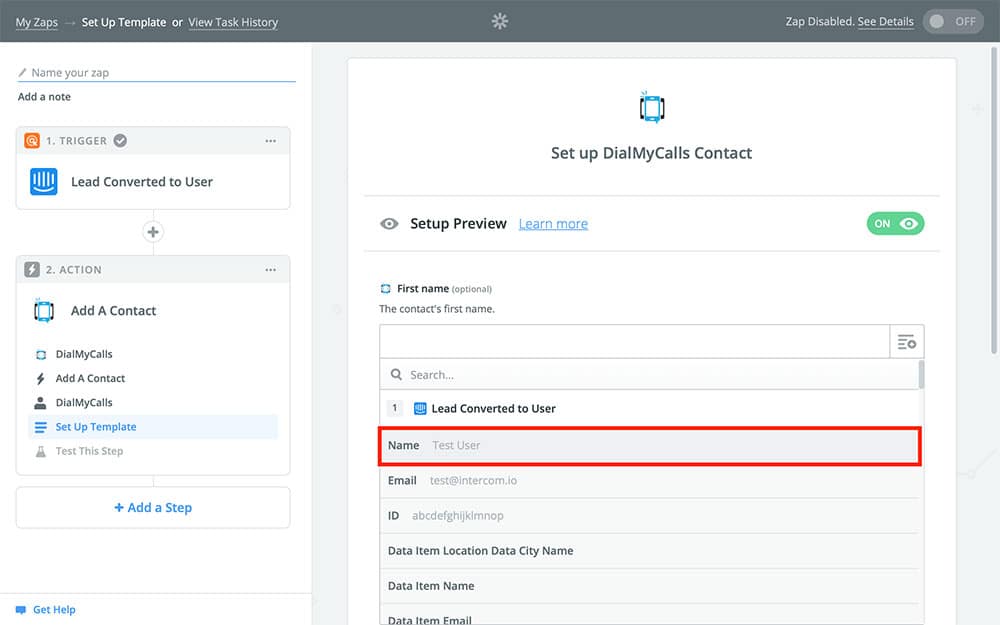
As you can see, Zapier is pulling information from the first step and using it to fill in these blanks. This means that when you select Name from the dropdown menu, the new user’s name is what will be filled in when your Zap actually runs. For now, though, you’ll only see our sample – which is why we created it to begin with.
Using the dropdown menu, you can fill in as many of these sections as you like. You can also fill them in by typing in them, but keep in mind that these won’t change. For example, if you type in “John,” for the First name field, all of your contacts add through this Zap will be called “John”.
You’ll notice, though, that when you go to the dropdown menu for Phone number that there isn’t actually a phone number option in the menu. This is because we only get the email from the new intercom user. Fortunately, you can send SMS messages to a person’s email address just like you would their phone number! So for this field, choose Email from the dropdown menu. Once you have all of the fields filled in, it should look something like this:
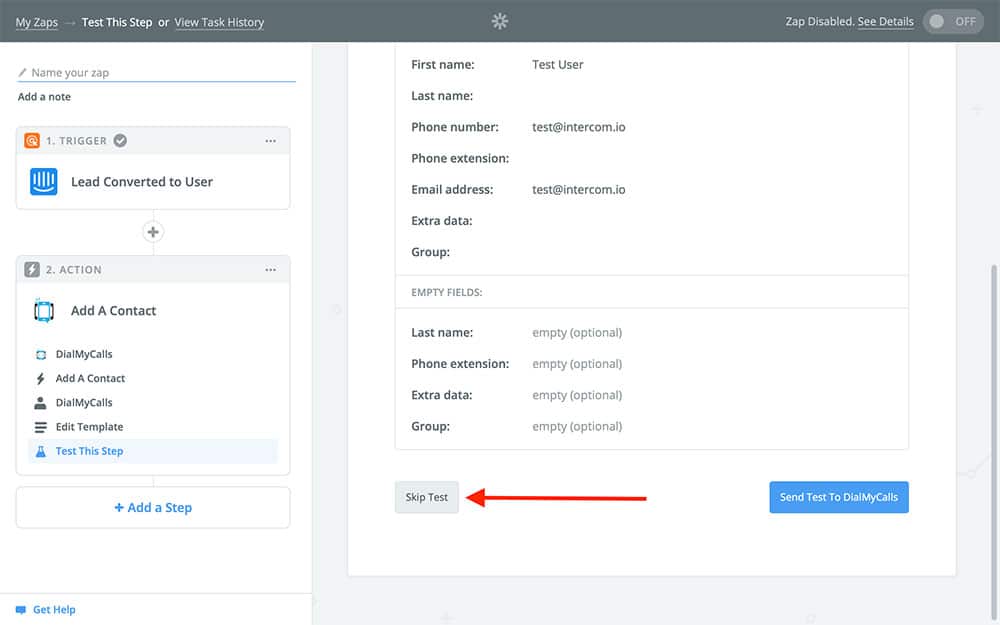
Once you’re finished, you can Continue to the next step, which is testing the Zap so far. If you’d like, you can run a test of your Zap to make sure that everything is working as it should. What this will do is create a new contact on DialMyCalls using the sample you chose while setting up your trigger. Testing the Zap is completely optional, though, so feel free to skip it:
Zapier will now ask you to name your Zap and turn it on. But wait! There’s more!
Step 4: Send A Welcome Email To Your New Intercom User
Remember that we not only want to add our new Intercom user as a DialMyCalls contact but also send them a welcome message confirming their sign-up. If you want, you can end the Zap here, but for our purposes we’re going to keep moving forward. Keep in mind that to create a Zap with three or more steps you’ll need a Premium Zapier account. If you don’t have one and would prefer to stay on the free version of Zapier, you can always split this into two Zaps by ending this Zap here and creating another with the same Lead Converted to User trigger.
Now, back to the next step! You should be looking at the following screen:
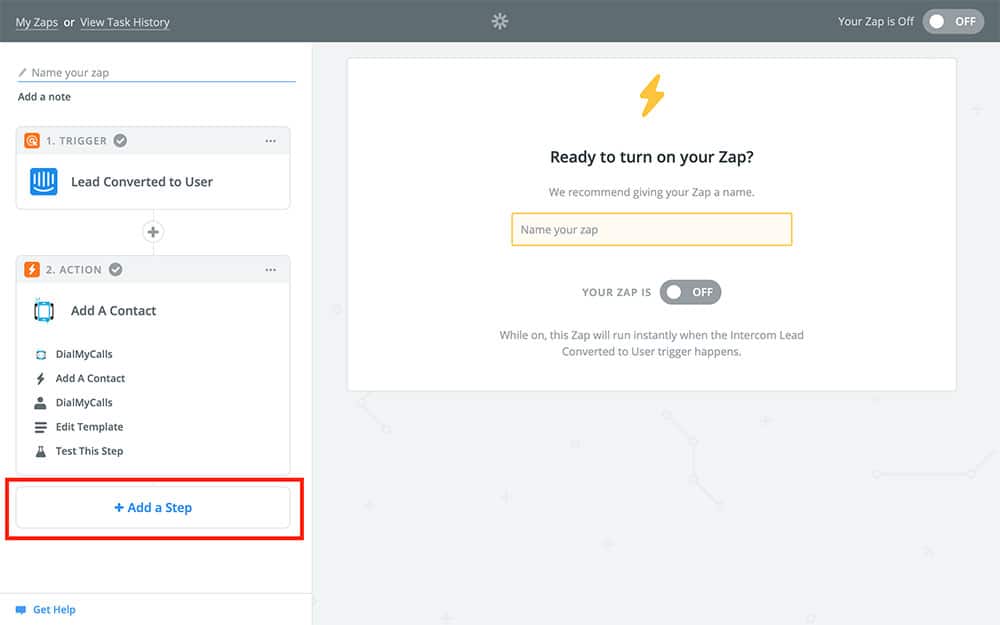
Instead of turning the Zap on, you’re going to select Add a Step in the lower left, as indicated by the red box in the screenshot above. After clicking that, you’re going to select Action/Search from the available options:
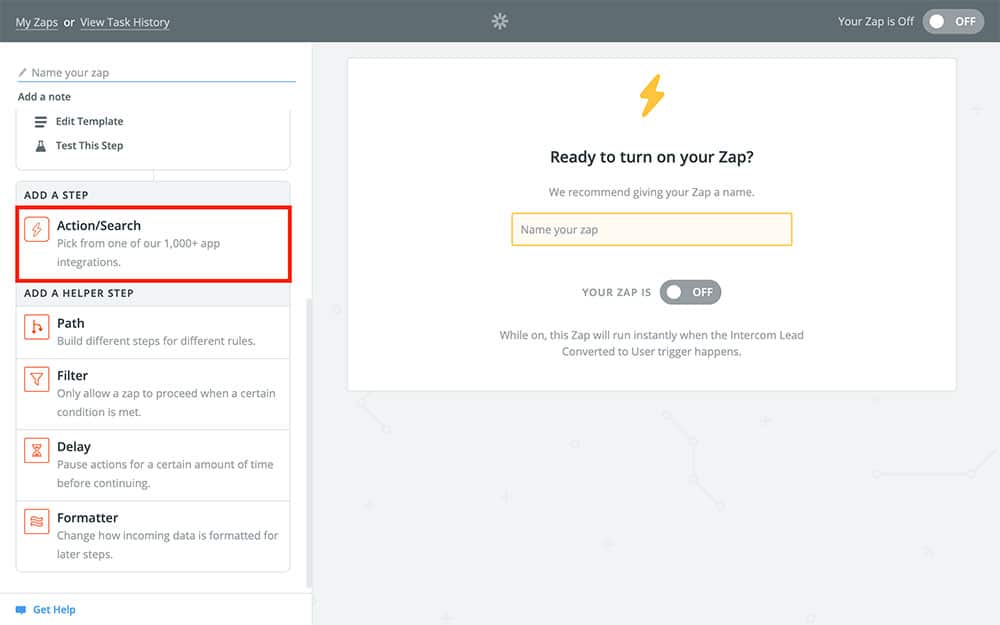
This will bring you to another app selection screen. Unlike before, though, you probably won’t see DialMyCalls listed as an option. Not to worry though! Just type “DialMyCalls” in the search bar and select it once it appears:
After selecting it and clicking Continue, you’re going to choose Send Text Message for our second action:
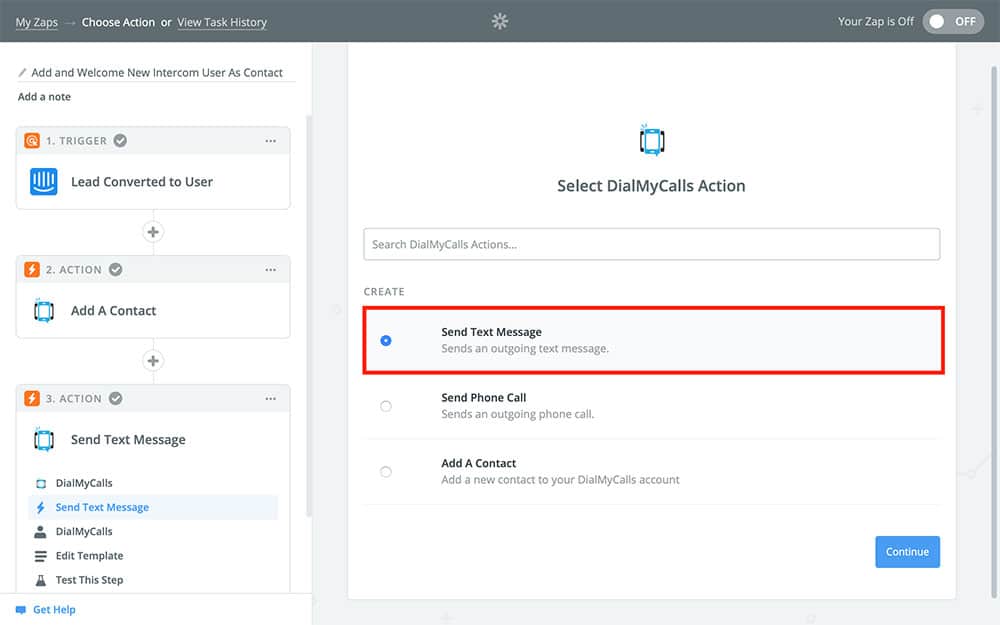
“But wait,” you say to yourself, “I thought we were going send the new user a welcome email, not a welcome text.” You are very astute! Remember how we mentioned that you can send SMS text messages to email addresses? Well, that’s exactly what we’re going to do! So after selecting Send Text Message, you can Continue to the next step.
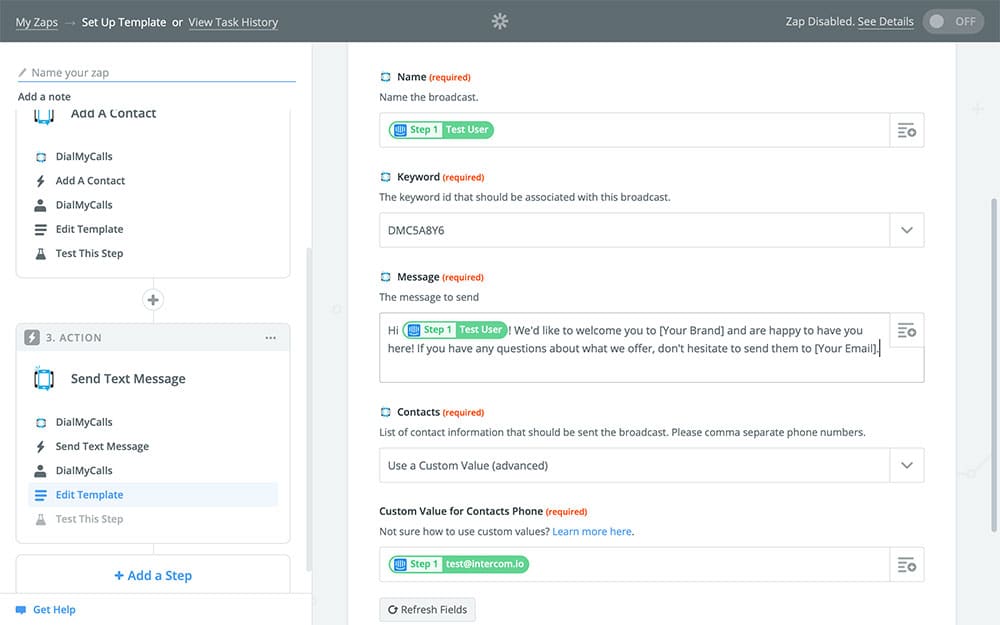
You’ll now be faced with this action’s template, which is where you’re going to decide where your message/email is going and how it’s going to look. As you would expect, you’ll fill in the Name field with the Name option from our Intercom trigger, just like before. The Keyword will be unique to your DialMyCalls account. If you have a paid DialMyCalls account, you can use a custom Keyword, otherwise you’ll have a default one assigned to you. Your Keyword is what tells your recipients who the message is coming from, so being able to customize it is a big plus!
Now you get to fill in the Message field. While we haven’t needed to yet, you can actually combine normal text with Zapier variables, allowing you to create custom messages. Feel free to get creative when filling this field out, and remember that whatever you type is what your new user is going to see.
The tricky field in this section is Contacts. You’ll notice that when you select it, you only see your DialMyCalls contacts available as options. This won’t work, though, since the message you’re sending is intended for the new contact that triggered this Zap in the first place – they aren’t in your DialMyCalls contacts yet!
Fortunately, Zapier has an option for just such occurrences: Custom Values.
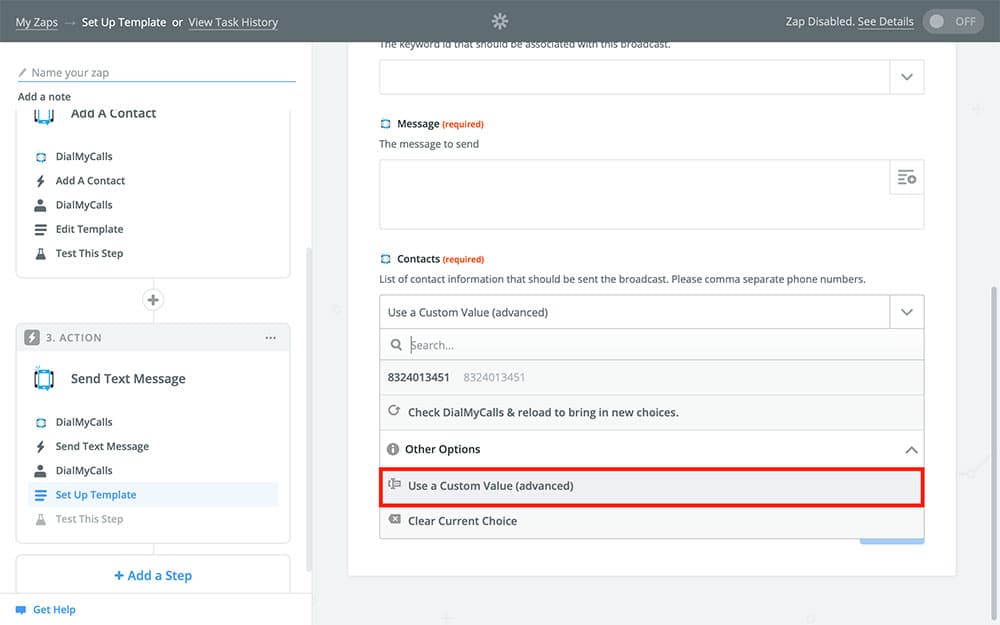
Selecting Use A Custom Value will allow you to use options that you normally wouldn’t be able to. After you select it, you’ll have a new field appear below it called Custom Value For Contacts Phone:
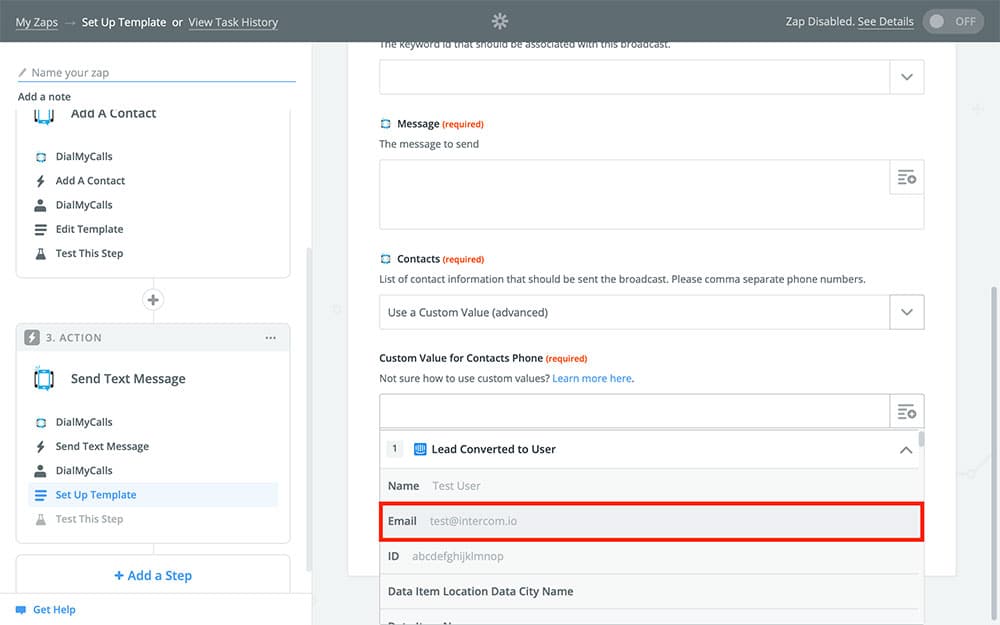
Now you should see Email available as an option. Go ahead and select it! Your finished template will look something like this:
Once you’re happy with it, you can Continue to the last step. All that’s left to do is name your Zap and turn it on:
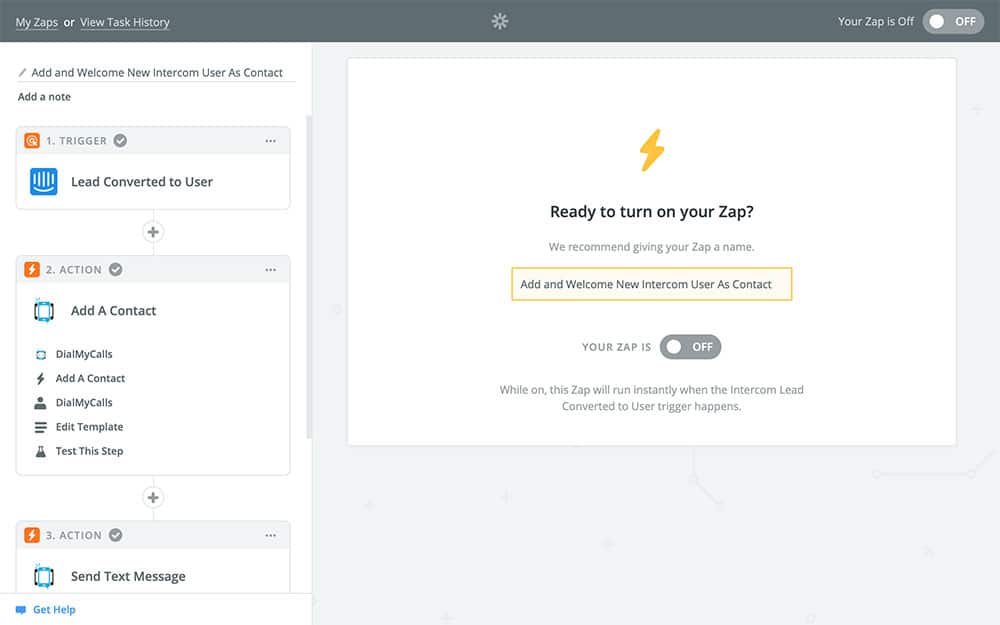
Keep in mind that once you turn it on, any new Intercom leads that convert to users will be added as DialMyCalls contacts and greeted with your welcome email and SMS Text Message until you turn this Zap off.
DialMyCalls + Intercom Integration Conclusion
Here’s a quick recap of everything we did:
- Created a Zap that connects Intercom to DialMyCalls
- Set our Zap to trigger anytime an Intercom lead converts to a user
- Copied that new user to DialMyCalls as a contact
- Sent the new user a welcome email via SMS text message using DialMyCalls
And that’s that! Remember that this is only one way to combine these two services using Zapier.
There are tons of ways in addition to this Intercom Integration to use DialMyCalls and Zapier, so don’t hesitate to explore the possibilities on your own!