Shopify Integration

Automatically Send Your Shopify Customers Exclusive Deals With DialMyCalls And Zapier
In this article, we’re going to show you how to combine Shopify and DialMyCalls through Zapier. Zapier is a platform that makes automating different services super easy, saving you time and resources in the long run.
The example we’re going to use in this article involves automatically adding your new Shopify customers to DialMyCalls as contacts. This way, you’ll be able to send your customers exclusive deals via SMS text message by using DialMyCalls, announce new products, and use SMS to improve your customer retention.
Shopify + DialMyCalls Integration (Video)
What You’ll Need:
- A premium Zapier account
- A Shopify account
- A DialMyCalls account
Step 1: Create Your Zap
The first step to getting your new Zap off the ground is creating it! To do this, login to Zapier and head over to your Dashboard:
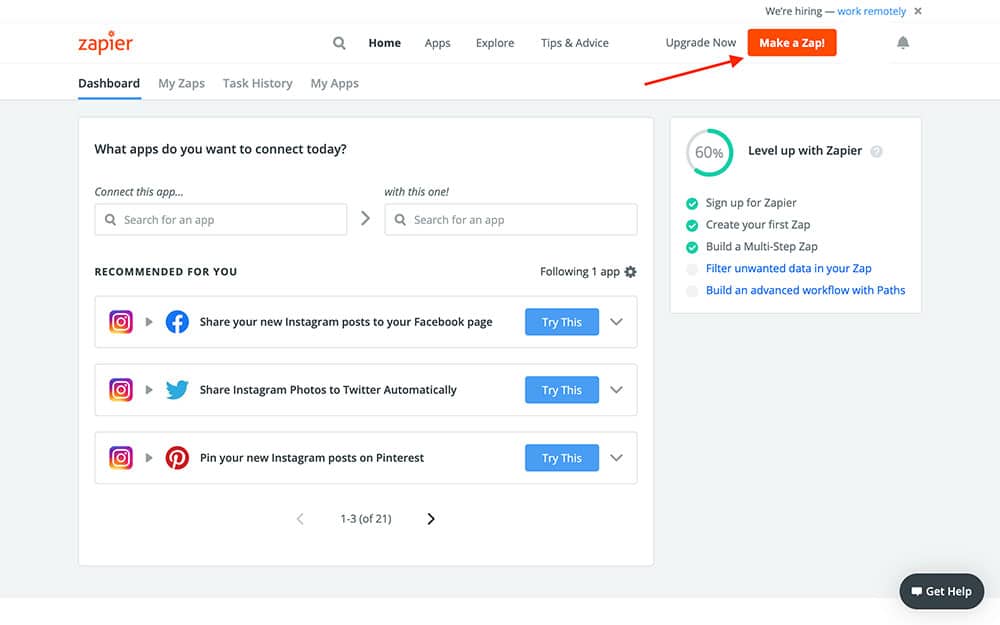
In the top right corner, you’ll see a bright orange button labeled Make a Zap! Press this button, which will take you to the Zap creation page.
Step 2: Create Your Shopify Trigger
You should now be looking at the following screen:
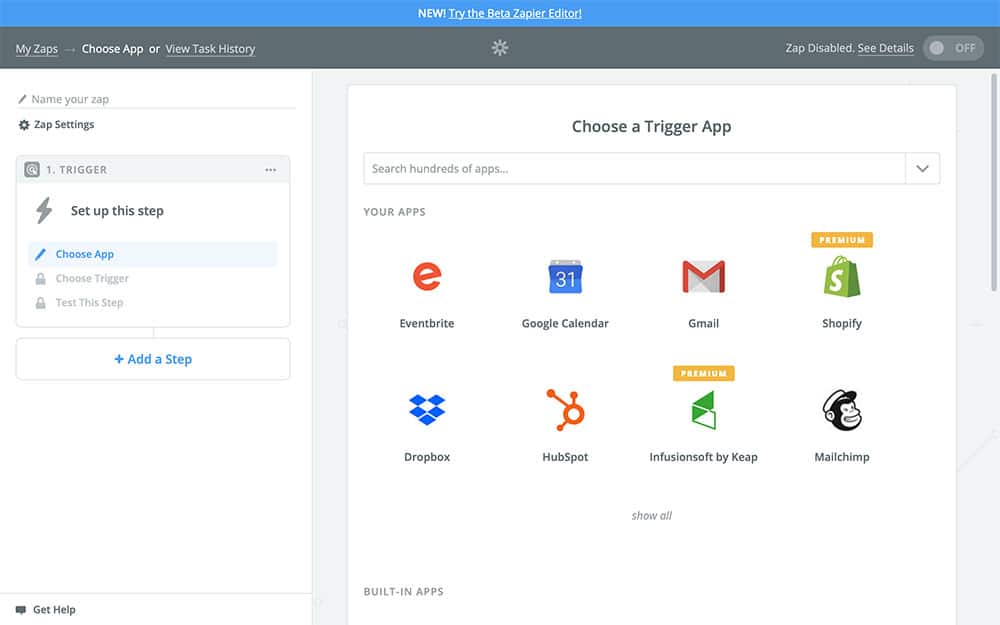
In the Search field, type “Shopify”, and select it when it appears:
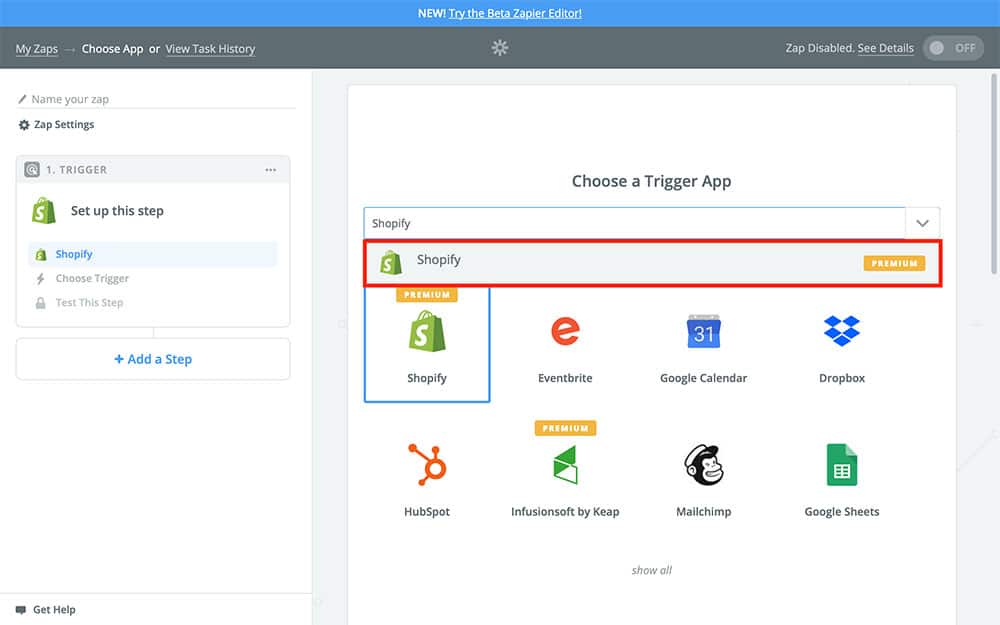
Once you’ve done that, choose Continue in the bottom right corner.
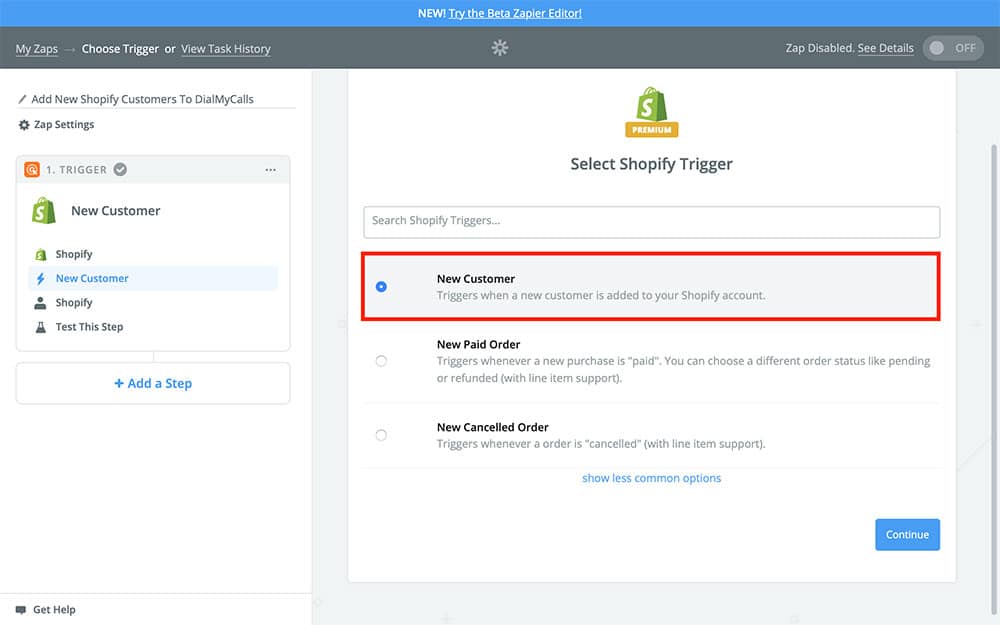
Next, you’re going to choose your Zap’s Trigger. Your Trigger is what tells your Zap when to run – every time your Trigger event occurs, this Zap will do what we program it to do. In our case, we want this Zap to run every time we get a new Shopify customer. So, choose this option and Continue:
After that, Zapier is going to ask you to connect your Shopify account:
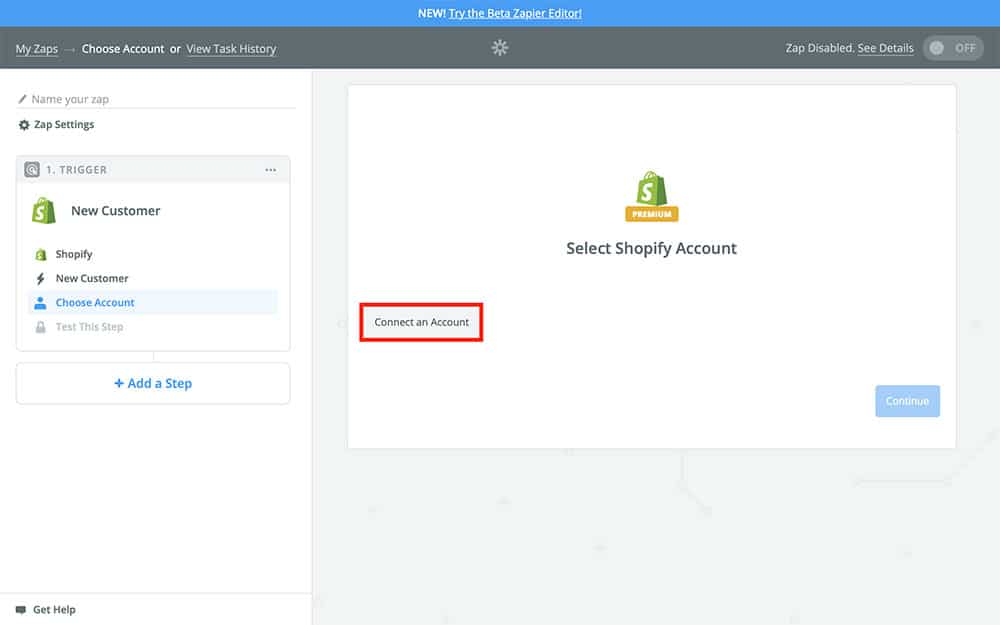
If you’ve already done this, you should see your Shopify account already available as an option. If so, select it and Continue to the next step. Otherwise, click the Connect an Account button. This will bring you to the following page:
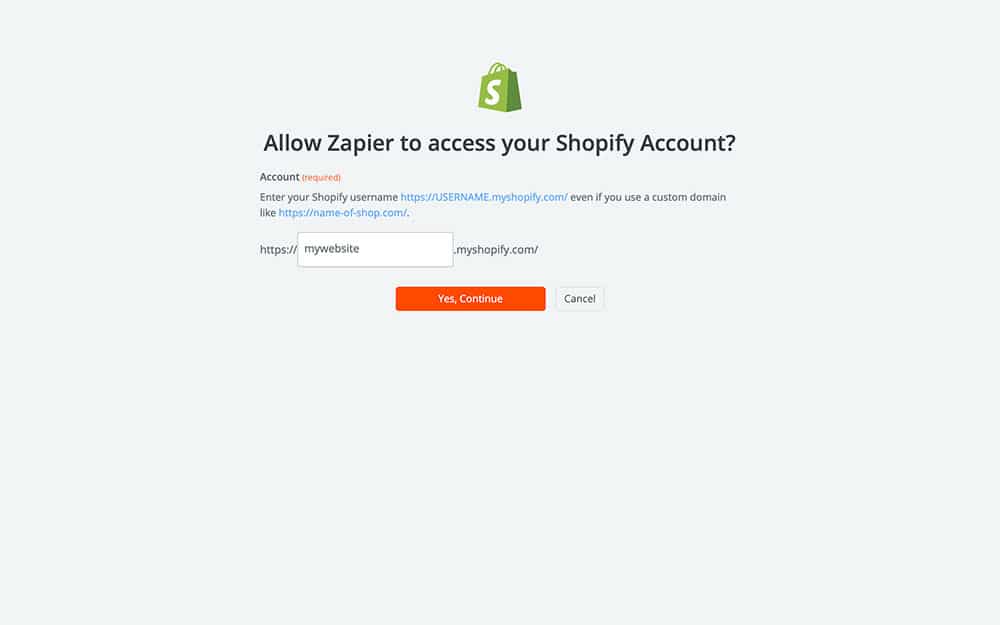
In the blank field, fill in the name of your online store. After that, press Yes, Continue. That will take you here:
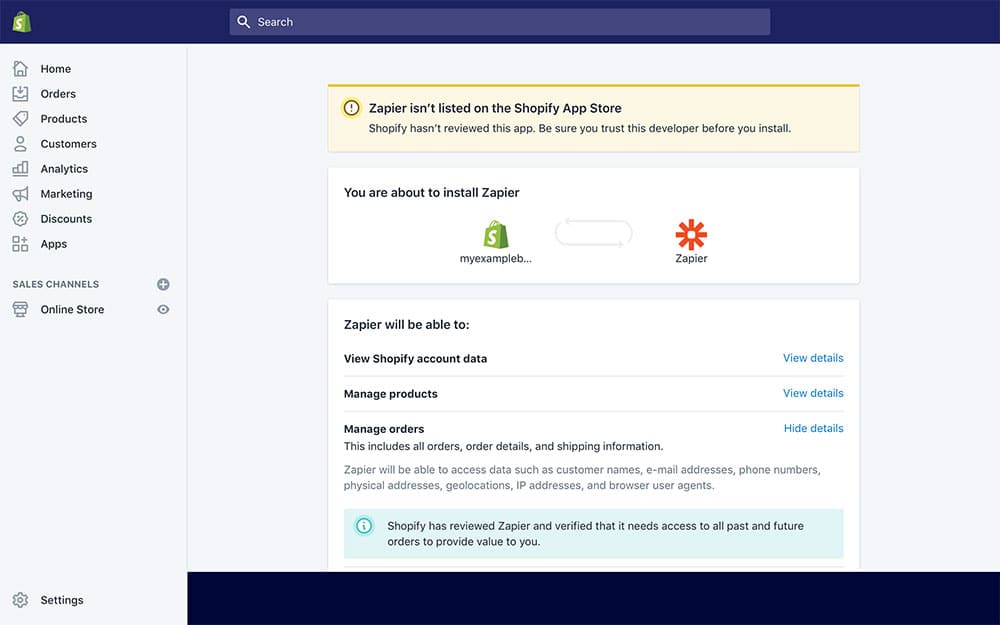
This page is where you’ll confirm that you want to give Zapier access to your Shopify account. In order for the two services to work with another, you’ll need to give Zapier this access. Scroll down to the bottom of the page and choose Install unlisted app:

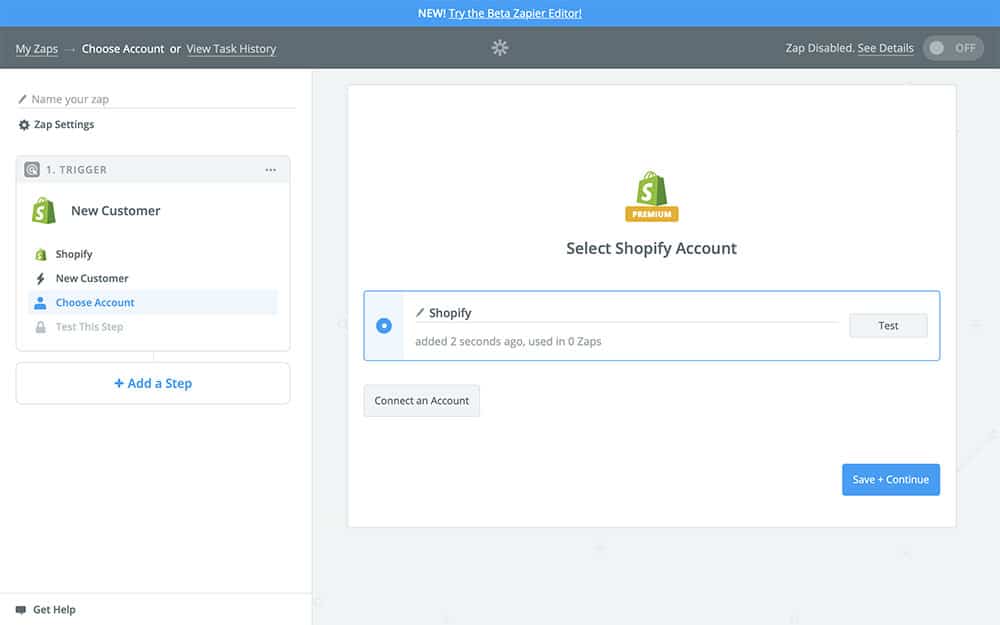
After that, you should be redirected back to Zapier. This time, however, you’ll see your Shopify account available as an option. Make sure it’s selected and choose Continue:
Next, Zapier will try to pull a Sample customer from your Shopify account. This Sample is what Zapier will use to fill in the rest of the Zap. You can use a Sample customer from your Shopify account, or choose to Skip This Step and use a random Sample created by Zapier, which we recommend:
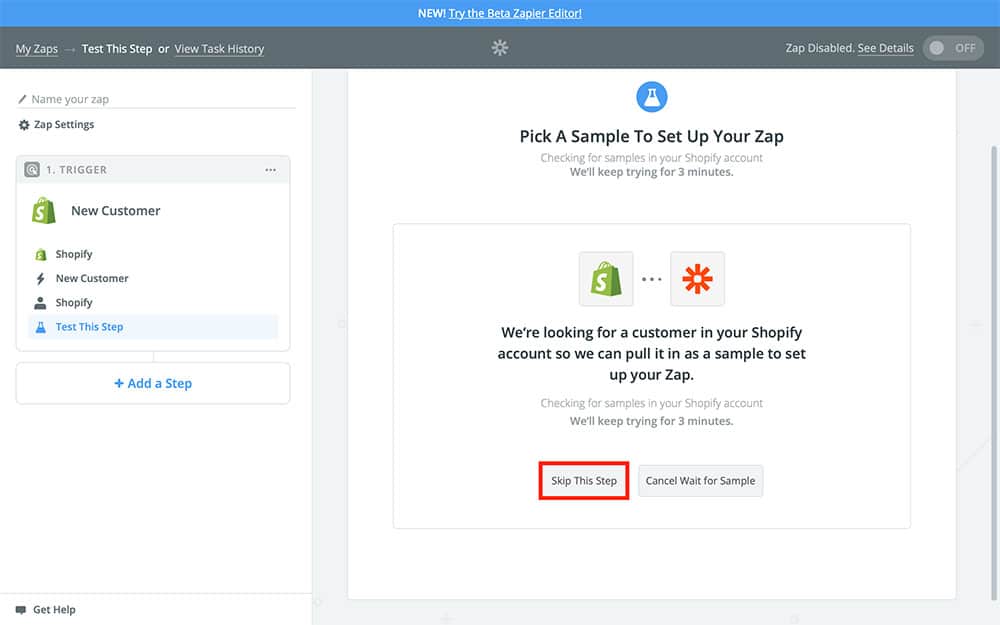
The reason using a random Sample is recommended is so that you don’t accidentally create a Contact in your DialMyCalls contacts or send a message to customer without meaning to. But the choice is up to you!
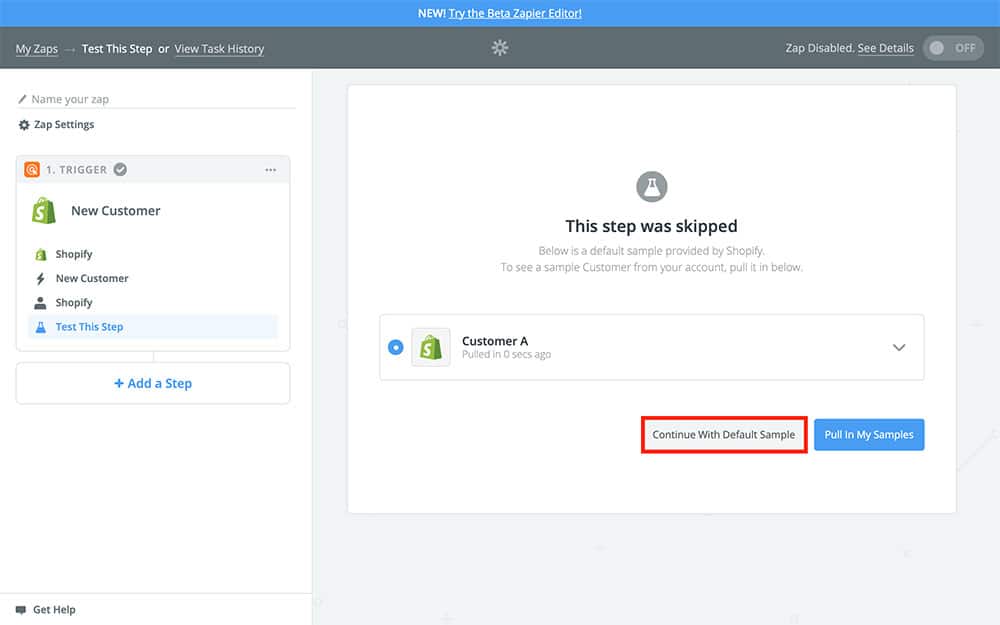
After you’ve selected your Sample, you should see the following:
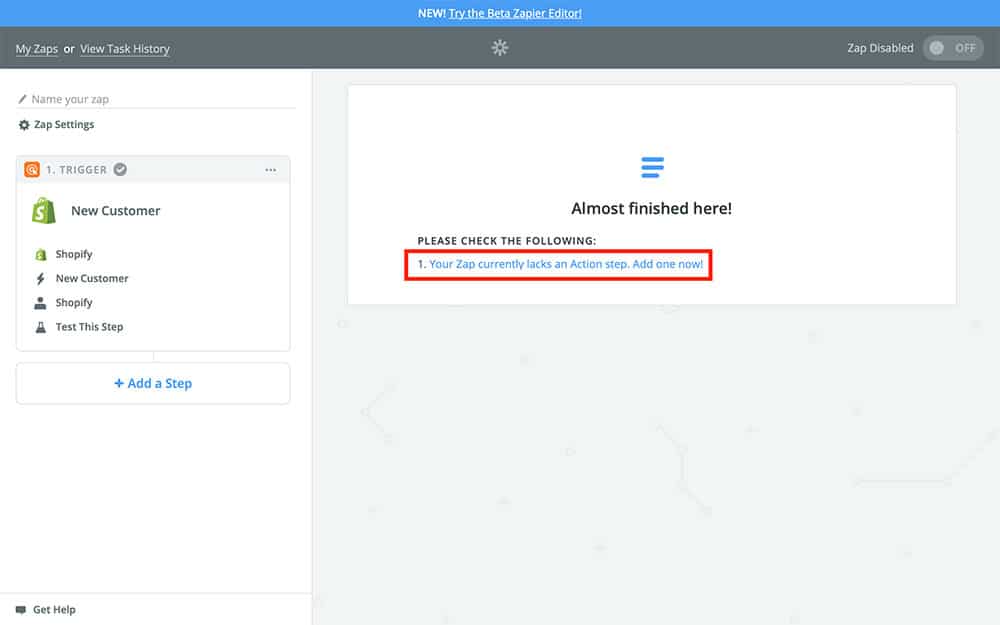
As indicated, click the blue text to add an Action step – which will bring us to the next part of this tutorial!
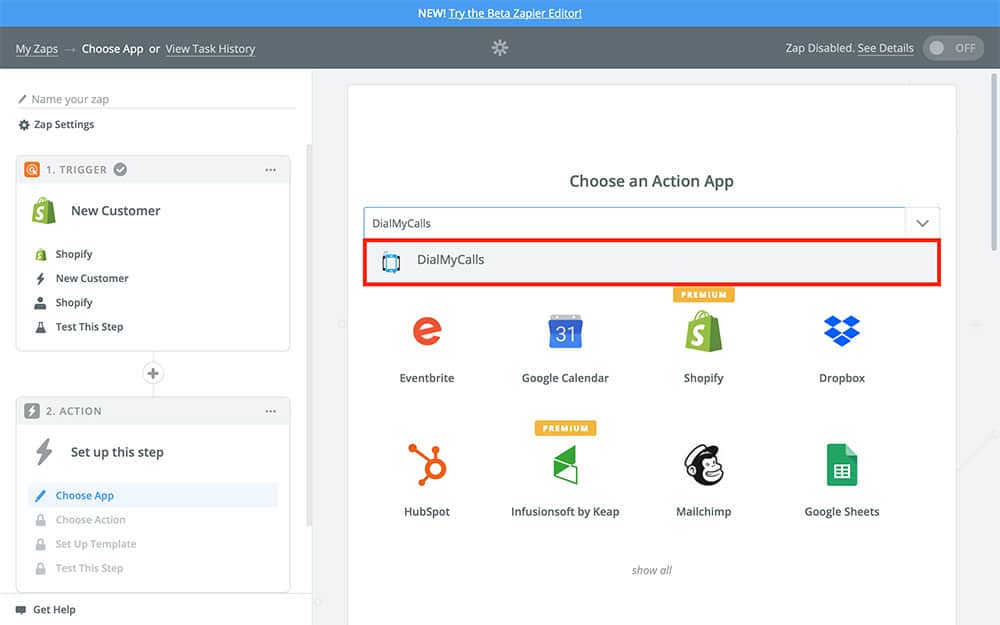
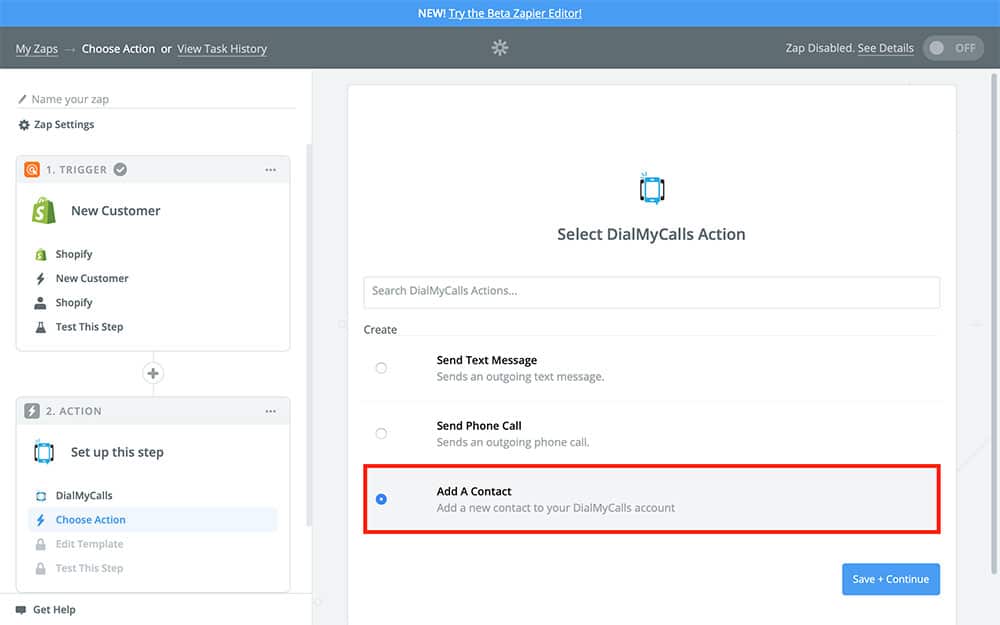
Step 3: Create Your DialMyCalls Action
Now it’s time to create our DialMyCalls Action. This is what the Zap is actually going to do once it runs. First, you’ll need to choose DialMyCalls as your Action app, just like we did for Shopify in the beginning:
Next, we’re going to choose our Action. In our case, we want this Zap to Add a Contact every time we get a new Shopify customer:
Next, Zapier is going to ask you to connect your DialMyCalls account. If you’ve already done this, you should see your account already listed, like so:
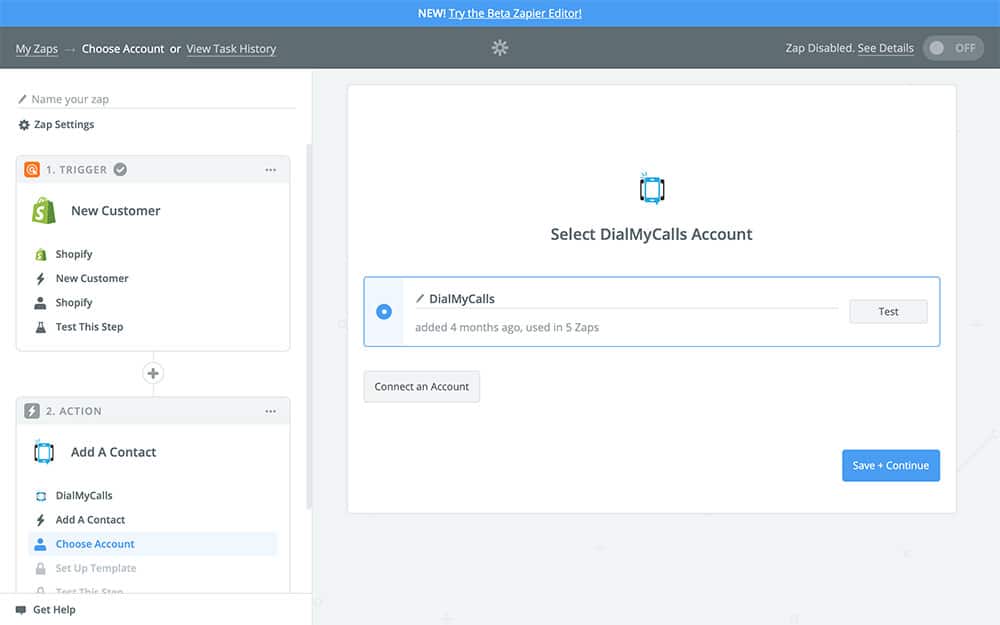
Otherwise, you’ll need to choose Connect an Account and follow the onscreen prompts.
After that, you’ll find yourself facing the Action template:
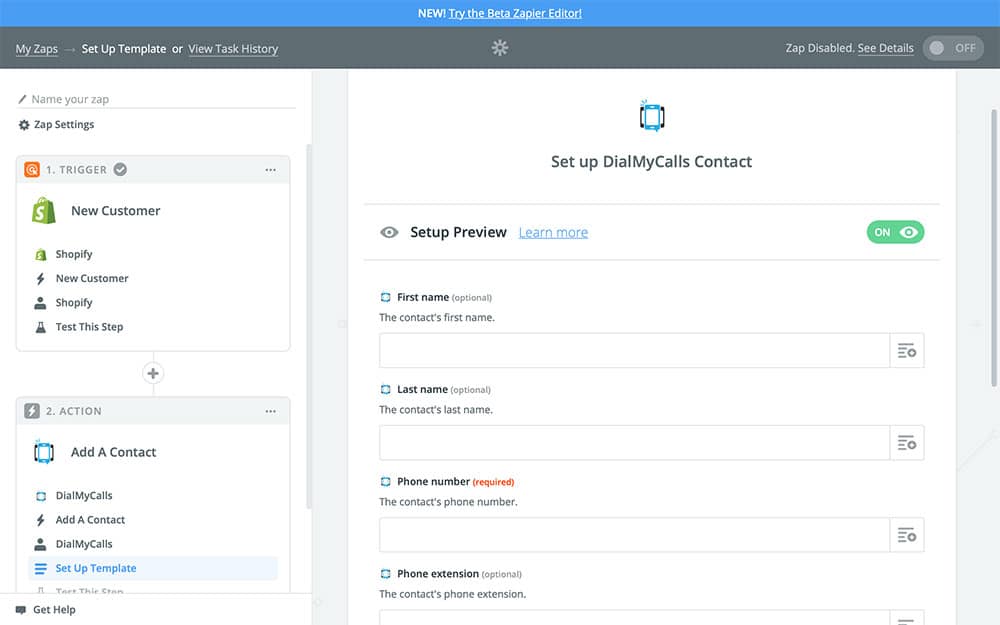
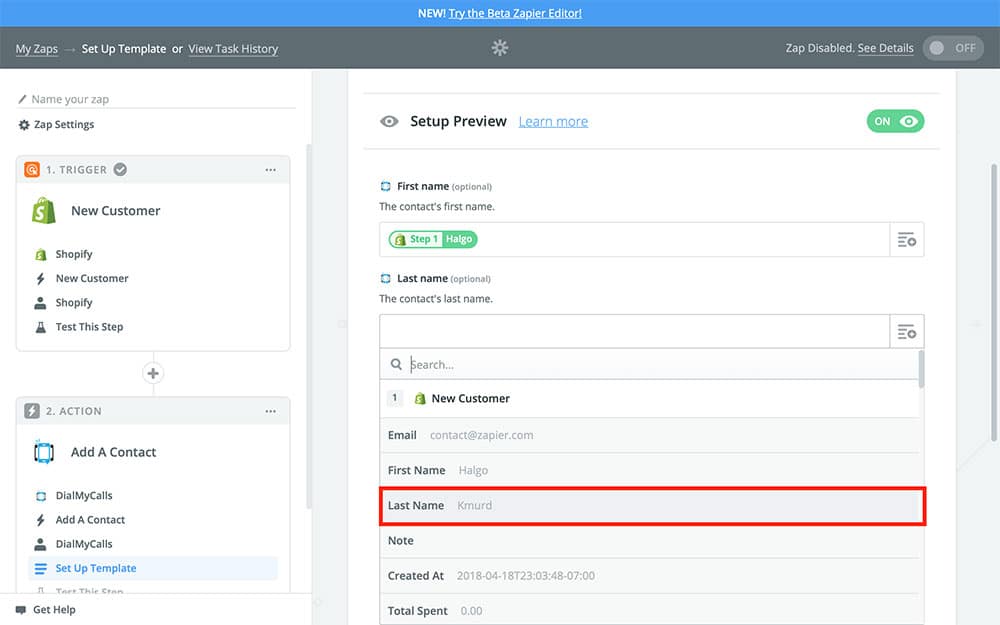
This is where we’re going to specify exactly how our Action works. Each field that you fill in will be used to create the information for the DialMyCalls contact that Zapier is going to create. You only have to fill in the required fields, but filling in as many as you can is the most beneficial.
To fill in a field, choose the dropdown button to the right of the field and select the corresponding Shopify data. Like so:
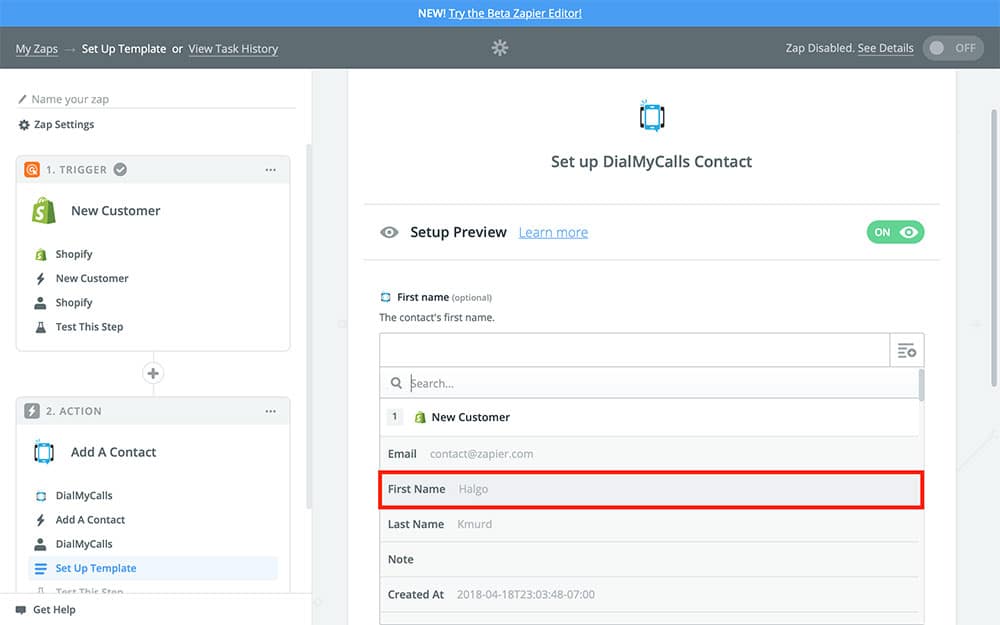
Do this for the Last name field as well:
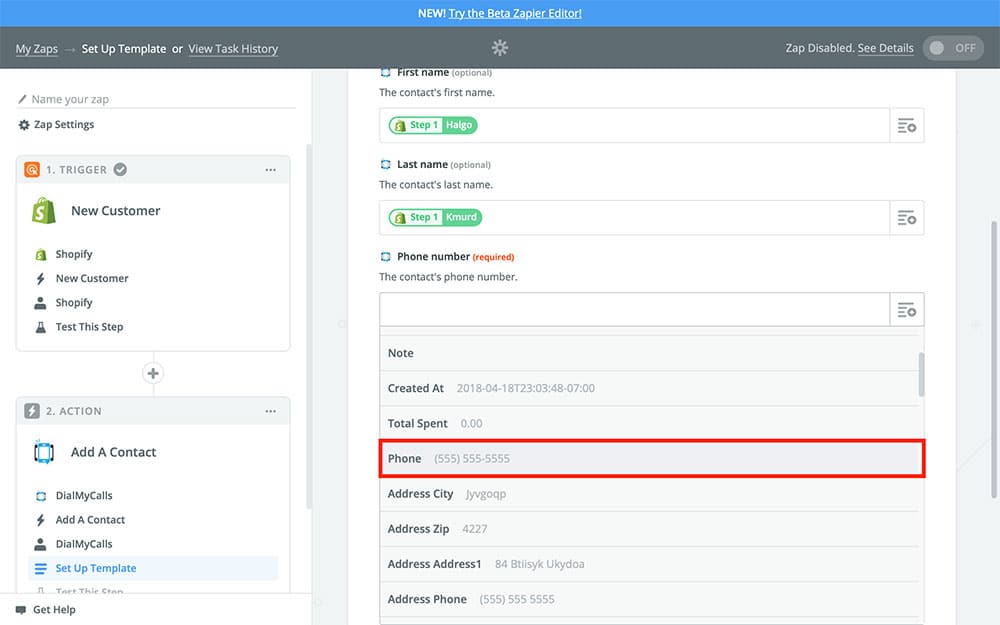
And the customer’s Phone number:
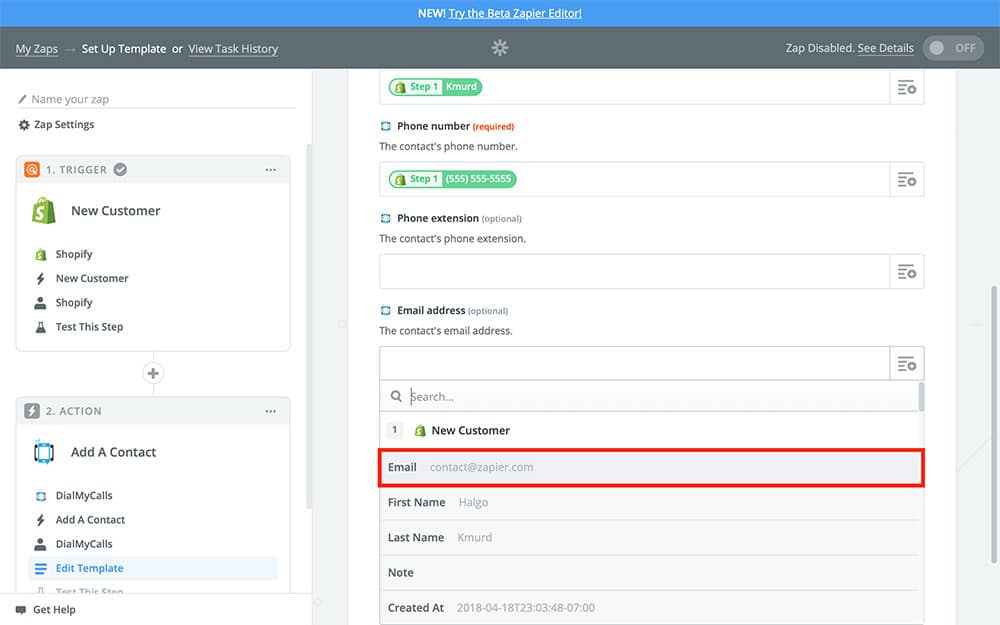
And finally the Email field:
Once you’re happy with your template, you’re ready to Continue to the next step!
On the next page, Zapier will ask you if you want to test your Zap:
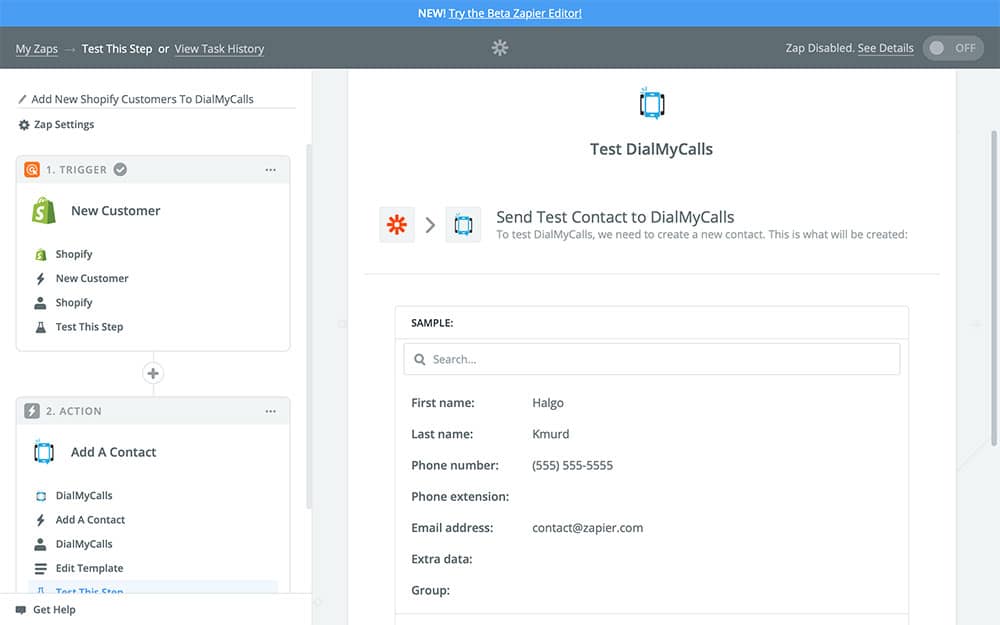
You can do this if you like, just keep in mind that it will add the Sample customer to your DialMyCalls contacts, so you may want to delete it after testing it. Otherwise, choose Skip This Step.
And that’s it! All that’s left to do is give your Zap a name and turn it on:
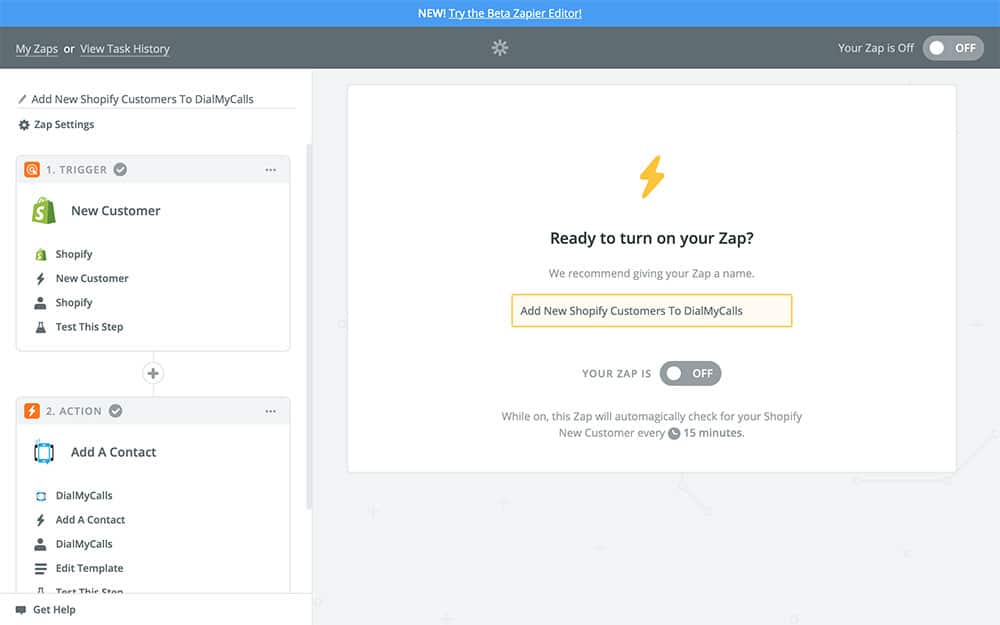
Just keep in mind that once you flip that switch to On your Zap is going to add all of your future Shopify customers to DialMyCalls as contacts – until you turn this Zap back off, of course.
DialMyCalls + Shopify Integration Conclusion
Here’s a quick recap of everything we did:
- Created a new Zap
- Set Shopify as our Trigger app
- Set our Zap to run every time we get a new Shopify customer
- Chose DialMyCalls for our Action app
- Copied the information from our new Shopify customers to DialMyCalls as a contact
Now that you have your newly created DialMyCalls + Shopify Zap ready to go, keeping up with your Shopify customers will be a breeze! Sending exclusive deals, promos, and announcements via SMS text message gives you a personal and immediate way to keep your customers close and connected to your business. You can even create Zapier automations that automatically send your new customers promo codes for making their first purchase! Doing all of this through DialMyCalls is a great way to improve business, as SMS marketing is proven to be far more effective than traditional email campaigns.
This Shopify Integration is only a sample of what can be accomplished through Zapier. Don’t hesitate to explore what else the service has to offer, and get creative with your automations!