Infusionsoft Integration

Welcome New Infusionsoft Subscribers Using DialMyCalls And Zapier
In this article, we’re going to show you how to combine Infusionsoft and DialMyCalls through Zapier. Zapier is a platform that makes automating different services super easy, saving you time and resources in the long run.
The example we’re going to use in this article involves welcoming your new Infusionsoft subscribers with DialMyCalls messaging platform. This allows you to make your subscription service more personal, as well as gives you a chance to let your new subscriber know what the subscription service has in store for them. It also acts as a simple and automatic confirmation of their subscription.
Infusionsoft + DialMyCalls Integration (Video)
What You’ll Need:
- Infusionsoft account
- Premium Zapier account
- DialMyCalls account
Step 1: Create Your Zap
The very first step is to create your Zap! To do this, log in to your Zapier account and go to the Dashboard. It should look something like this:

We’re going to bring our focus on to that first box, What Do You Want to Automate Today? In the first field, Connect this app…, type in “Infusionsoft” and select it when it appears. In the second field, with this app!, type in “DialMyCalls” and select it as well. Your screen should now resemble the screenshot above. Once you have that done, choose the orange Make a Zap! button in the lower right corner, indicated by the red arrow in the screenshot.
Step 2: Create Your Infusionsoft Trigger
Once you press the Make a Zap! button, Zapier will bring you to the following screen:
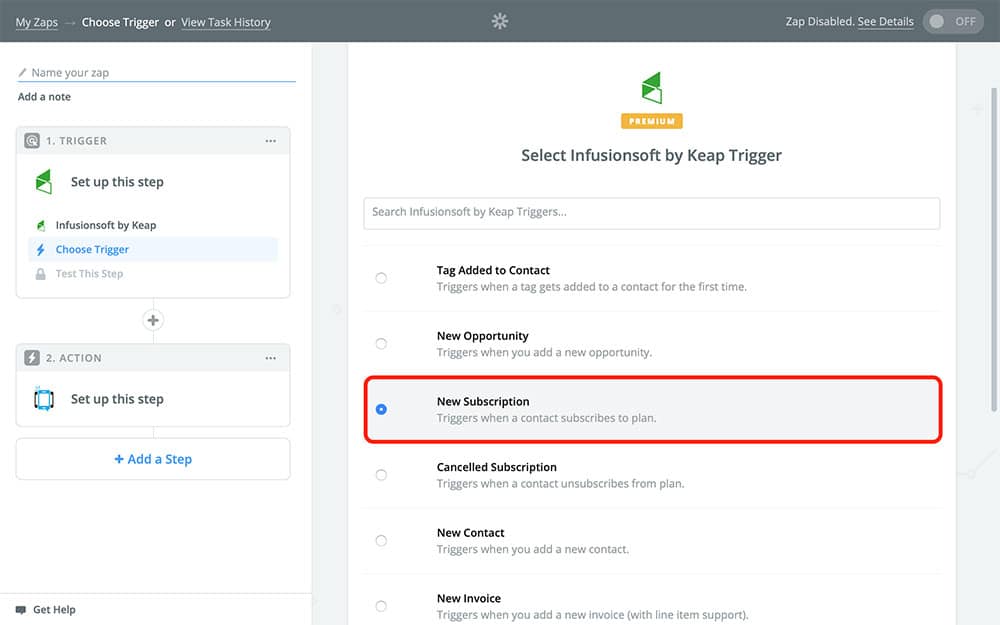
This is where we’re going to set up our Zap’s Trigger. The Trigger is what tells your Zap when to run. Every time the Trigger occurs, your Zap will do whatever we program it to do. In this case, we want our Zap to run every time we get a new subscriber. So, like in the above screenshot, choose New Subscription from the available options and Continue. If you don’t see it listed as an option, you can easily search for it using the search field at the top of the page.
On the next page, Zapier is going to ask you to connect your Infusionsoft account to Zapier:
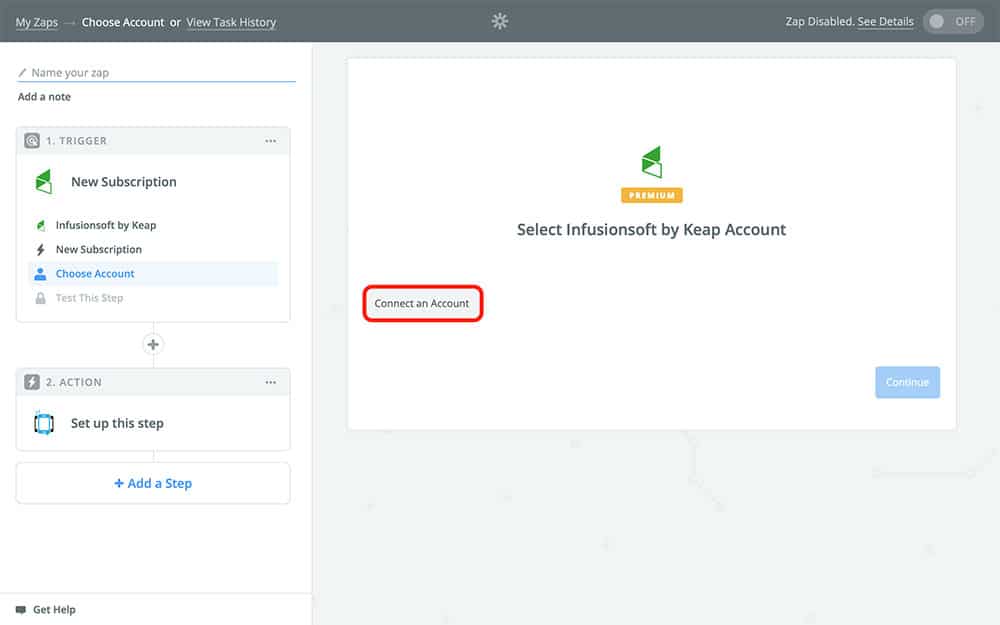
If you’ve already used Infusionsoft with Zapier in the past, you’ll see your account available as an option. If that’s you, great! You can go ahead and Continue to the next section. But just in case, we’re going to walk you through the process of connecting your Infusionsoft account. First, select the Connect an Account button. This will open a new tab or window that should look something like this:
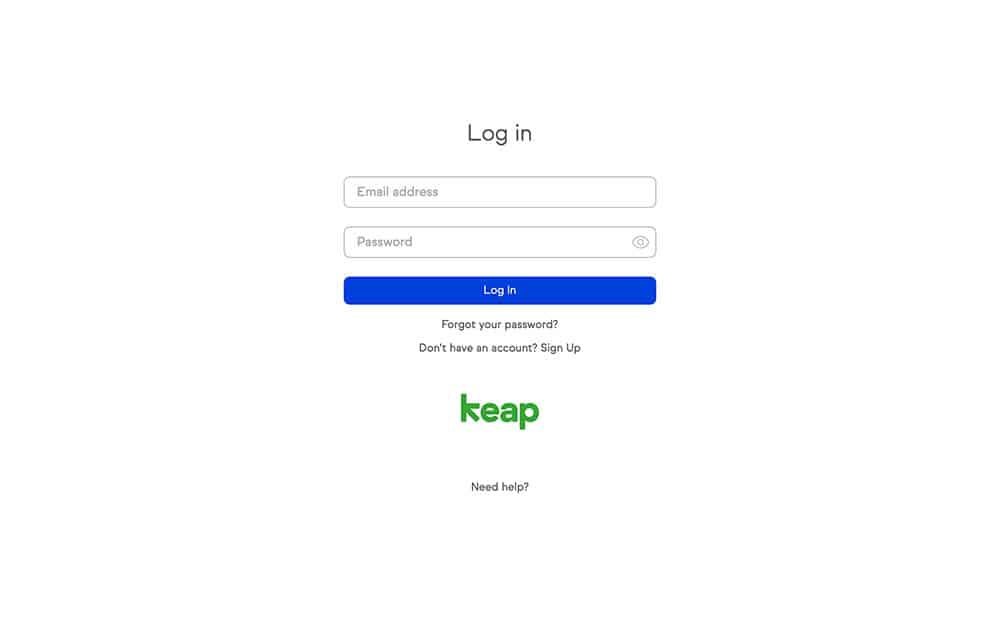
Enter your Infusionsoft login information and choose Log in. After that, you’ll be redirected to the following page:
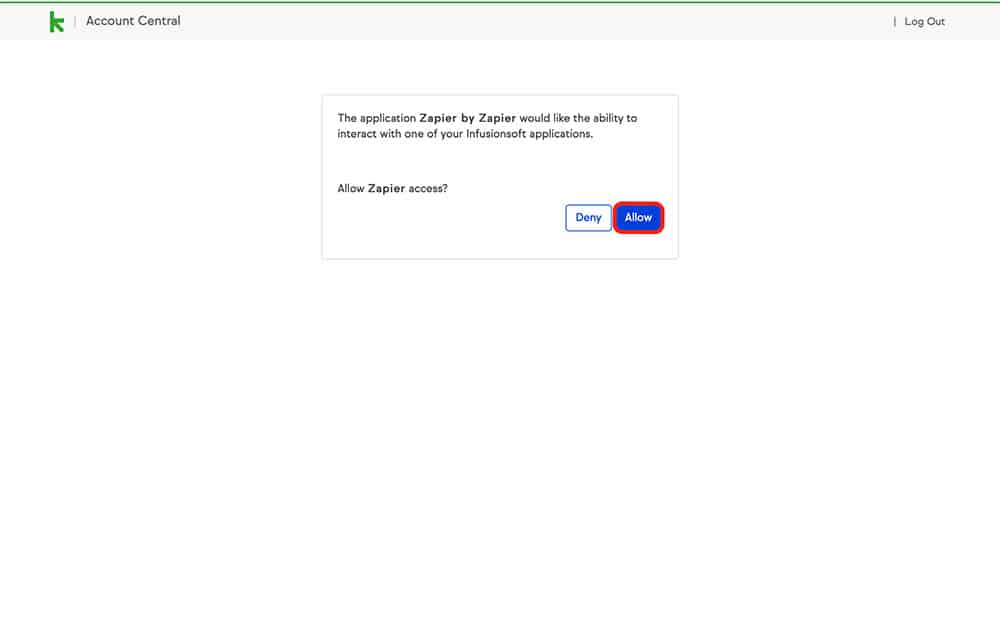
Pressing Allow will give Zapier access to your Infusionsoft account, which you’ll need in order to link the two services together. So, press it! Once you do, go back to the page where we were creating our Zap, and you should see your Infusionsoft account listed:

Once you have it chosen, Save + Continue!
The next page will be where your Trigger template:
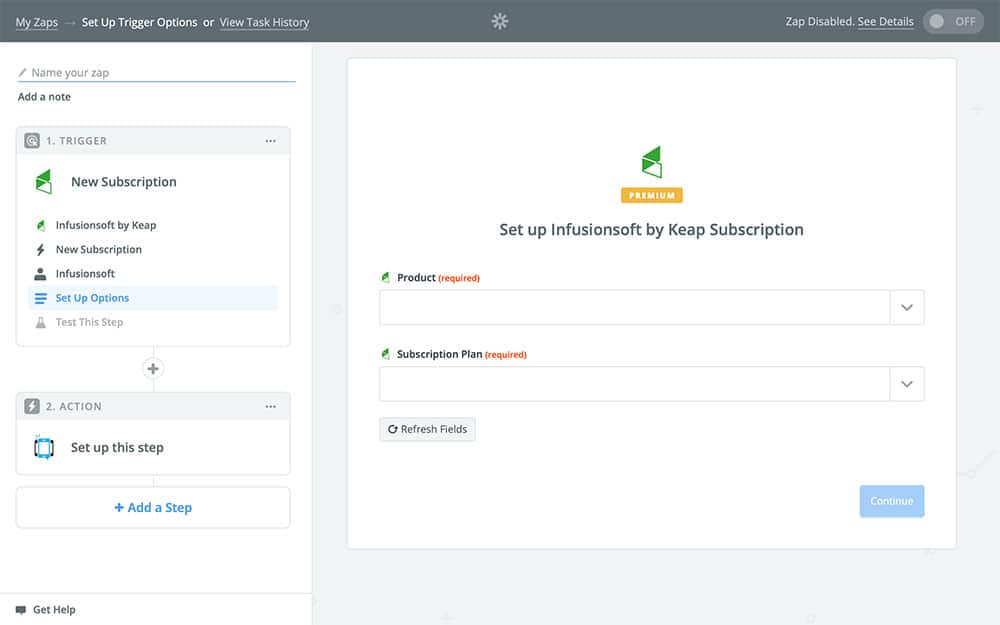
This is where you’ll decide which product plan triggers this Zap to run. You’ll use the dropdown menus by each field, which will pull in information from your Infusionsoft account. For example, clicking the dropdown menu beside Product will give you a list of your products on Infusionsoft. Whichever one you choose is the one that – when it gains a new subscriber – will cause this Zap to run. Once you have your Product and Subscription Plan selected, Continue.
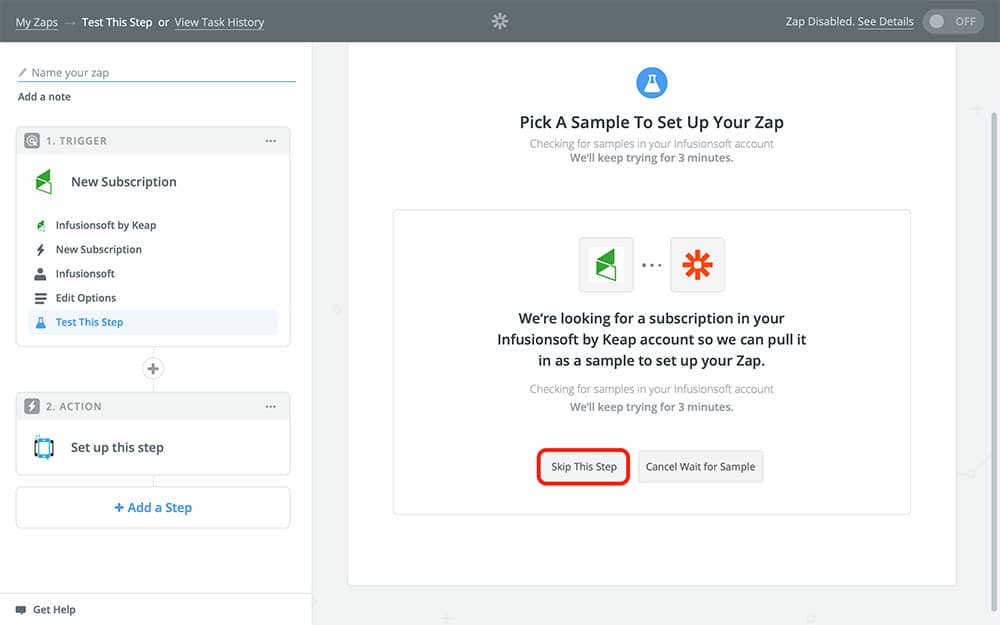
Next, Zapier is going to ask you to pull in a Sample:

The Sample is what Zapier will use when we are setting up our Action. In our case, the Sample will be a new subscriber. The Sample won’t actually be used when your Zap runs, it’s just there to make it easier to set up your Zap. If you want, you can pull your Sample directly from Infusionsoft. However, we prefer to use a random one created by Zapier. To use a random one, choose Skip This Step.
This will bring you to the following screen:
As you can see, Zapier has generated a random Sample for us, Subscription A. Yours may look a little different, which is totally ok! Just choose Continue With Default Sample once you have it chosen.
And that’s everything you need to do to finish setting up your Infusionsoft Trigger! Now it’s time to create our Action.
Step 3: Create Your DialMyCalls Action
Now it’s time for the fun part, creating our DialMyCalls Action. This is what your Zap is going to do when it runs. Once you set this part up, you’ll never have to do this action by hand again.
You should be looking at the following screen after finishing the previous step:
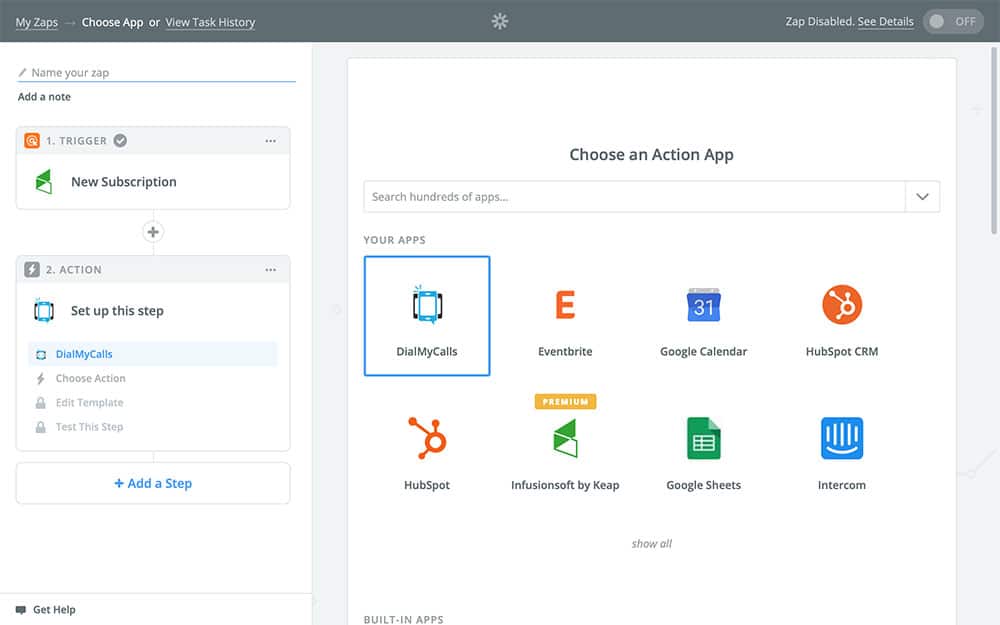
Since we chose to connect Infusionsoft to DialMyCalls in the first step, you should see it already selected like in the screenshot above. If you don’t, though, no worries! Just use the search bar at the top to find it. Once you have DialMyCalls selected, Continue.
Next is where we’re going to choose our Action:
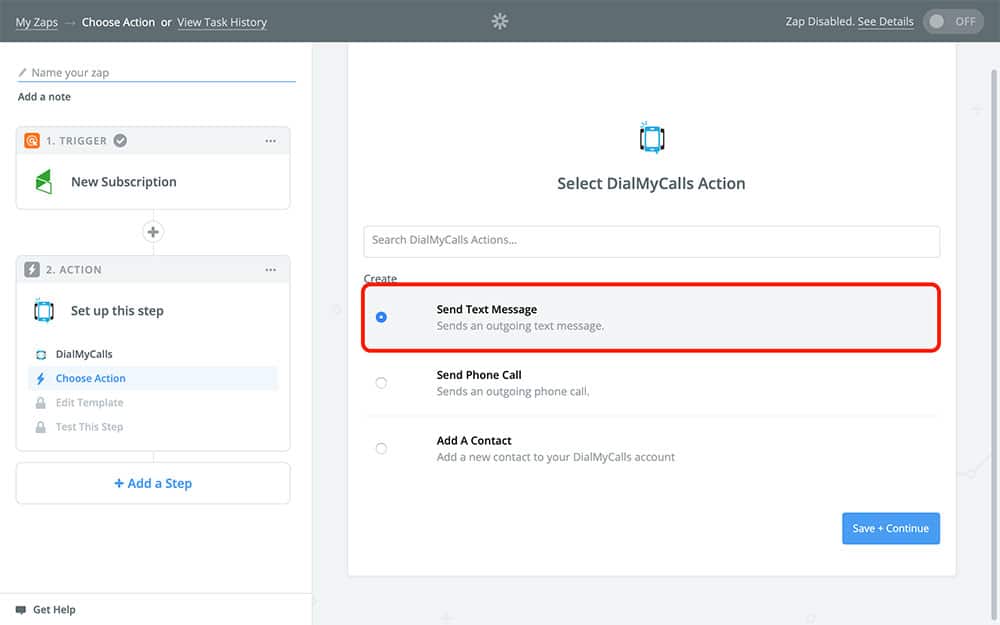
Like we covered, this is what our Zap is actually going to do when it runs. For this example, we want to send a text message to our new Infusionsoft subscribers. So, choose Send Text Message and Continue.
Next, just like in the last step, we’re going to connect our DialMyCalls account to Zapier. If you’ve already done this before, you should see it listed as an available option like so:
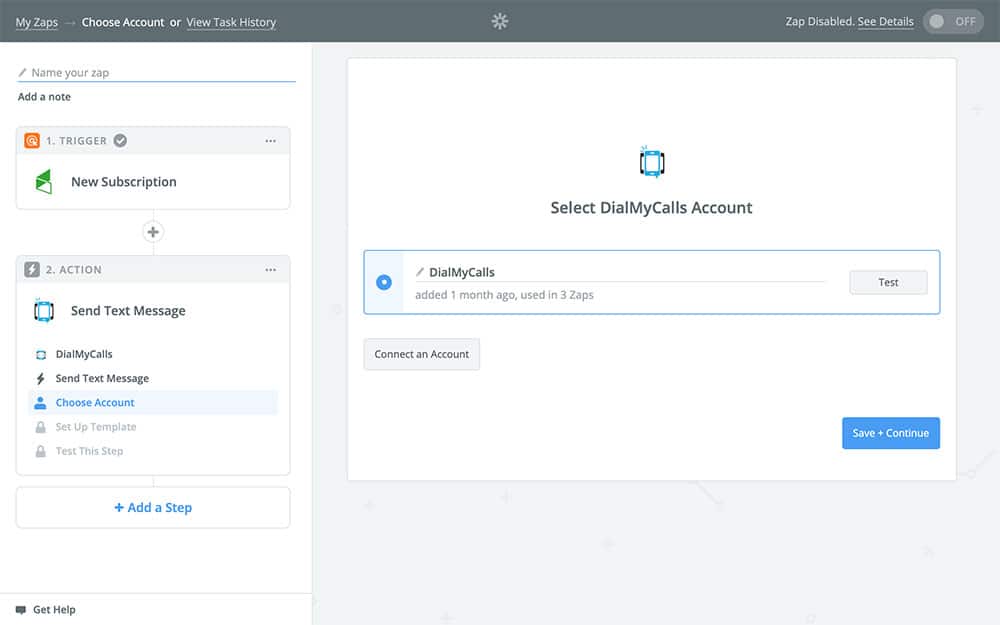
If you haven’t used the two services together before, then you’ll need to choose Connect an Account and follow the onscreen steps, just like we did when connecting Infusionsoft to Zapier. Once that’s done, Continue.
The next screen Zapier will take you to will look similar to the following:
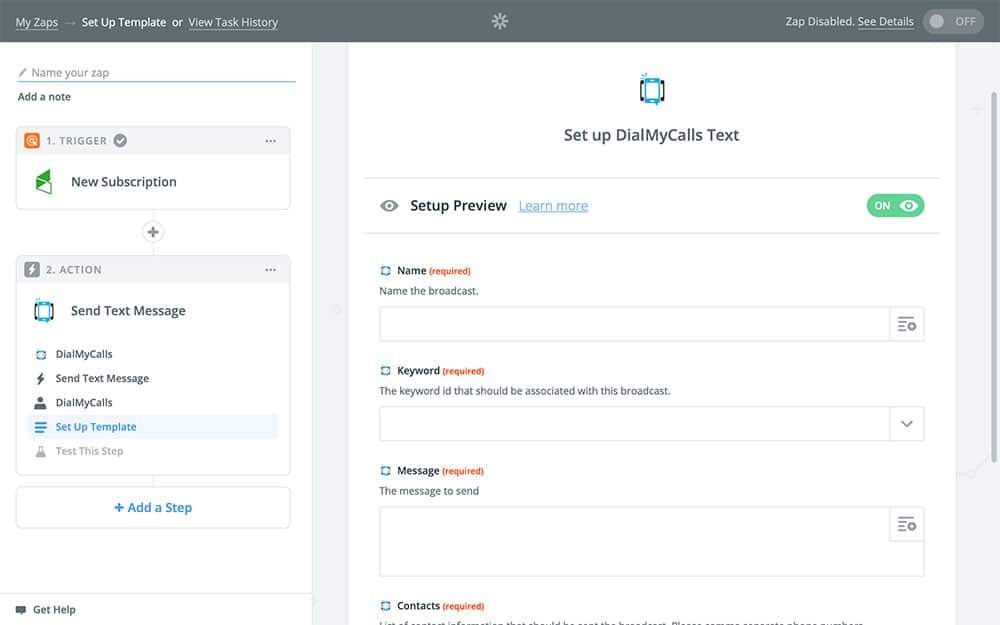
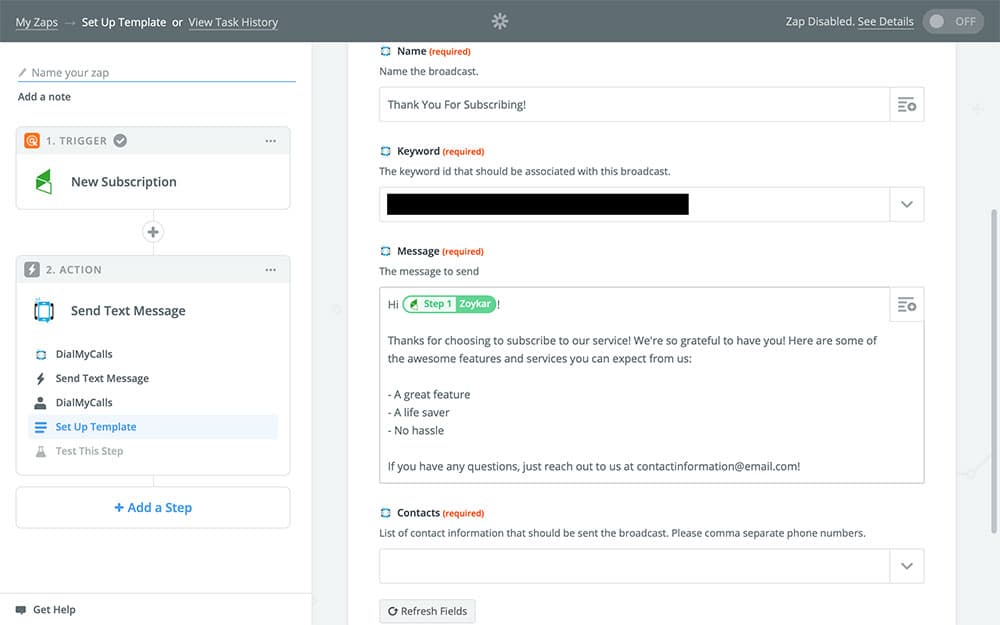
This is the Action template. Now that we’ve already told Zapier what we want our Zap to do, we need to specify how we want it done. Each of these fields – Name, Keyword, Message, etc. – is going to play a role in how our Zap works. Like in the Trigger template, we’re mainly going to be using the dropdown menu to the right of each field when setting up our template.
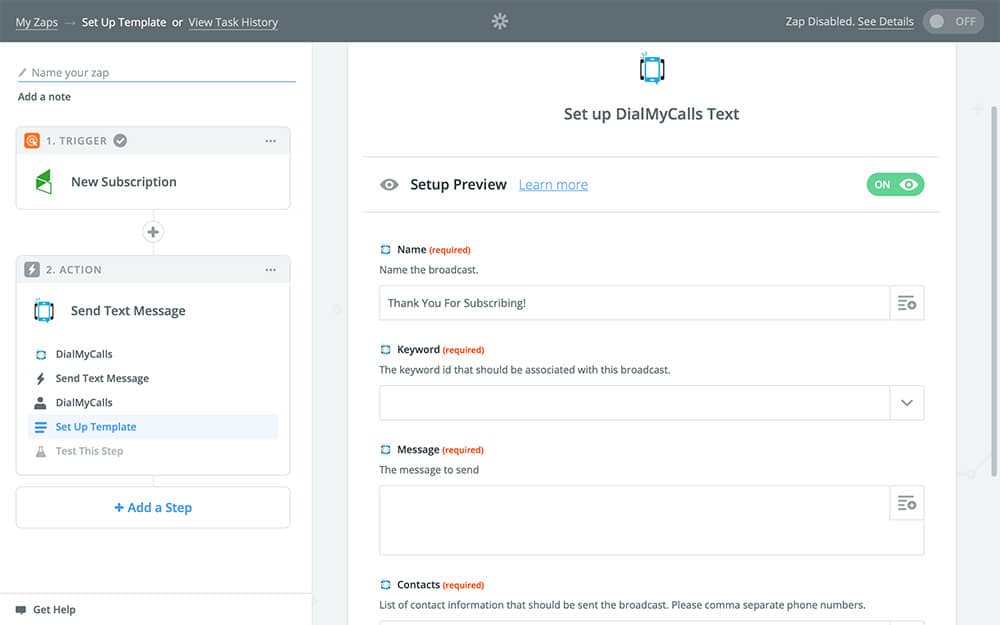
The Name field is going to be the name of our message. This can be whatever you like, though it should be related to welcoming your new subscriber to your service. Here’s an example:
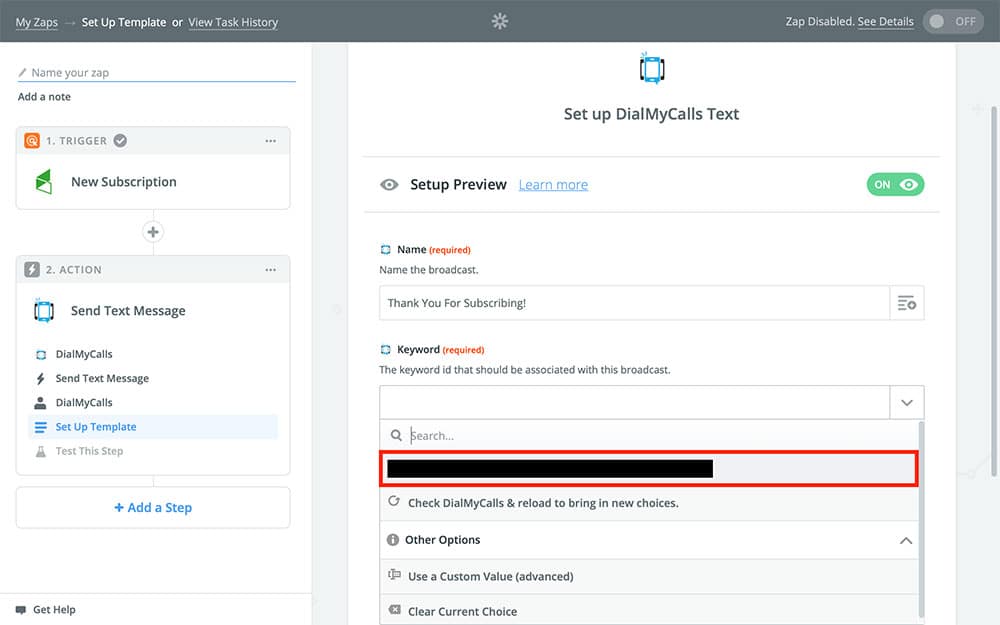
Next is the Keyword field. The Keyword is how DialMyCalls will identify you to the person receiving your message. When you create your DialMyCalls account you get a free, randomly generated Keyword. You can customize your Keywords by upgrading your account. You’ll choose your Keyword from the dropdown menu, like so:
Next is the Message field. As you can probably guess, this is the message your new subscriber is going to receive automatically after they subscribe. If you type in “Hey!” then they’re going to get a pleasant “Hey!” after subscribing to your service.
That said, we do recommend making your subscription confirmation more welcoming, useful, and personal. In order to do this, we’re going to first include a variable from the dropdown menu.
First, type “Hi” into your Message field, including the space. Next, open the dropdown menu and choose the Contact First Name variable:

This variable will change depending on which subscriber triggers your Zap to run. For example, if Sally subscribes to your service, then your message will read as “Hi Sally.” You can add more levels of personalization if you want, though this should be plenty for most.
Next, fill in the rest of the message as you see fit. You don’t want to overload your new subscriber with new information, though, so be sure to find a balance between being informative and succinct. Here’s what ours looks like:
As you can see, we include the basic information about our service, thank them for joining, and provide them with a resource to learn more if they need. You can even incorporate links into your message if you like.
Next, we need to set up who our message is going to send to. This is where the Contacts field comes in. You’ll notice, though, that when you choose the dropdown menu next to Contacts, it only gives you choices from your existing contacts in DialMyCalls. This doesn’t do us much good with this Zap since our new subscriber is unlikely to be in our contacts. And besides, we need the contact information in this field to be specific to the person who just subscribed.
To do this, we’re going to choose an advanced feature known as Use a Custom Value:
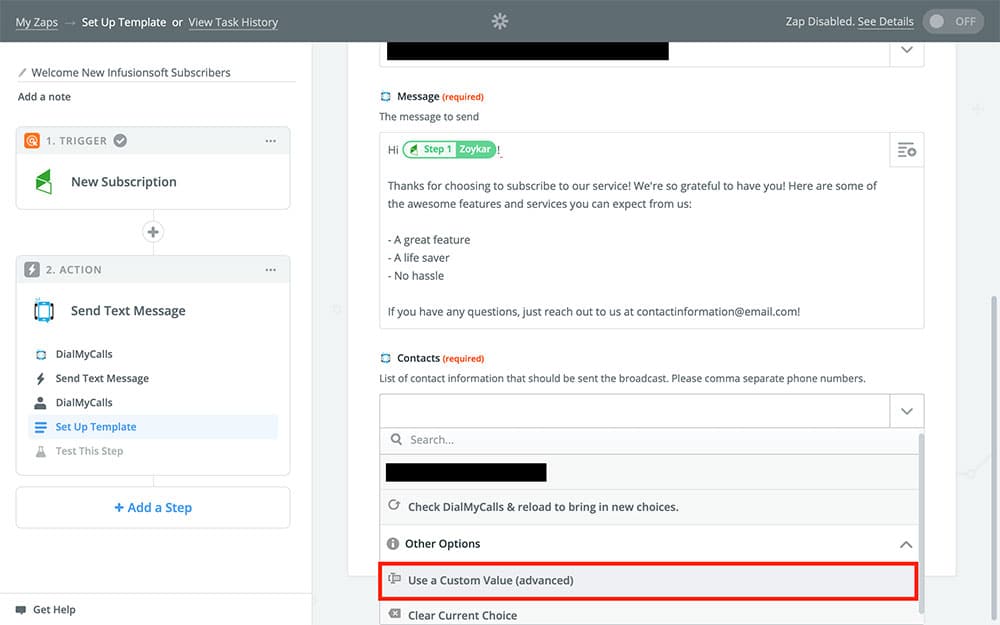
This allows us some extra flexibility when deciding who our message is sent to – specifically, we can use the variables from our new subscriber to create custom contact information.
Once you choose Use a Custom Value, a new field labeled Custom Value for Contacts Phone will appear. Choose the dropdown menu next to this field and scroll until you find the Contact Phone # variable:

After that, your Action template should be finished! Yours might look something like this:
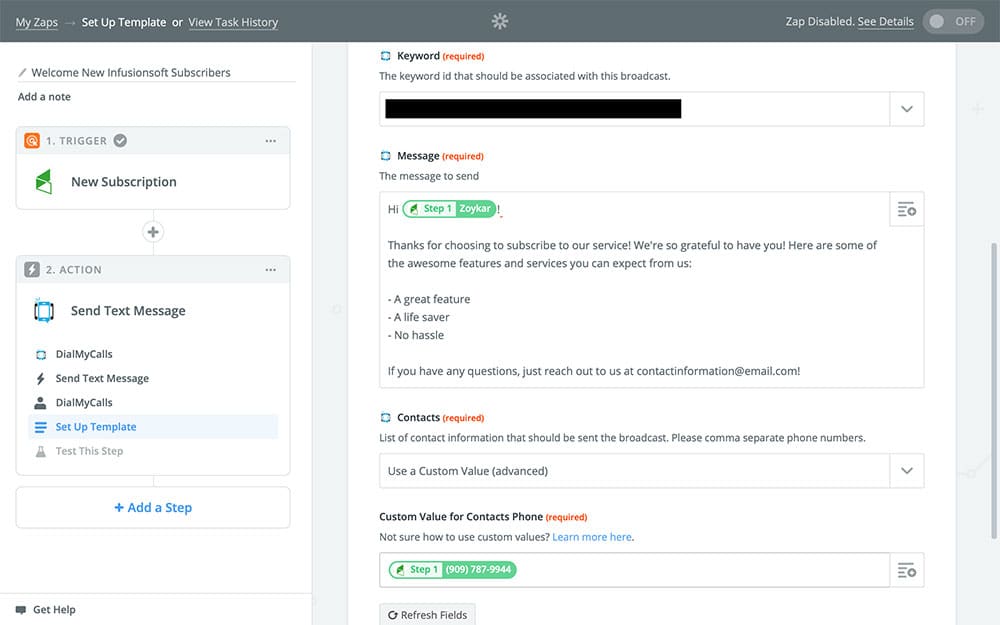
Once you’re satisfied with your template, Continue.
Next, Zapier is going to ask you if you want to test your Zap. There’s generally no harm in doing this, though it’s not really necessary. The only thing to keep in mind with testing your Zap is that if you used a real Infusionsoft subscriber for your Sample, testing this Zap will send a sample message to them. If you used a random one, however, testing your Zap will send a Zap to the random number instead of a real one.
If you don’t want to test your Zap, just choose Skip Test:
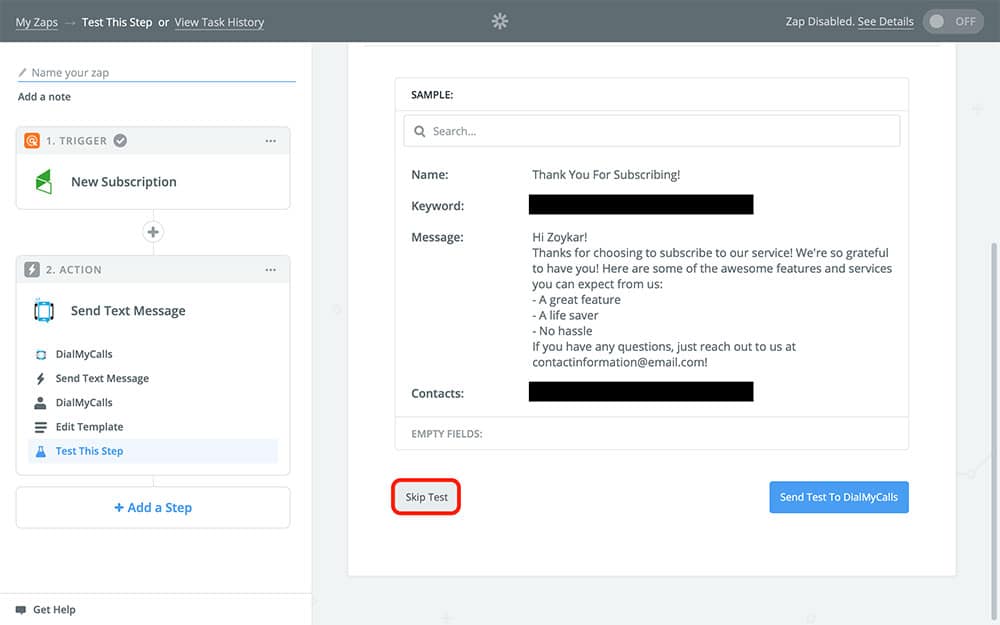
Now all that’s left to do is name your Zap and turn it on:
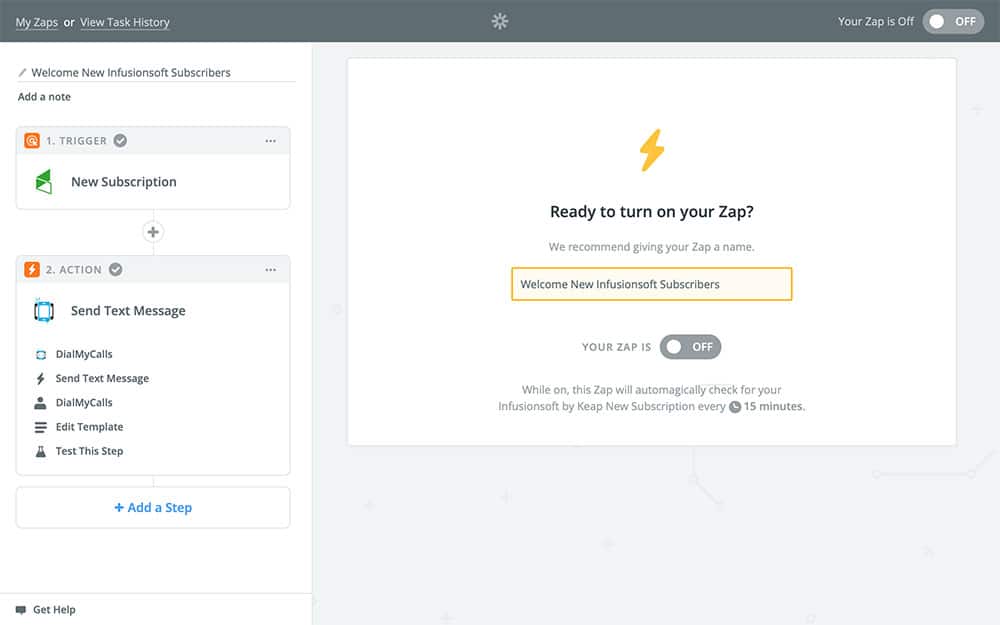
Just keep in mind that once you turn it on, your Zap is officially going to be running. This means that every new Infusionsoft subscriber is going to get a welcome message via SMS Text Message from your service.
DialMyCalls + Infusionsoft Integration Conclusion
Here’s a quick recap of everything we did:
- Created a Zap that connects Infusionsoft to DialMyCalls
- Set our Zap to run every time a specific subscription plan of ours on Infusionsoft gets a new subscriber
- Set our Zap to automatically send a welcome message to that subscriber
This DialMyCalls + Infusionsoft Zap allows you to stay in touch with new subscribers 24/7 without having to be at your computer 24/7. It acts as a confirmation of sorts for your subscriber, letting them know that their subscription was successful. It also gives them some important information regarding their subscription and puts your service on a more personal level.
This Infusionsoft Integration is only a sample of what can be accomplished through Zapier. Don’t hesitate to explore what else the service has to offer, and get creative with your custom integrations!