Freshdesk Integration

How to Send Your Freshdesk Team SMS Notifications for New Support Tickets With DialMyCalls and Zapier
In this article, we’re going to show you how to send Freshdesk SMS notifications by integrating with DialMyCalls through Zapier. Zapier is a platform that makes automating different services super easy, saving you time and resources in the long run.
The example we’re going to use in this article involves automatically notifying your Freshdesk customer support team of new support tickets using DialMyCalls. DialMyCalls is an automated way to send text messages. This will allow you to improve your customer support response times and keep your team better connected to your customers.
What You’ll Need:
- A Zapier account
- A DialMyCalls account
- A Freshdesk account
Step 1: Create Your Zap
The first step of creating any Zapier automation is creating your Zap. “Zaps”, are just the name for the automations you make in Zapier. To make one, log in to Zapier and go to your Dashboard.
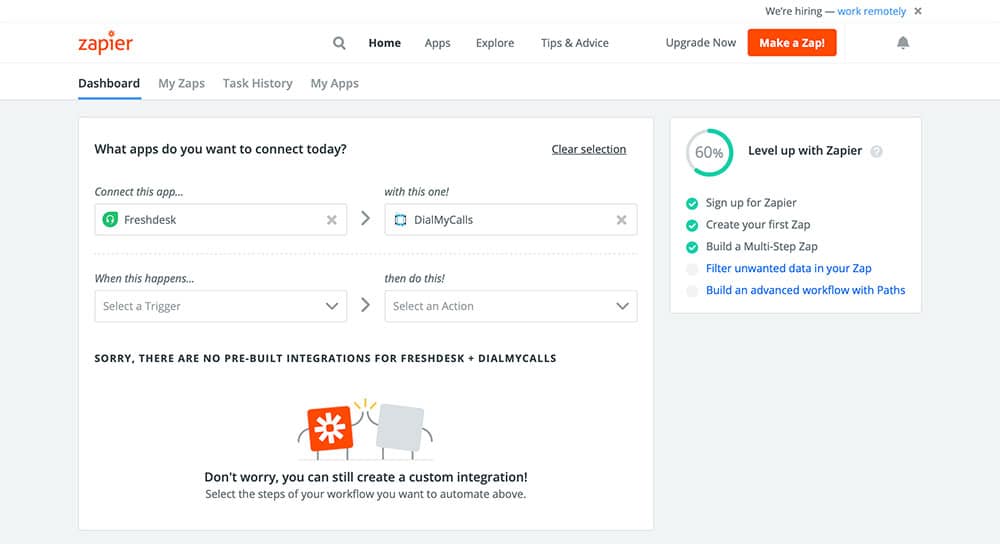
On this page you’ll see a section title What apps do you want to connect today? In the first field of this section, Connect this app…, you’re going to type “Freshdesk”, and select it when it appears. In the second field, with this one!, you’re going to do the same thing with “DialMyCalls”. Once you’ve done that, your screen should match the above image.
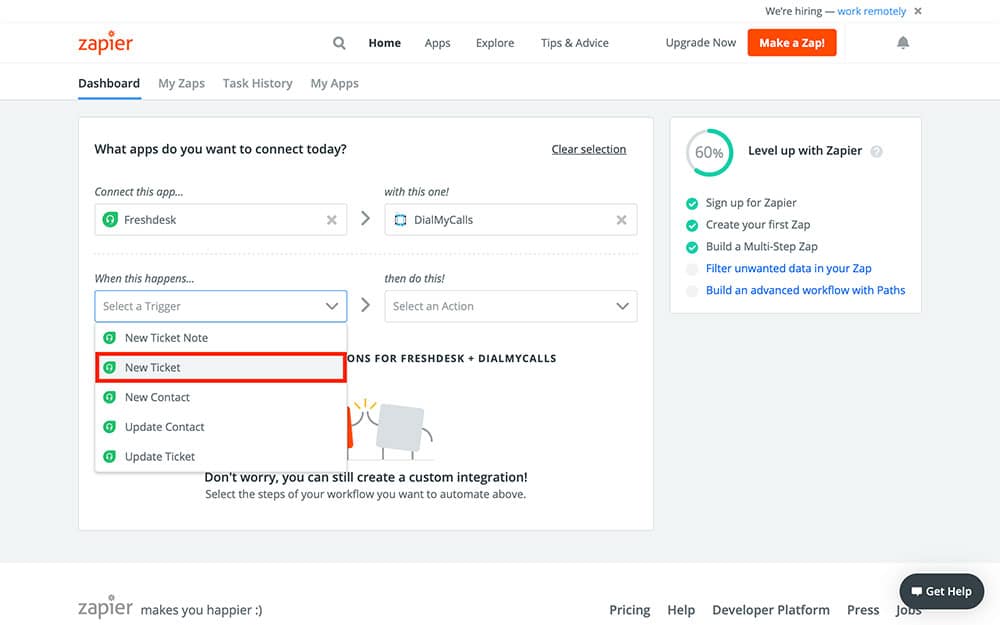
Next, you’re going to choose your Zap’s Trigger. The Trigger is what tells the app when to run; every time the Trigger event happens, your Zap will perform an Action. In our case, we want this Zap to run every time we get a new support ticket. So, from the dropdown menu, select New Ticket:
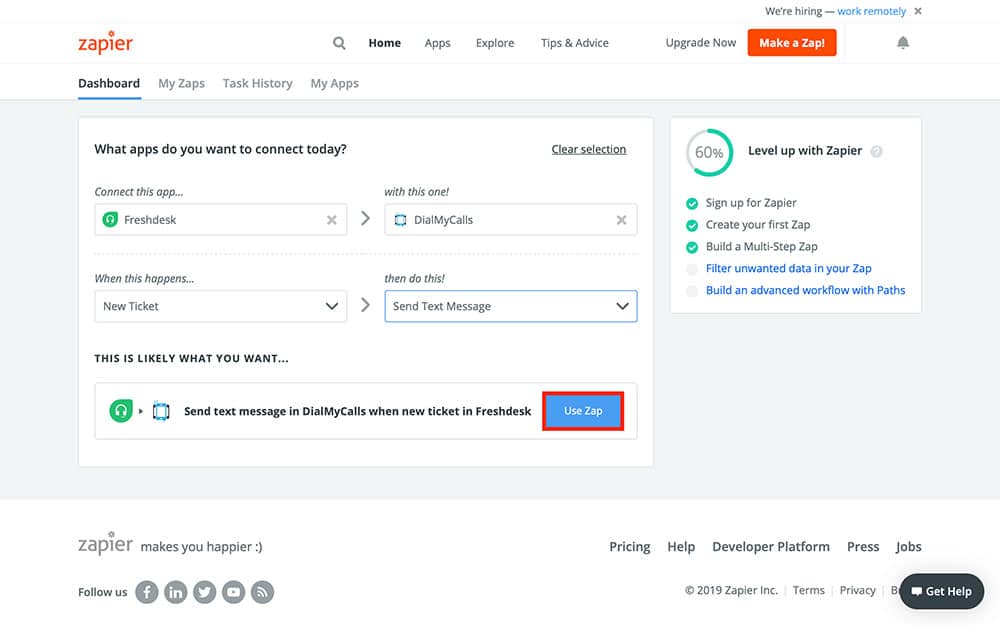
For the fourth and final field, then do this!, select Send Text Message. This is what our Zap will do every time it runs. Once you’ve done that, press the blue Use Zap button:
Step 2: Connect Your Freshdesk Account
After you press the Use Zap button, Zapier will bring you to the following screen:
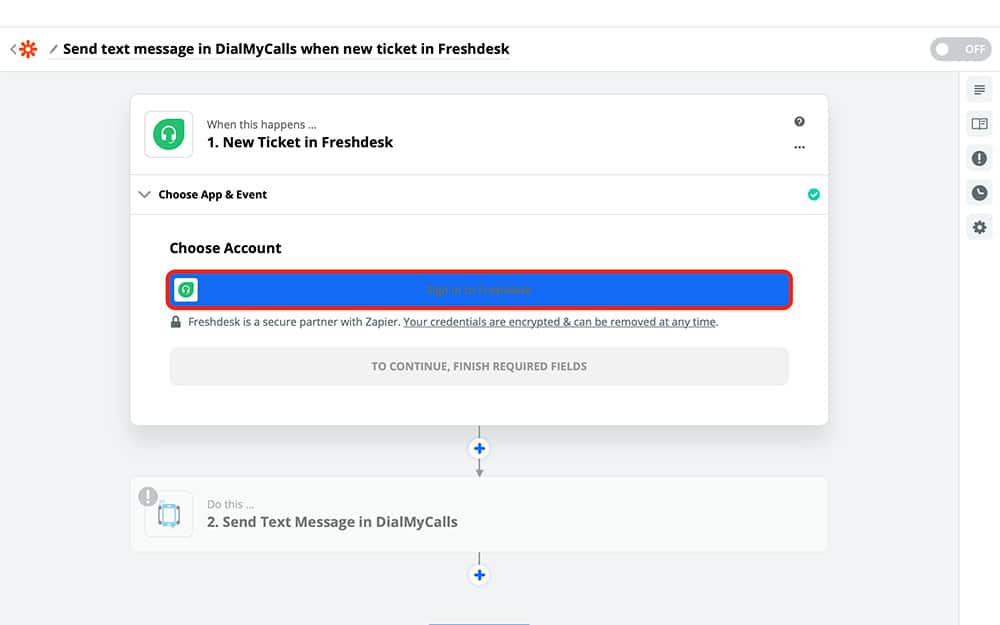
This is where you’re going to connect your Freshdesk account to Zapier. If you’ve already used the two services together, you should see your Freshdesk account listed as an option; you can select it and skip to the next step. For everyone else, here’s how you connect the two services.
Start by clicking the blue bar under Choose Account, highlighted in red in the image above. That will bring you to this screen:
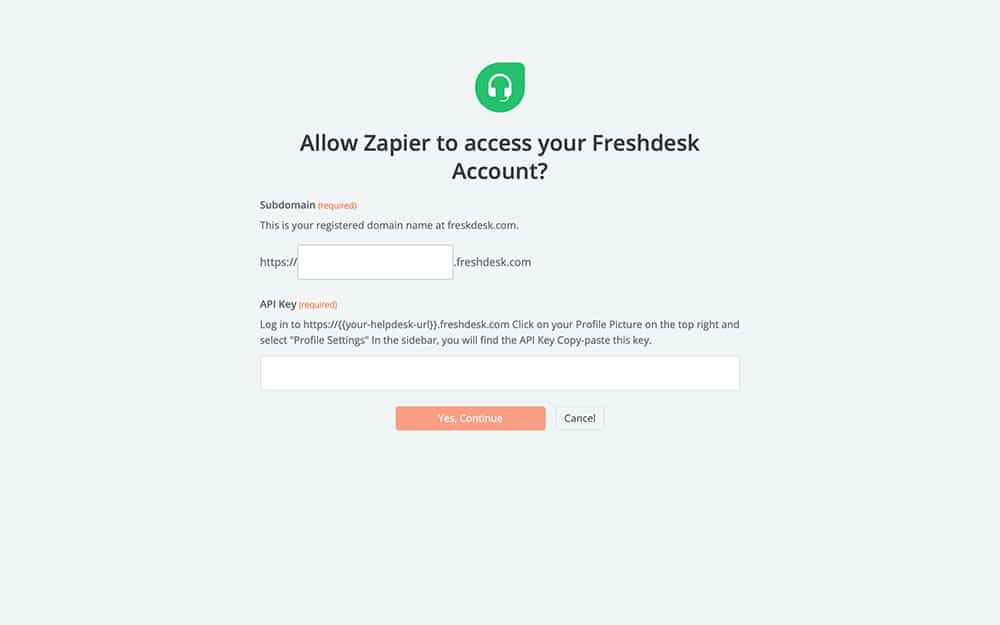
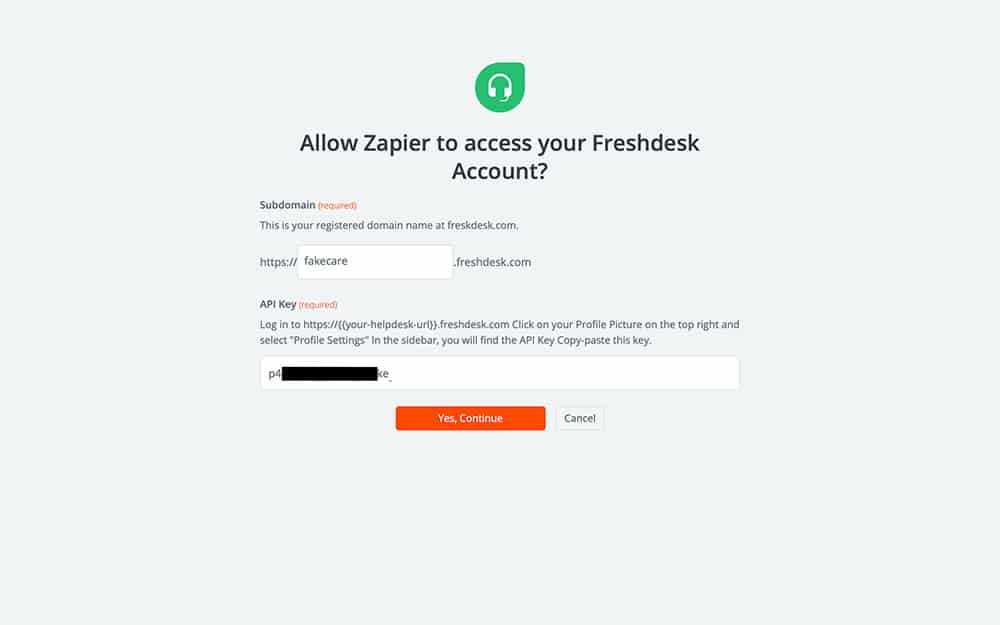
To connect these services, we’re going to need to fill out both of those blanks. You may be able to fill in the first one from memory, but if not, we’ll show you how to find that as well.
Open a new tab and login to your Freshdesk account. If you look at the top of your internet browser, where the URL is, you should see something like this:
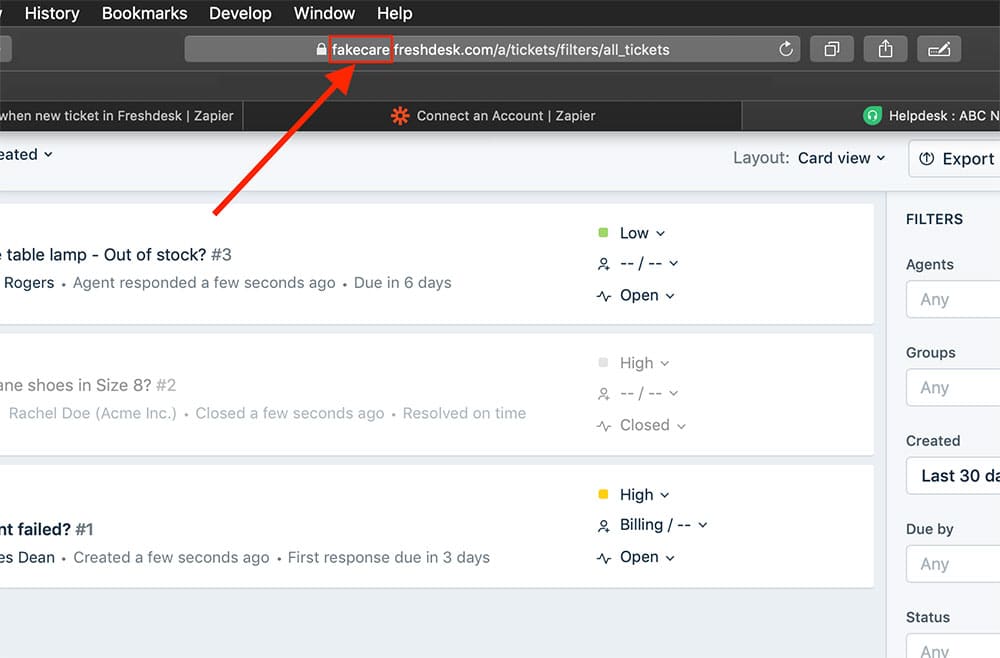
The part of the URL in the box above (in our case, “fakecare”) is what you’re going to paste into the first box of the Allow Zapier to access your Freshdesk Account page, the other tab we left open.
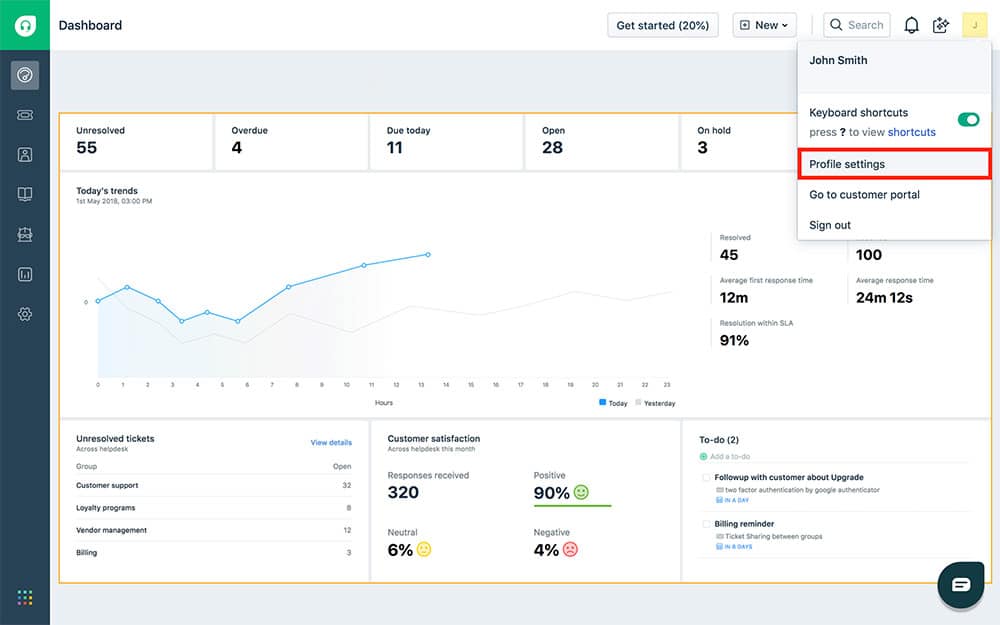
Once you’ve pasted that into the Zapier tab, we’re going to navigate to our Profile settings in Freshdesk. You can find these settings by clicking your Freshdesk profile picture in the top right of the screen and selecting Profile settings from the dropdown menu:
From there, you’ll be able to view the nitty-gritty details of your Freshdesk account, one of which is your API key. You should see your API key on the right side of this page:
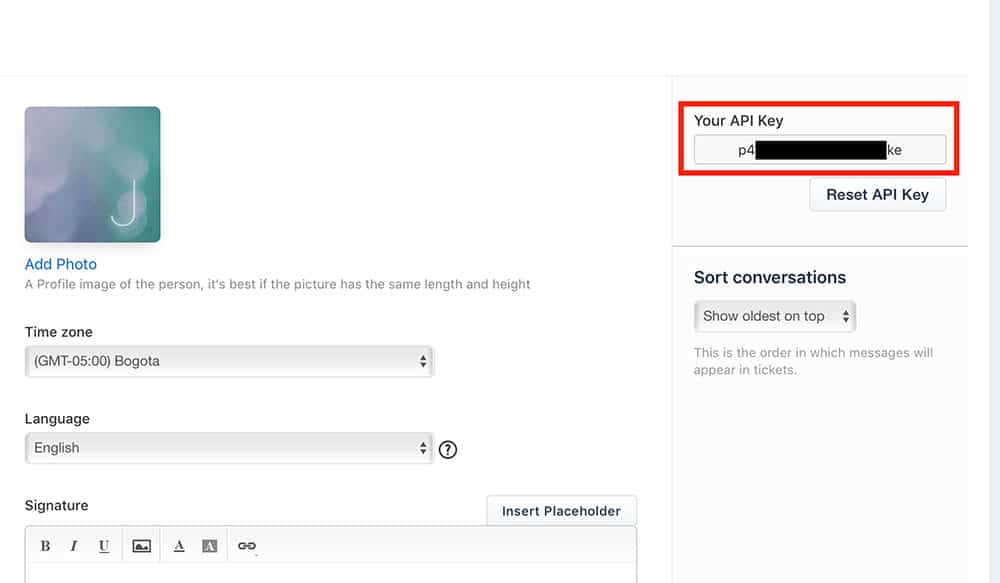
For obvious reasons, we’ve left our API key blacked out. But yours should look like a string of random numbers and letters. You can reset it if you like (usually to remove access from other people/services), just keep in mind that if you ever do reset it, you’ll have to copy it to Zapier again.
Speaking of copying, go ahead and copy your API key and paste it into the second field of the Allow Zapier to access your Freshdesk Account page. Your screen should look similar to this:
Once you’ve copied your Freshdesk info over, you can select the orange Yes, Continue button. This will bring you back to the original Zapier page, which will now have your Freshdesk account listed:
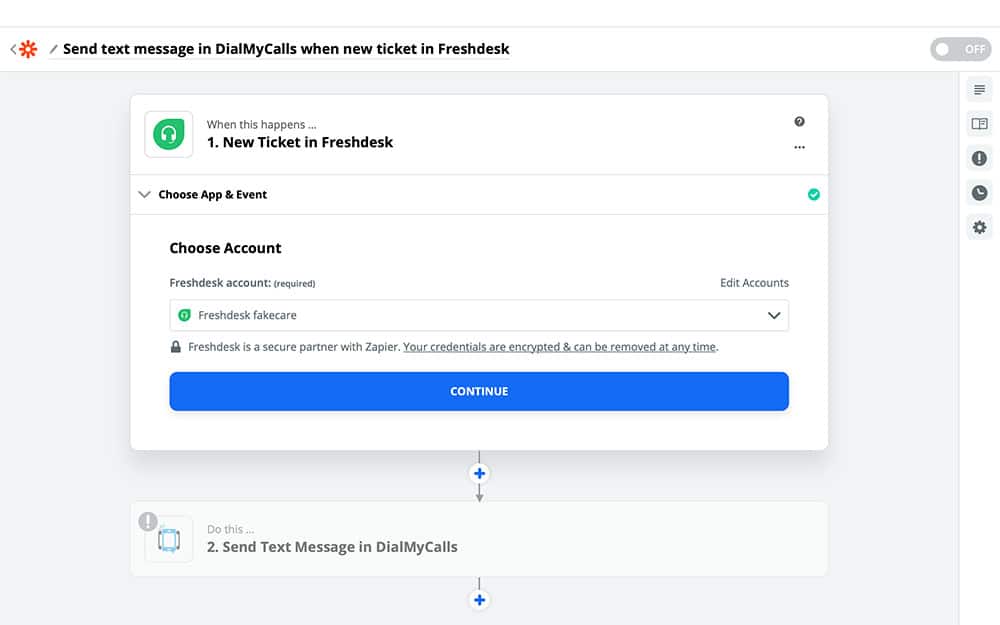
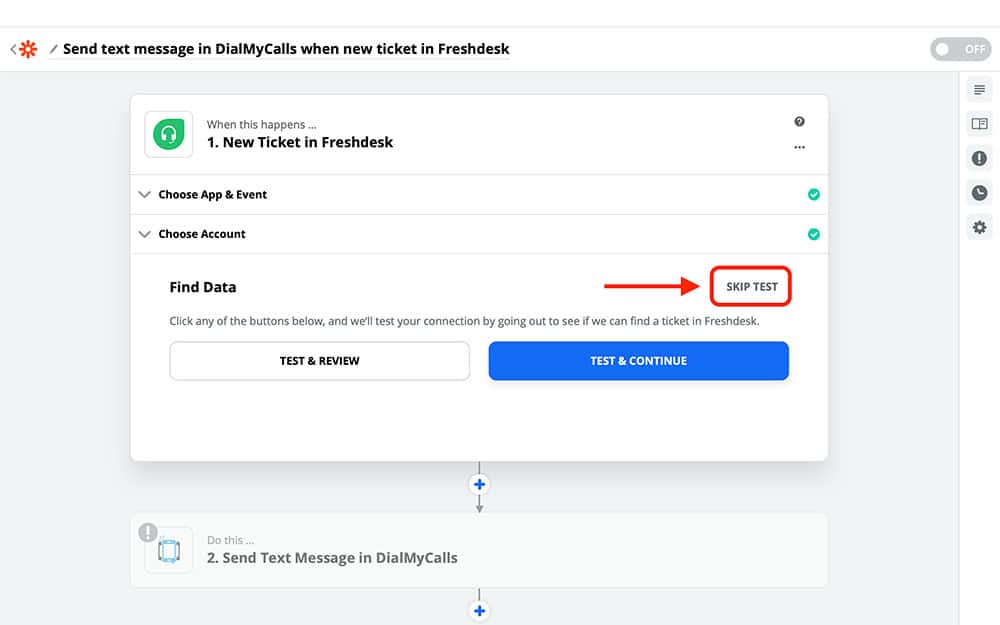
Now that your account is connected to Zapier and selected for this Zap, you can go ahead and press that big blue Continue button! The next page will ask you if you want to test your Zap. You can test it if you like, otherwise, just choose SKIP TEST:
Step 3: Create Your DialMyCalls Action
Now that we’ve got our Freshdesk account connected to Zapier, it’s time to create our DialMyCalls Action. This is what the Zap is actually going to do when a new ticket is created in Freshdesk. You should be looking at the following screen:
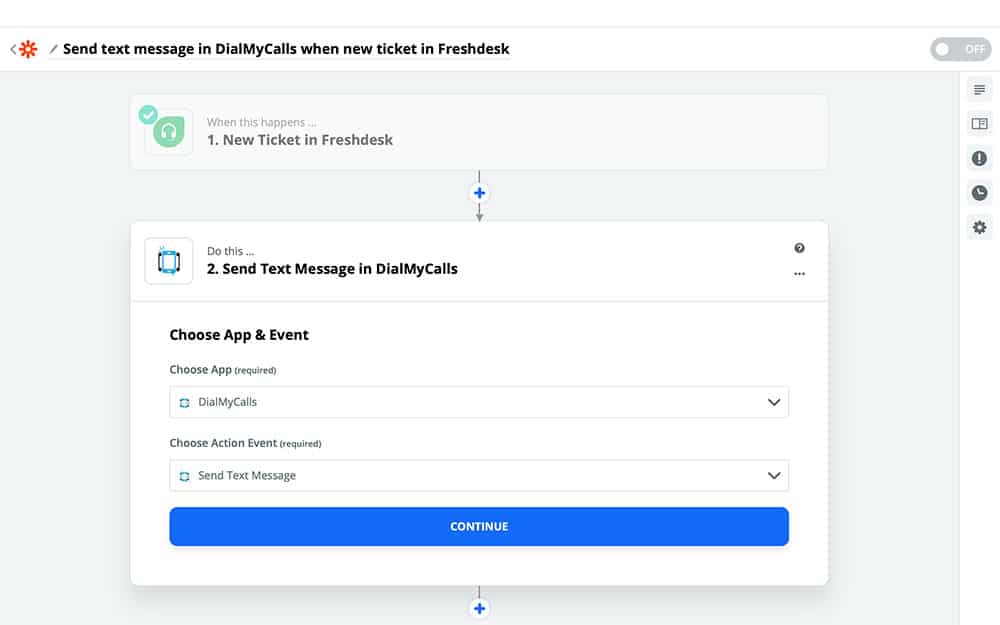
If you have the same app and action selected, as shown above, go ahead and Continue.
On the next page, Zapier is going to ask you to connect your DialMyCalls account. As before, if you’ve already used DialMyCalls with Zapier, you should see it listed as an available option on this page. Otherwise, you’re going to connect it just like we did for Freshdesk:
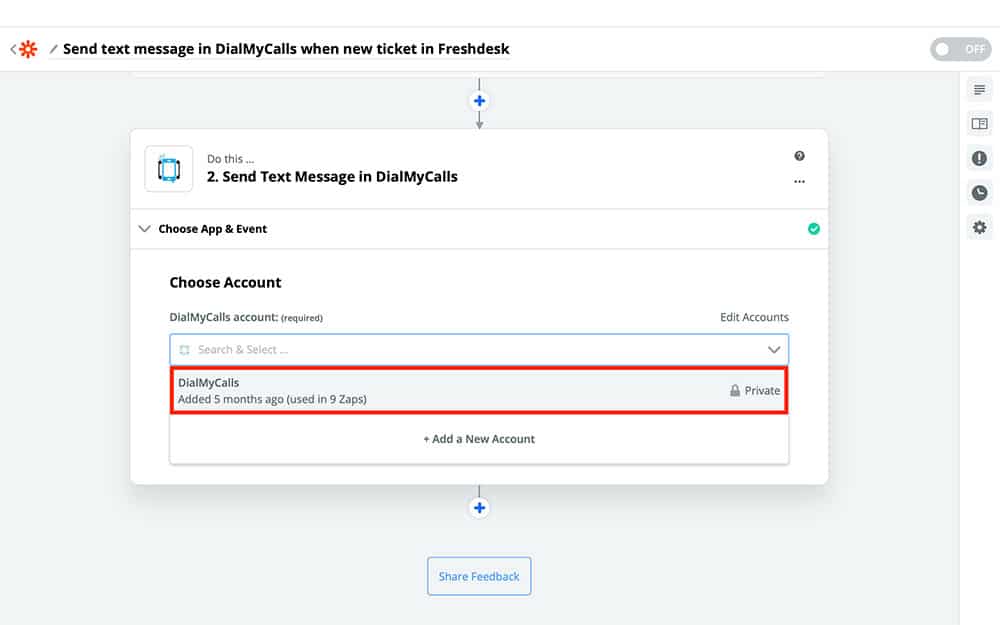
Once your account is connected and selected, you can Continue.
Step 4: Complete Your DialMyCalls Action Template
Pressing that Continue button will bring you to your Action template:
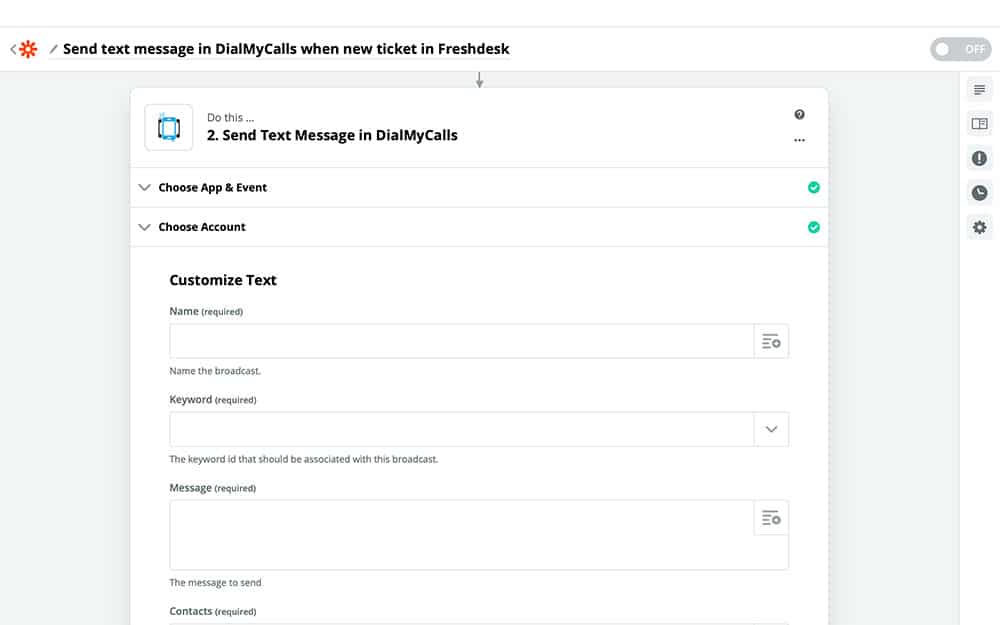
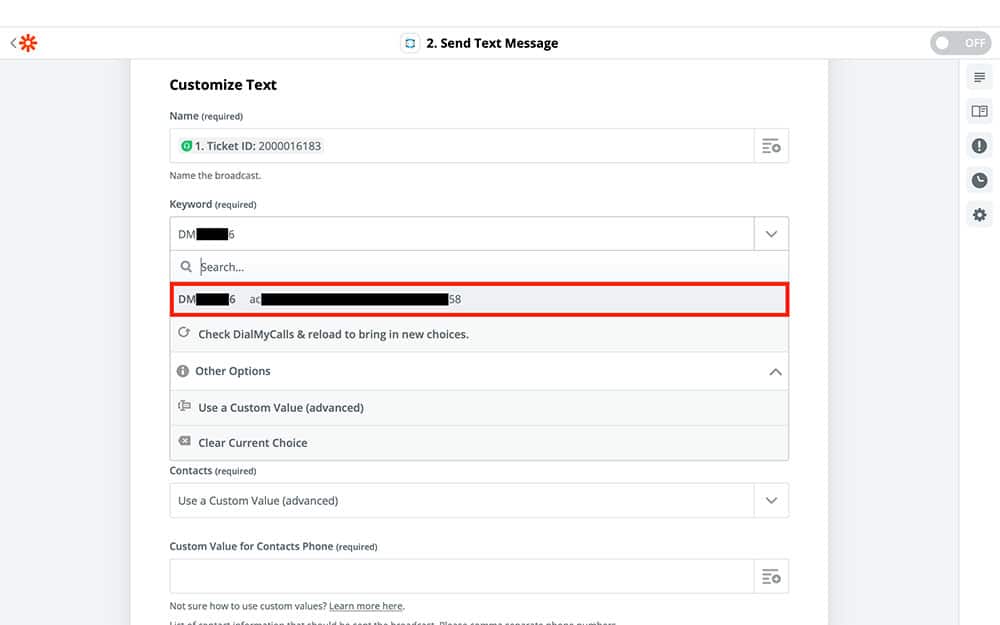
This is where we’re going to create the specifics of how the Zap works using the different fields. The first field, Name, is where we’re going to give our text message a title, like the Subject field of an email. You can name it whatever you like, though we recommend naming it after the support ticket ID so you can easily link the message back to the ticket. You can find the ticket ID from the dropdown menu of the Name field:

The next field we’re going to fill out is Keyword. This is used to identify who is sending the message. You can customize your Keyword with DialMyCalls, or use the randomized default Keyword given to you when you create your account:
After that, you’re going to create your Message. As you can probably guess, this is what our message is going to say. If you just type, “Hey, this is a message!” every message that this Zap sends will look the same (“Hey, this is a message!”). To customize each message automatically and provide information about the ticket that initiated the Zap, we’re going to use variables.
Variables are the options you can choose from the dropdown menu, as we’ve done for the past few fields. By combining variables and regular text, you can create a message template that displays relevant information from each ticket for your team. Your message might look something like this:
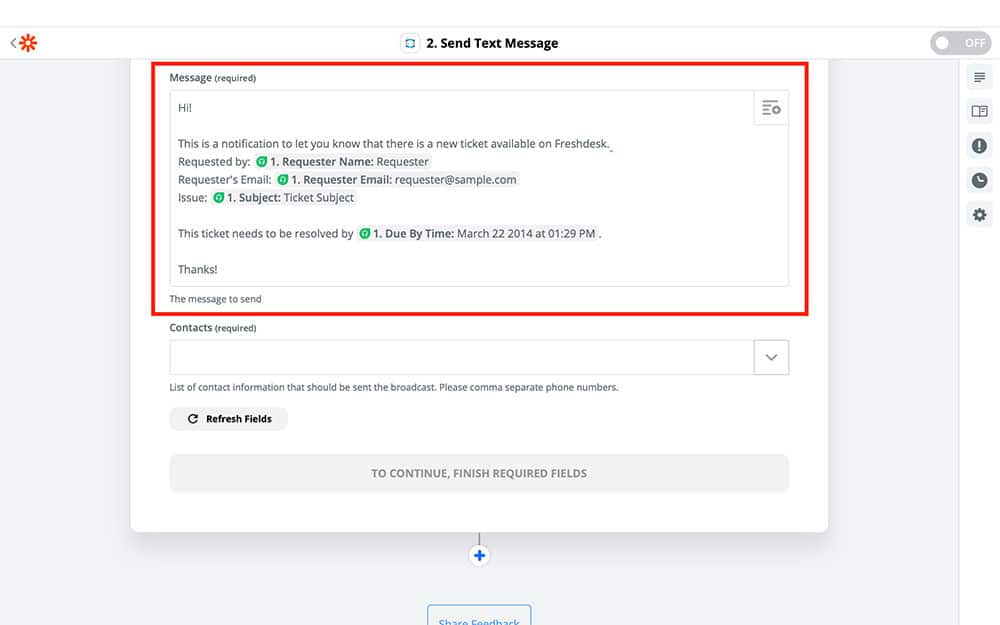
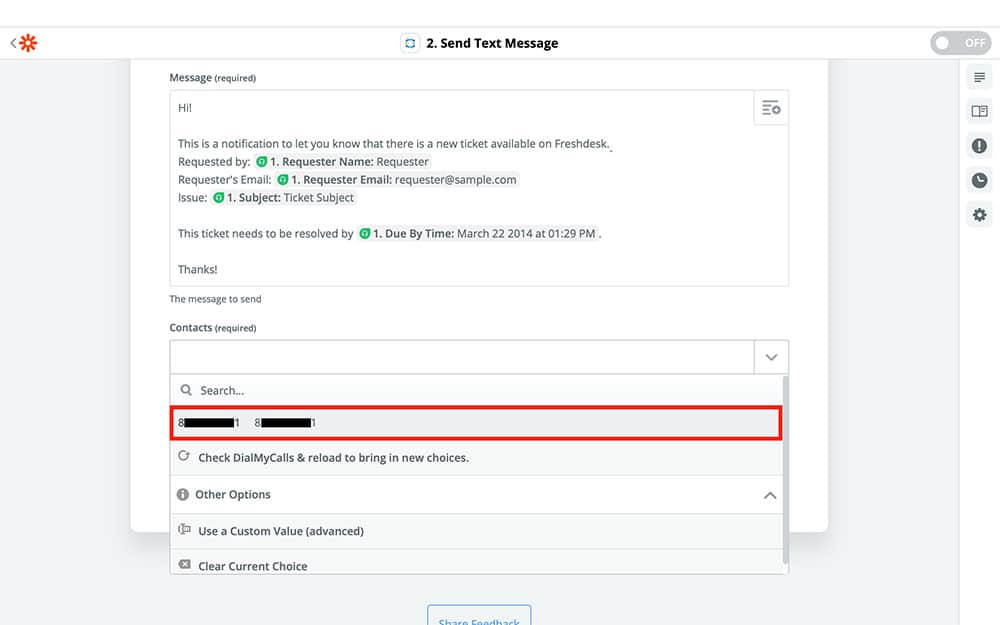
Finally, all that’s left to fill out is the Contacts field. This is who your message is going to be sent to. We recommend sending it to your entire Freshdesk team, whether that’s one person or ten. Just make sure that all of your desired contacts are added to DialMyCalls, and you should be able to see them in the Contacts dropdown menu:
After that, double-check that each field is filled in how you like, every required field is completed, and then select Continue.
Step 5: Turn On Your Zap
After you select Continue, you’ll be brought to this page:
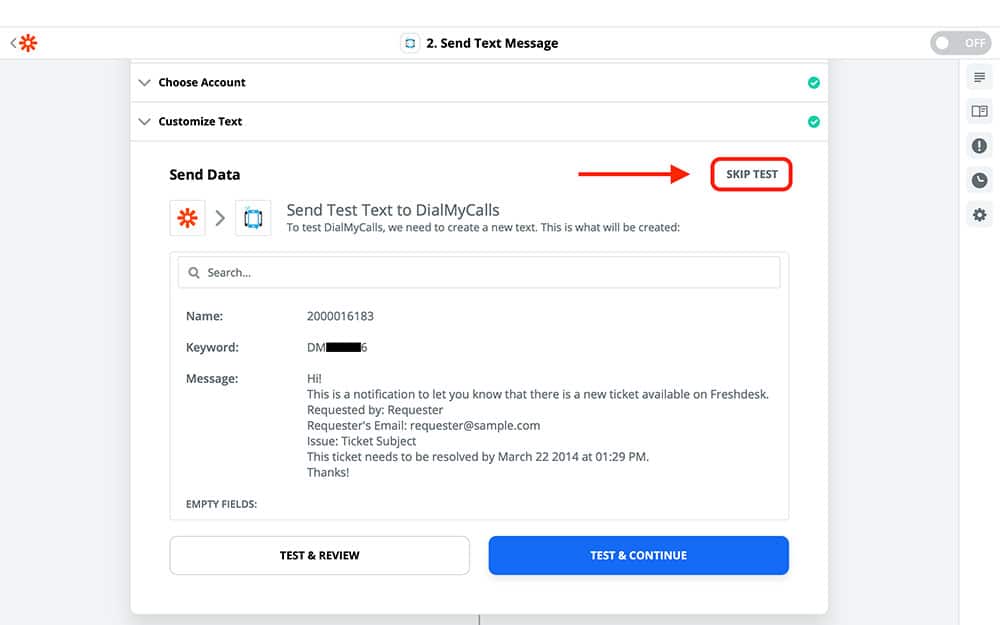
This page gives you a chance to double-check everything and test the Zap if you want. Like before, you can test the Zap before turning it on to make sure it’s working as expected. If you do test it, it will run with the information you see on this screen. This means that your Freshdesk team will receive an SMS text message containing the information here. Otherwise, just select SKIP TEST.
And that’s it! All that’s left to do is turn your Zap on:
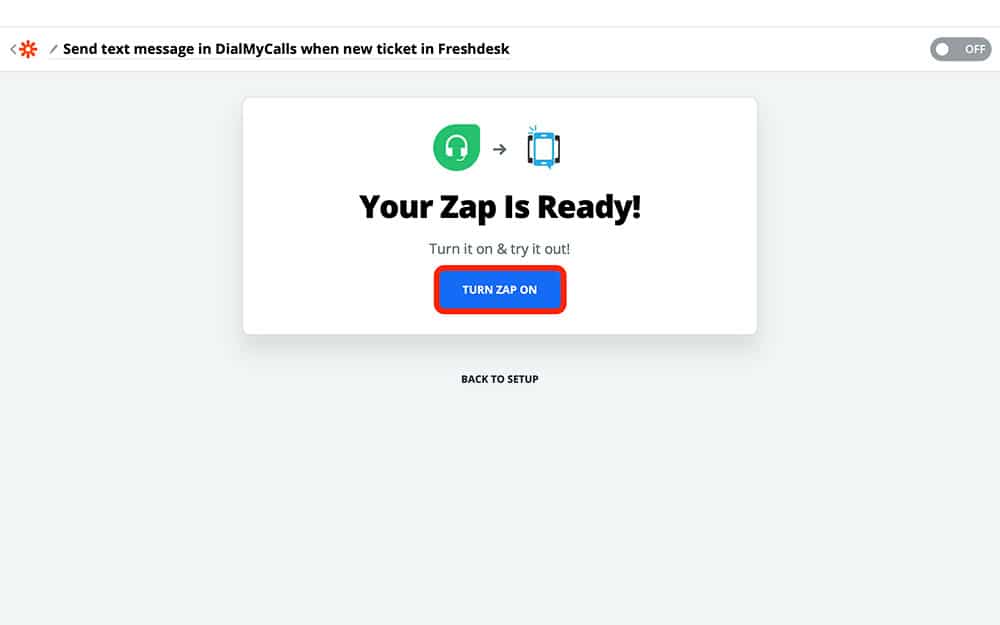
If you’d like, you can change the name of your Zap by clicking it in the top left portion of the screen. Keep in mind that after you press the TURN ZAP ON button, your Zap will run every time you get a new support ticket in Freshdesk, sending a text message to your selected DialMyCalls contacts. You can turn the Zap back off whenever you like.
DialMyCalls + Freshdesk Integration Conclusion
Here’s a quick recap of everything we did:
- Created a new Zap
- Connected our Freshdesk account
- Connected our DialMyCalls account
- Chose Freshdesk as our Trigger app
- Chose “New Ticket” for our Trigger
- Chose DialMyCalls as our Action app
- Chose “Send Text Message” for our Action
- Created a DialMyCalls text message template for the Zap
Now that your DialMyCalls + Freshdesk Zap is up and running, your Freshdesk support team will receive an SMS notification via mass text message every time you get a new support ticket in Freshdesk. This Zap combines three powerful platforms in a way that brings your customer support team even closer to your customers. It’s a great way to improve your customer support response times and keep your team in the loop about what’s needed. If you have not already, sign up for a DialMyCalls account today to utilize this integration!
This Freshdesk Integration is only a sample of what can be accomplished through Zapier. Don’t hesitate to explore what else the service has to offer, and get creative with your automations!