- Home
- Features
- Integrations
- iContact Integration
iContact Integration

Welcome Your New iContact Subscribers To Your Mailing Automatically
In this article, we’re going to show you how to combine iContact and DialMyCalls by using Zapier. Zapier is a platform that makes automating different services super easy, saving you time and resources in the long run.
The example we’re going to use in this article involves sending your new iContact subscribers an email automatically that welcomes them to your mailing list through DialMyCalls. This email can contain more information for them to browse, special offers, and more!
This allows you to engage with your subscribers in a personal and authentic way without having to do so by hand. You can also use this idea to keep track of your iContact subscribers through DialMyCalls, which we’ll touch on as a bonus automation!
iContact + DialMyCalls Integration (Video)
What You’ll Need:
- iContact account
- DialMyCalls account
- Zapier account
Step 1: Create Your Zap
After you have your accounts in place, you’re ready to make your Zap! If you’ve never used Zapier before, a “Zap,” is just an automation that connects two different services to one another. Once created, it will perform a task whenever specified conditions occur so that you never have to do the process manually again.
The first step towards creating your Zap is to connect iContact to DialMyCalls. To do this, log into Zapier and go to your Dashboard. You should see something at the top of the screen that looks something like this:
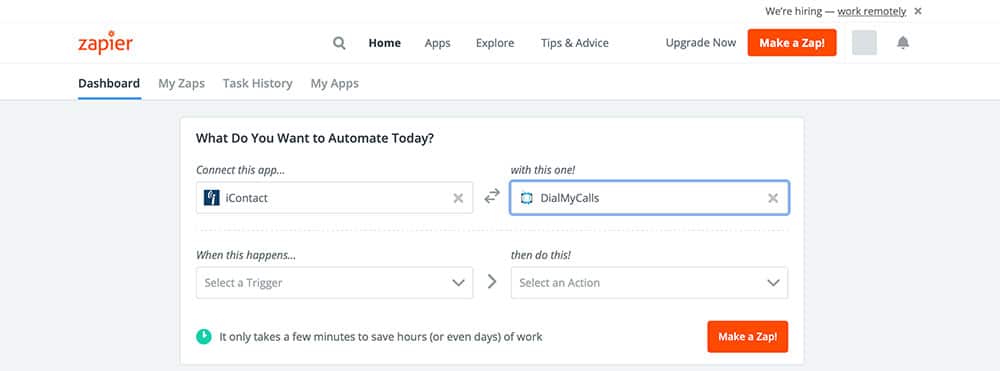
Following the image above, you’re going to type “iContact,” into the Connect this app… field and “DialMyCalls,” in the with this one! field. Then click the orange Make a Zap! button in the lower right and you’re ready to get started!
Step 2: Create Your iContact Trigger
Your Zap’s “Trigger,” is what tells it when to run. For example, if you created a Zap that automatically kept track of how many apples you ate, you would want it to run every time you ate an apple; therefore, your Trigger would be something like “Eats an apple.”
In our case, we want our Zap to run every time someone new subscribes to our iContact mailing list. After you choose Make a Zap!, Zapier will bring you to this page:
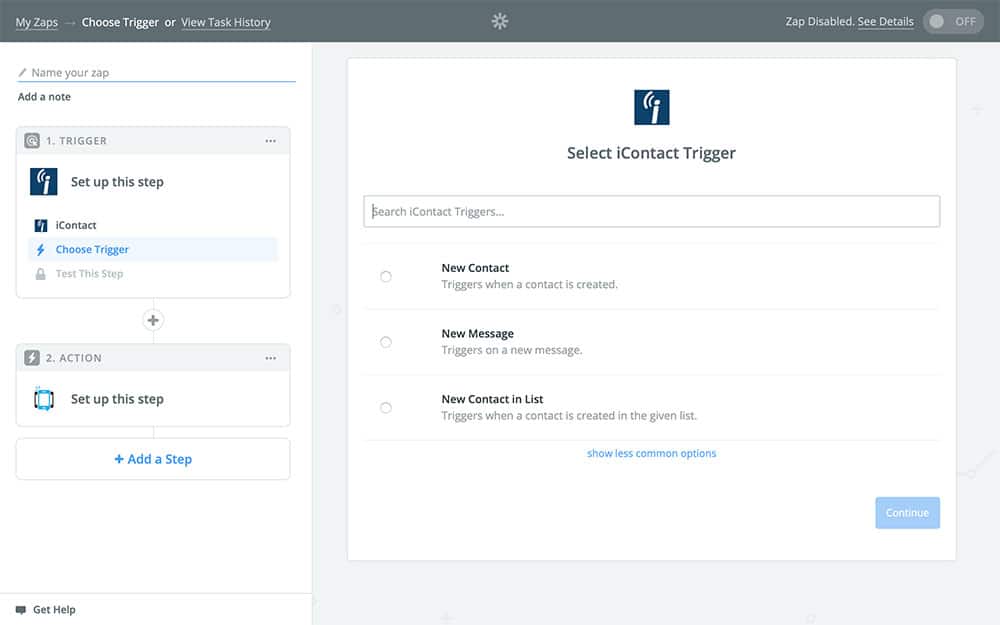
As you can see, though, none of the options mention new subscribers. Fortunately, Zapier allows you to search for your Trigger in case it isn’t listed. In the search field at the top, type in “Contact Subscribed,” and choose it once it appears, like below:
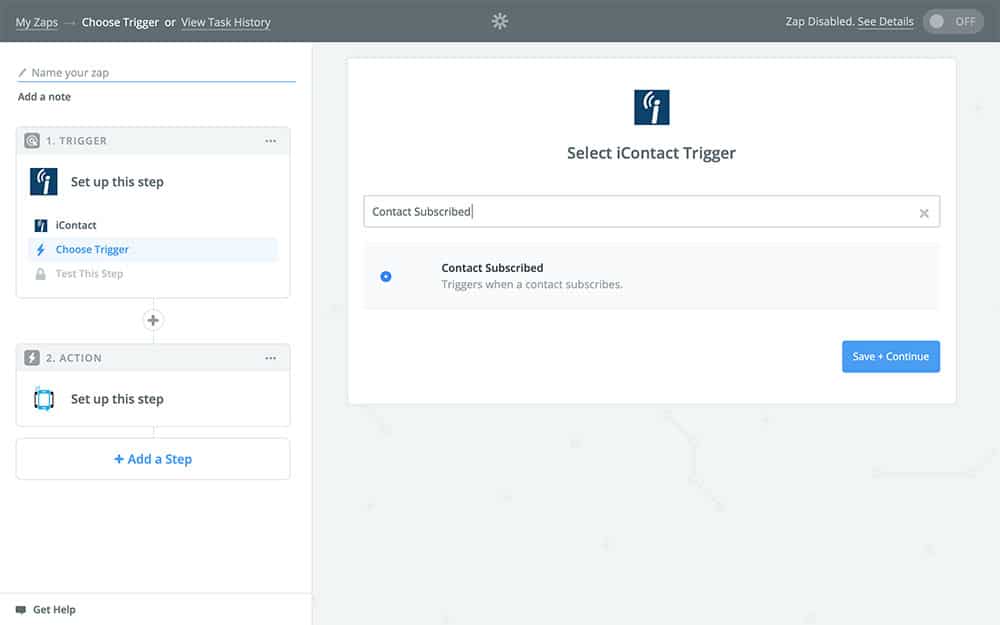
After selecting it, choose Save+Continue.
This brings you to the hardest part of creating our Zap, and fortunately, it’s not too difficult! You should be looking at the following screen:
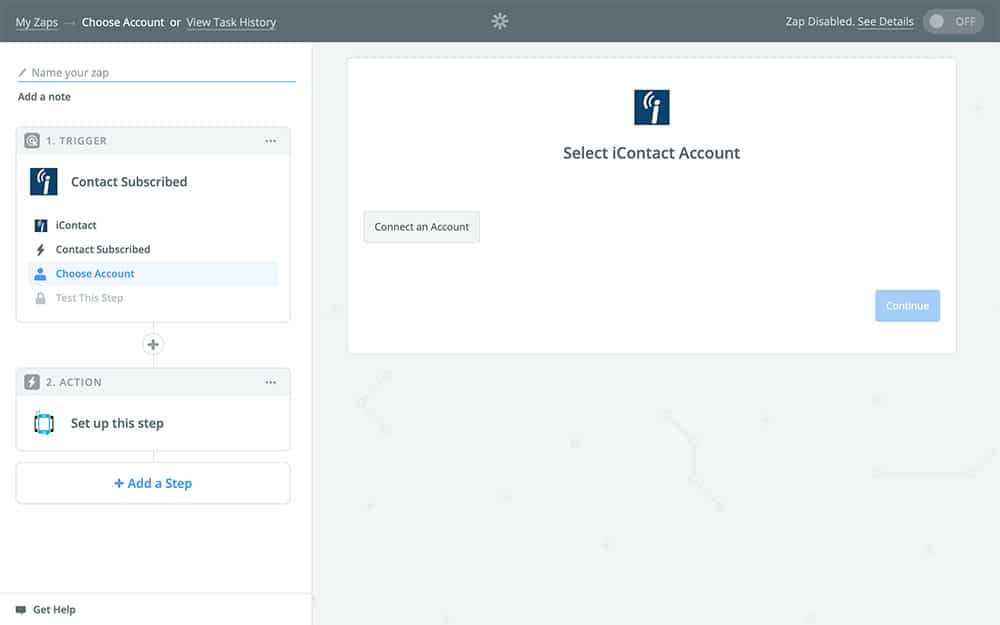
If you’ve used iContact with Zapier before, you’ll see it listed as a selectable option on the above screen. If that’s you, then you can simply choose it and move on to the next step. For the rest of us, though, we’re going to choose Connect an Account.
This will open up a new tab that looks like this:
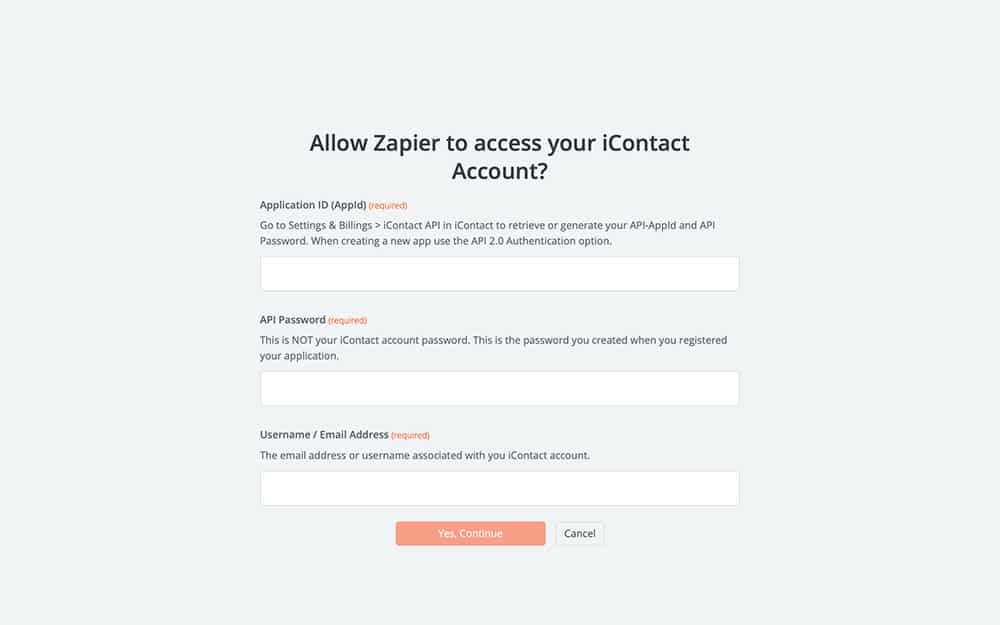
In order to connect iContact to Zapier, we’re going to need some information from our iContact account. This page has directions on how to link the two, but we’re going to walk you through it in order to keep things simple.
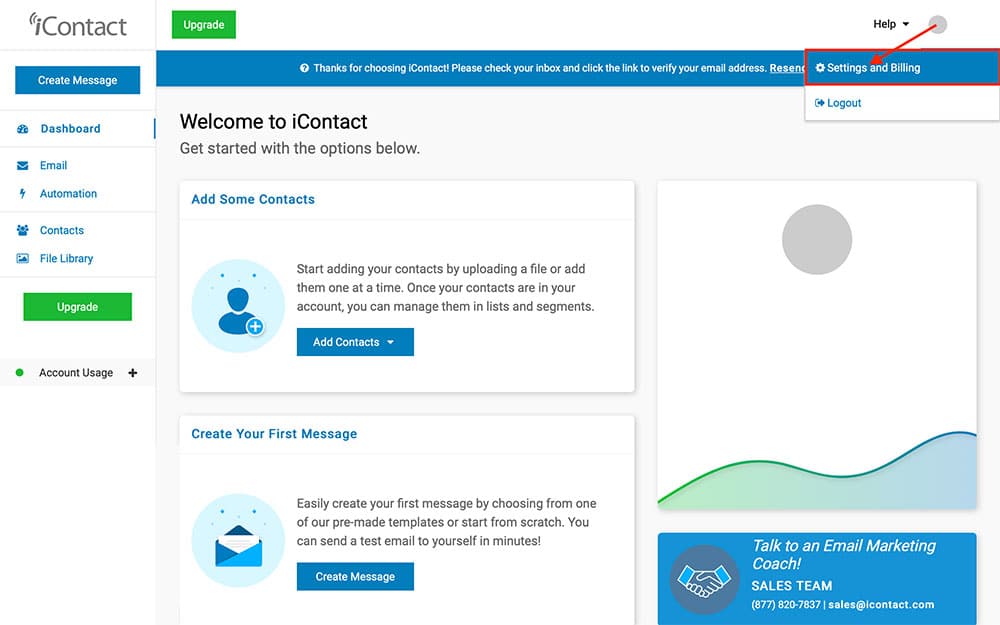
First, open a new window (without closing the one that you’re using to work on your Zap!) and login to your iContact account. Once there, you’re going to click your username in the upper right corner and choose Settings and Billing:
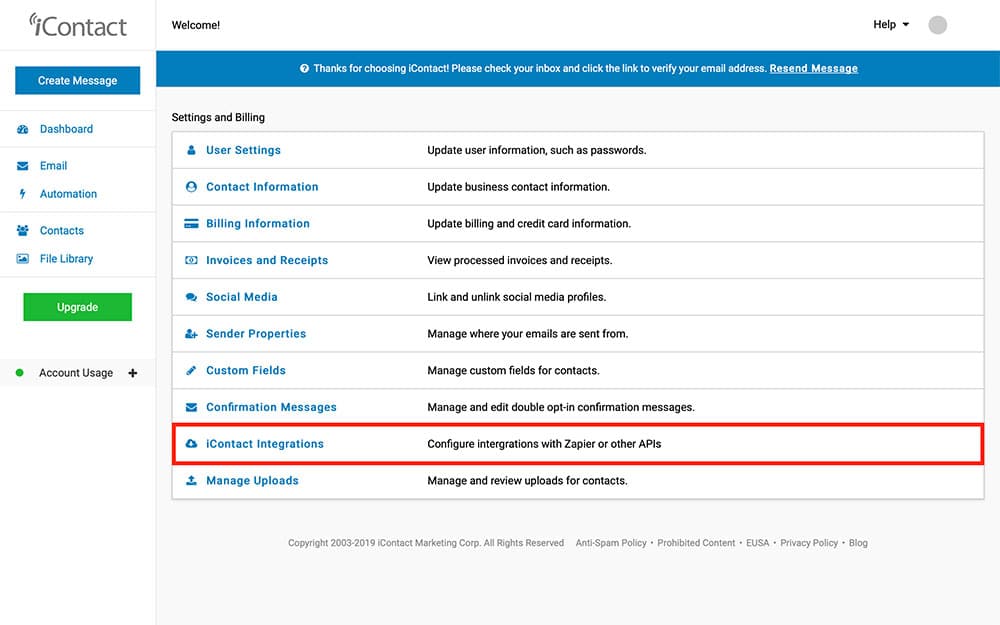
On the next page, you’re going to choose iContact Integrations near the bottom of the page. You’ll even see that Zapier is mentioned next to this option:
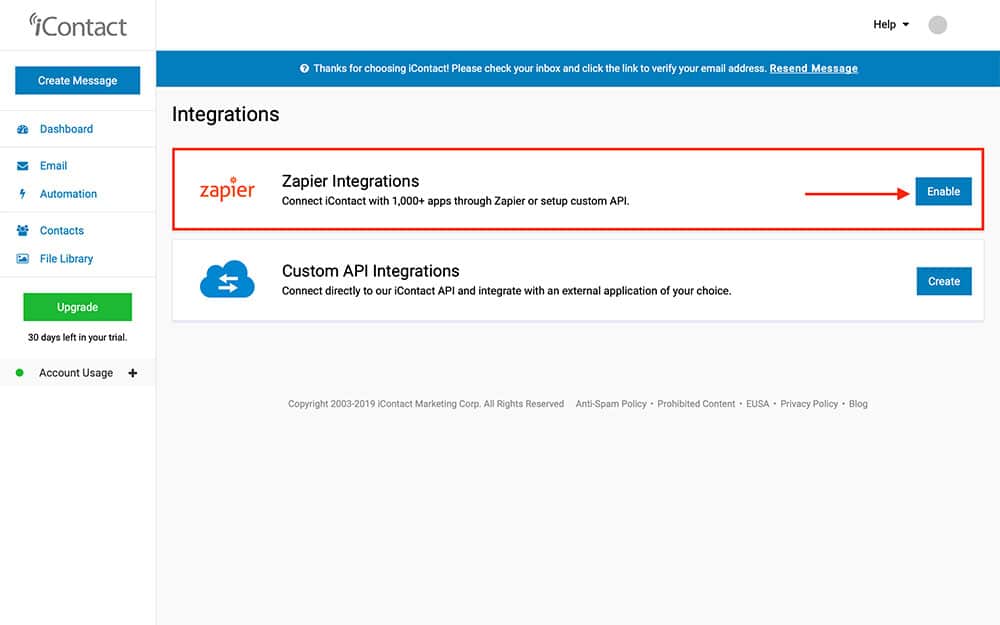
This next step should be pretty obvious! All you’re going to do is select Enable next to Zapier, which will open up your iContact account to Zapier integrations:
This will bring you to a page containing a few bits of information – like an AppID and Password – which can’t be edited:
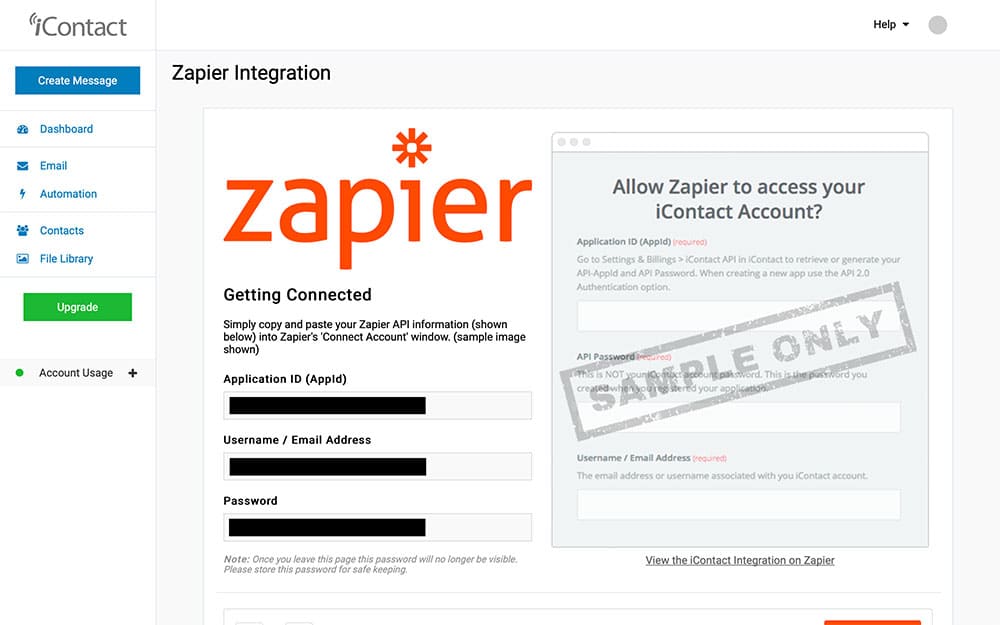
This is what you’re going to copy and paste into the tab that Zapier opened up a while ago. Once you’ve entered in all of your information, select Yes, Continue to finish connecting your iContact account to Zapier:
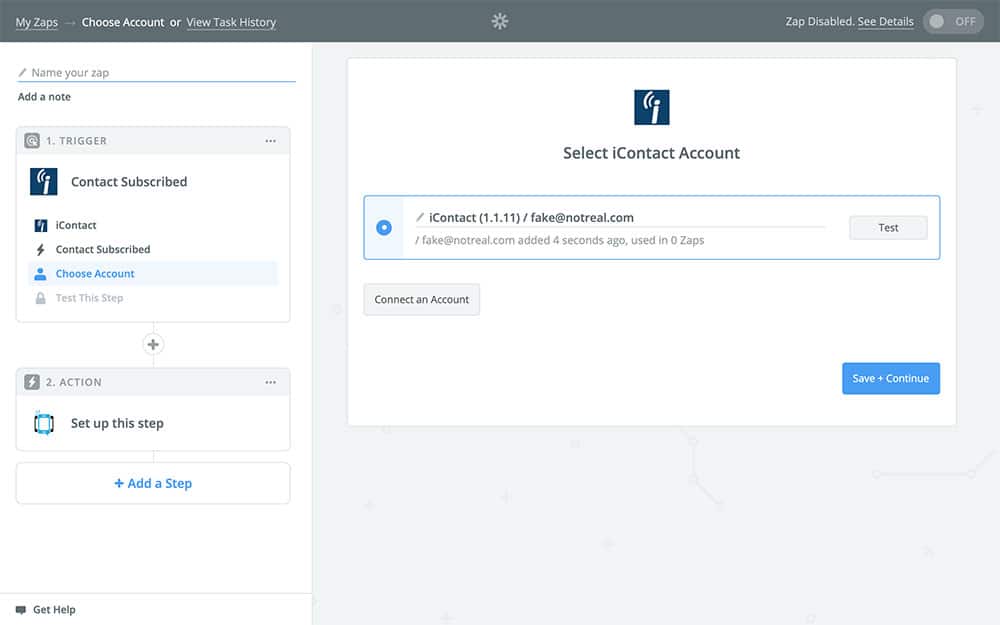
Now all that’s left to is select your account and Continue!
From here, Zapier is going to ask you to pull in a sample. This sample is what Zapier is going to use in the next section when you’re deciding what exactly you want your Zap to do. This sample won’t actually be used when your Zap is running, though, so it doesn’t matter which sample you use. You can use one from your actual iContact contacts, or have Zapier create a random one like this:
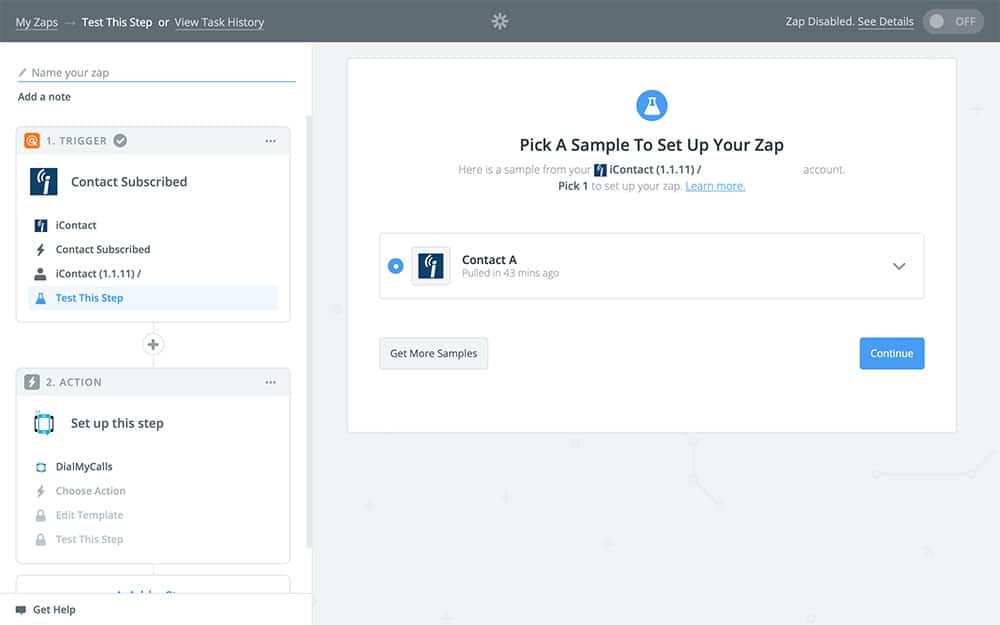
Once you have your sample, you can select Continue. Zapier may ask you to test this step, which you can if you so choose. Otherwise, you can skip the testing and move on to the next stage, creating your action!
Step 3: Create Your DialMyCalls Action
Now we’re going to create our action. As the name suggests, this is what our Zap is actually going to do once we get a new iContact subscriber. You can have your Zap do multiple actions, though for this example today we’re just going to use one.
After finishing your Zap’s trigger, you should be at the following screen:
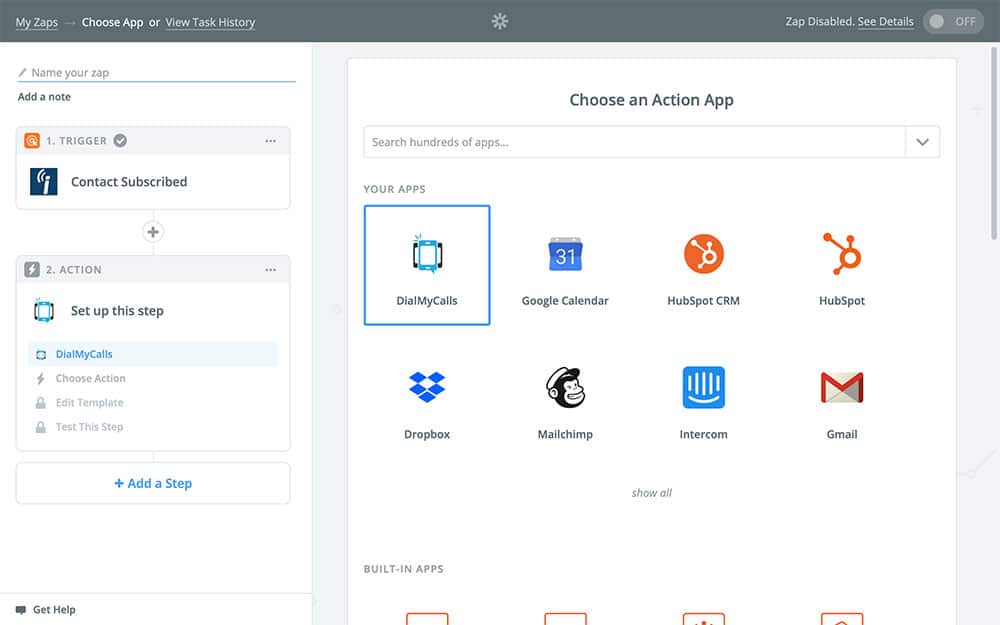
Since we chose to connect iContact to DialMyCalls in the first step, it should be the first app in your list, like in the screenshot above. If you don’t see it, though, you can find it by searching in the search field at the top of the page. Once you have it selected, Continue.
Now we’re going to choose the action that our Zap performs. In our case, we want to send a welcome message to our new subscribers. To do this, choose Send Text Message:
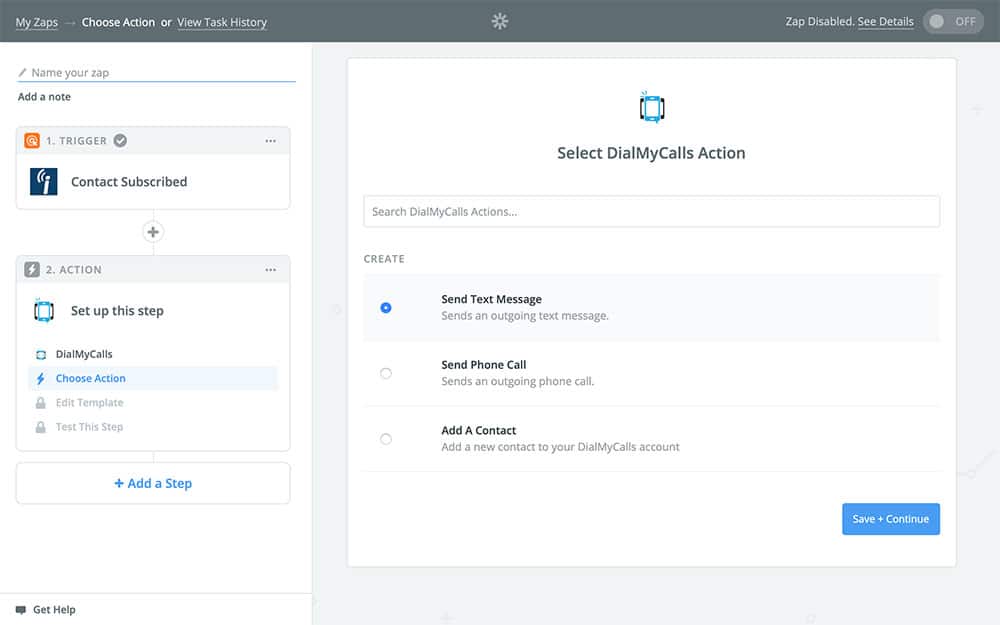
Now you may be asking yourself, “Wait a second, why are we sending our new email subscriber a text message?” Well, the answer is we aren’t – sort of. While you may have never realized it, you can actually send emails to people through SMS text messages by typing their email address in place of their phone number – which is exactly what we’re going to do.
The next page you’re going to see is the template:
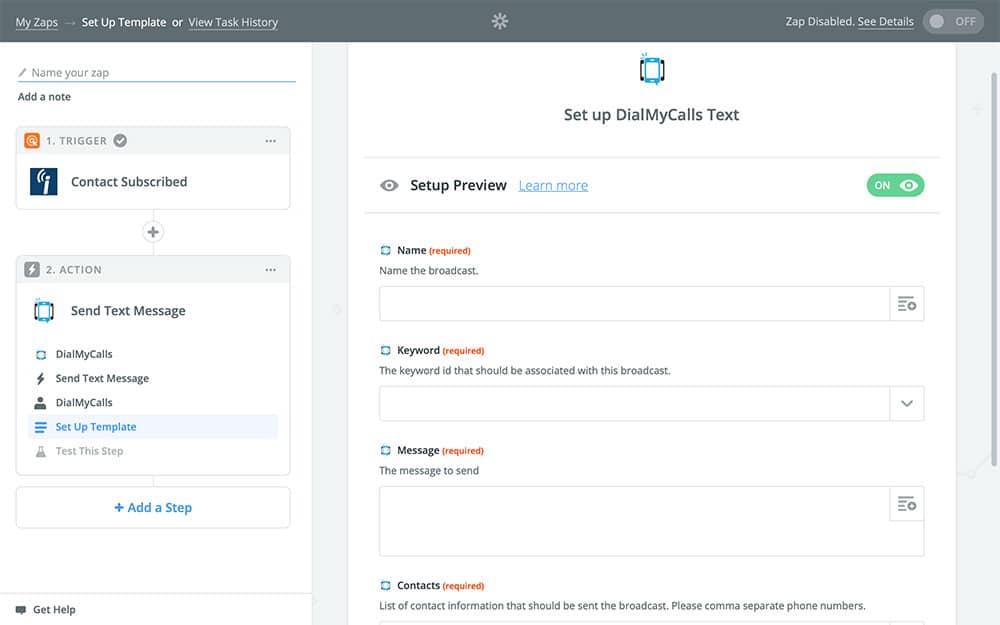
This is where you’re going to specify exactly how your Zap works. In our case, that means deciding what our message says, who it sends to, and so on. Now if you wanted, you could fill in each field simply by typing what you want to say. This will work, but it means that your messages won’t be personalized. This is where variables come in.
To the right of each field, you’ll notice a little dropdown menu. This menu uses information from your iContact account, DialMyCalls account, and this very Zap, and it’s what makes Zapier so useful. We’ll touch on it more in a second.
First, in the Name field, you’re going to type in the name of this message. In our case, that will be something along the lines of “Welcome to our mailing list!!” No variables required – yet.
The second field, Keyword, will need to be filled with an option from the dropdown menu. It should pull any keywords from your DialMyCalls account (a random one if you are using a free account). Pick the one that best applies to this particular Zap.
Next is the Message field. This is where you get to be creative, especially with variables. If you just type in “Hi! Thanks for subscribing!” then all of your subscribers will get the same generic message. However, you can use variables to personalize it by including the new subscriber’s name in the message, like below:
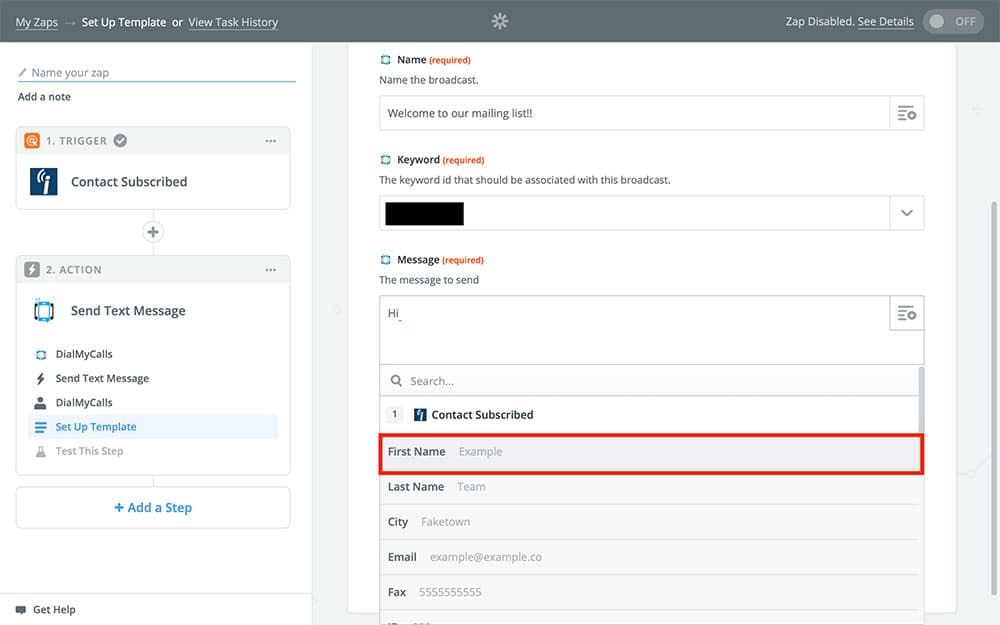
You can stop here, or you can get even more creative with how you personalize the message. It’s totally up to you!
Next is the Contacts field, and it’s where you’re going to enter the subscriber’s email. Using Zapier, we can pull this email straight from iContact.
When you click the dropdown menu on the Contacts field, you’ll notice that you don’t immediately see the email from the previous step. In order to access it for this field, you’re going to need to choose Use a Custom Value (Advanced):
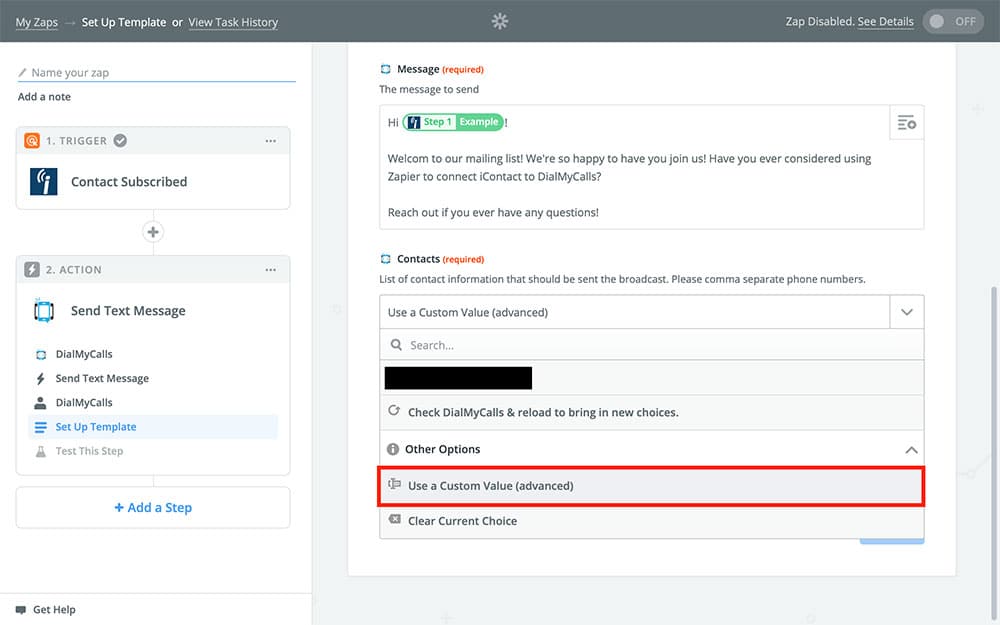
This will spawn a new field, Custom Value For Contacts Phone. The dropdown menu of this field will allow you to choose the subscriber’s email from the first step:
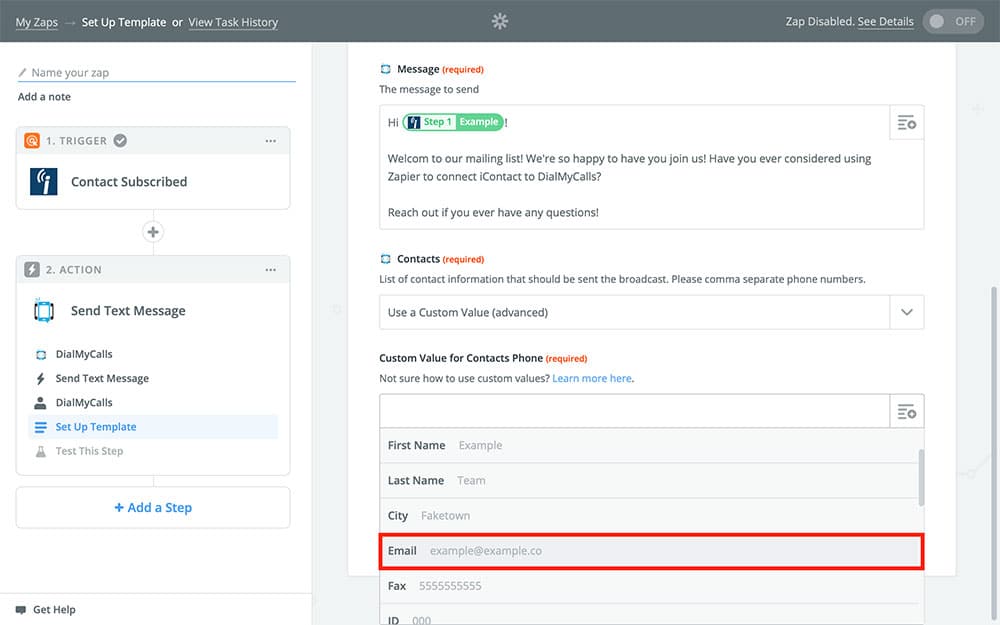
Once you’ve selected Email from the dropdown menu, your template should be good to go! It might look something like this:
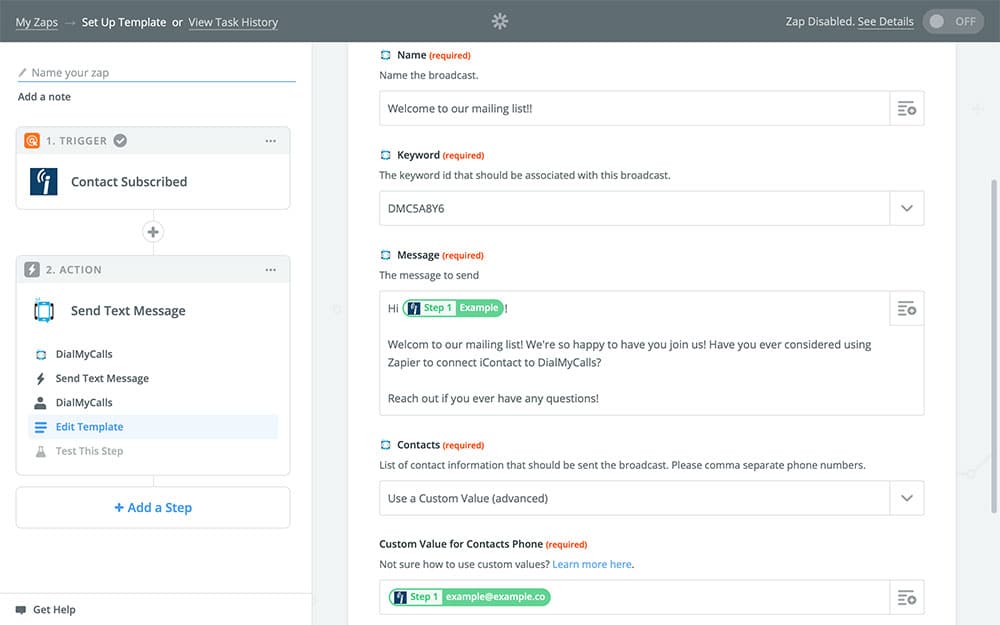
When you’re happy with how your Action template looks, you can Continue to the final steps.
The next page will ask you to test your Zap again. Like before, you’re welcome to test this Zap if you like, but it’s not necessary.
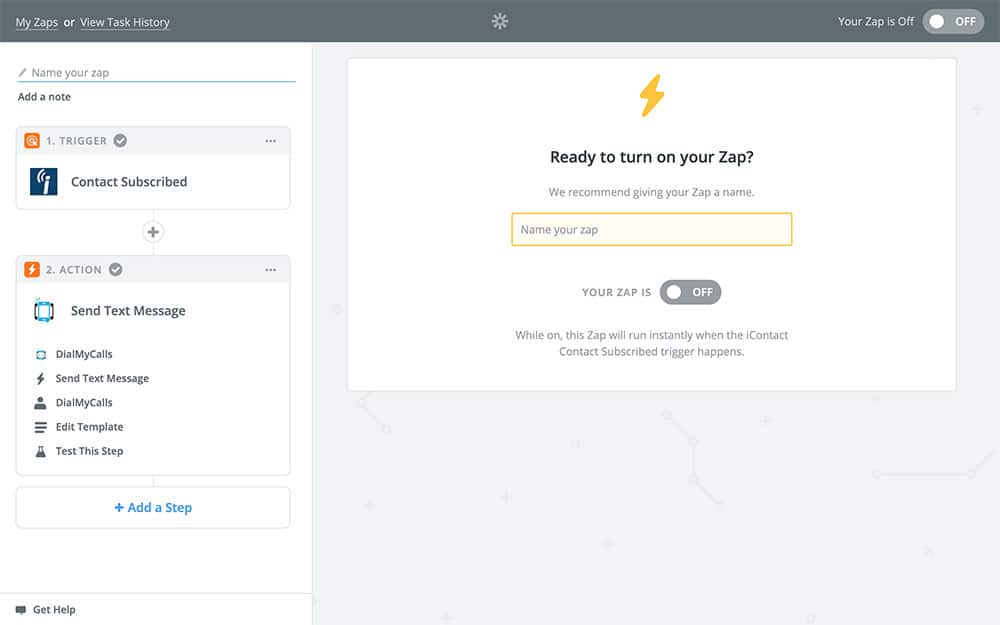
The next and final step is to name your Zap and turn it on! Be sure to name it something you can easily recognize, and keep in mind that once you turn your Zap on, everything we’ve told Zapier to do will start happening as soon as you press that button.
DialMyCalls + iContact Integration Conclusion
Here’s a quick recap of everything we did:
- Created a Zap that connects iContact to DialMyCalls
- Set our Zap to run every time we get a new subscriber in iContact
- Linked our iContact account to Zapier
- Set our Zap to send an email to new subscribers through DialMyCalls
- Created a custom welcome message for new iContact subscribers
And that’s that! If you’d like to get a little more out of this Zap, you could even add an extra step that duplicates the iContact subscriber as a contact in DialMyCalls. You could even set up custom DialMyCalls messages for different types of subscribers, or even send messages out for different events using DialMyCalls.
In addition to this iContact Integration, there are tons of ways to get more out of DialMyCalls + Zapier. Don’t hesitate to experiment and try out more on your own!
- Home
- Features
- Integrations
- iContact Integration
More Integrations
Try Using DialMyCalls Right Now
Start For Free