Trello Integration

Automatically Notify Your Team When They Are Added To A Trello Card Using Zapier
In this article, we’re going to show you how to combine Trello and DialMyCalls through Zapier. Zapier is a platform that makes automating different services super easy, saving you time and resources in the long run.
The example we’re going to use in this article involves automatically notifying your Trello team when a new member is added to a Trello card via text message. This way, you’ll be able to keep your team in the loop about who is working on what as soon as you assign people to cards.
Trello + DialMyCalls Integration (Video)
What You’ll Need:
- A Zapier account
- A Trello account
- A DialMyCalls account
Step 1: Create A Group For Your Trello Team In DialMyCalls
First, we’re going to create a group in DialMyCalls specifically for your Trello team. This will make it much easier to figure out which contacts you want to send your Trello notifications to in the fourth step. This step is optional, though, so if your DialMyCalls contacts only consist of your Trello team, then feel free to skip to step number two. If you have a lot of DialMyCalls contacts, however, you’ll likely find this helpful.
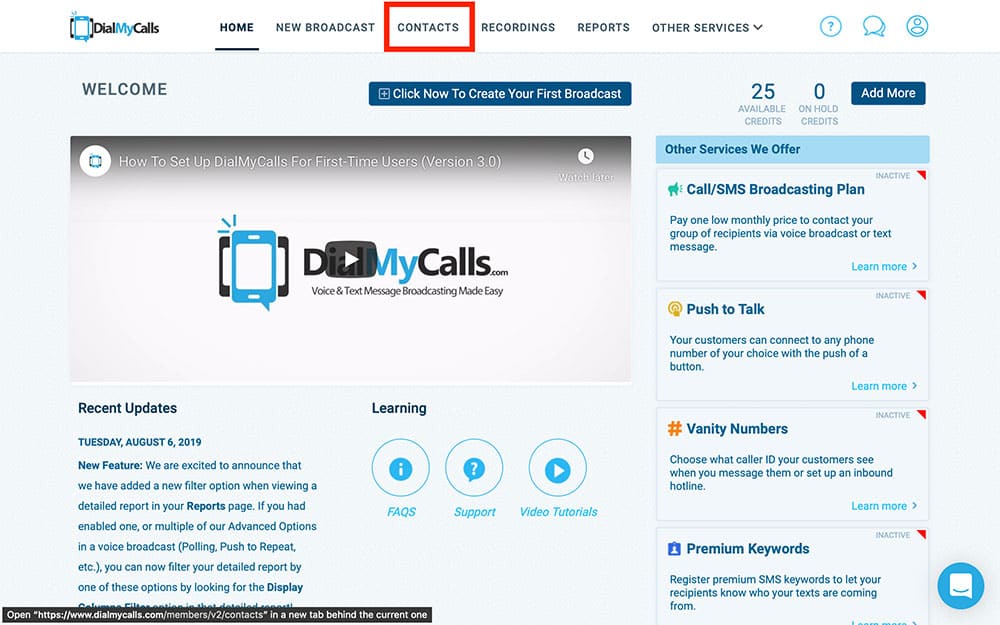
Log in to your DialMyCalls account and choose Contacts at the top of the screen:
On the next screen, click Add Group in the top right:

Next, name your new group something that will help you remember that it’s your Trello team, like so:

After you’ve done that, you can start adding your Trello team members in your DialMyCalls to that list. This way, when we’re setting up who to send our automated notifications to in Step 4, you’ll be able to use this group as a reference point. Keep this group open in a separate tab on your browser.
Step 2: Create Your Zap
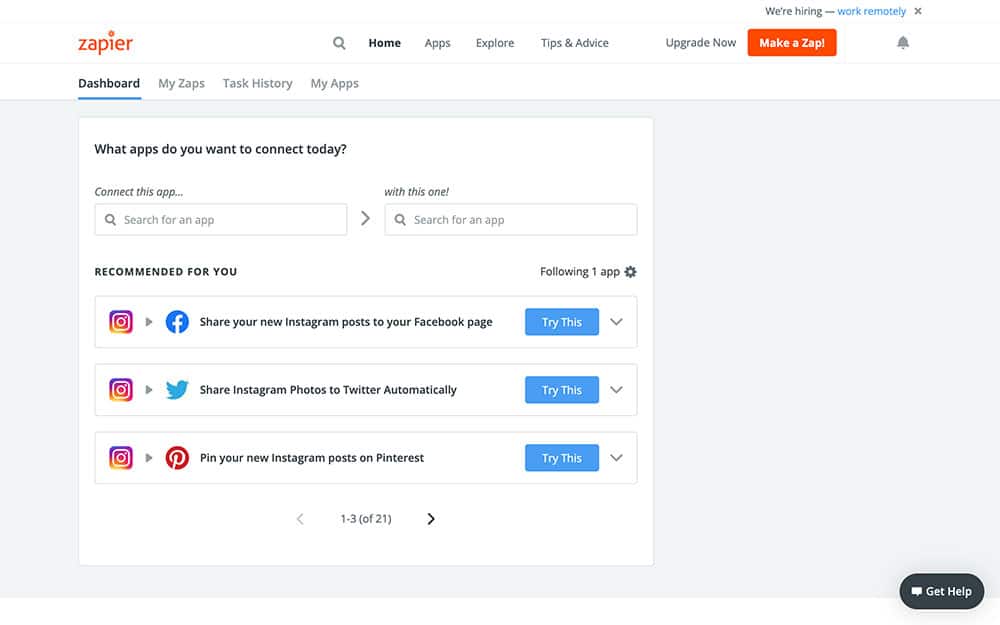
Now that you’ve put in the prep work by creating a DialMyCalls group (or skipped to Step 2 – I see you) it’s time to create your Zap. Go ahead and log in to Zapier and head over to your Dashboard:
See the orange Make a Zap! button in the top right? Push it! This will bring you to the Zap creation screen, which is where things start to get interesting.
Step 3: Create Your Trello Trigger
The first step of this Zap (and every other Zap) is going to be the Trigger. This is an event that tells your Zap when to run. Every time your Trigger happens, Zapier will automatically tell this Zap to do its thing.
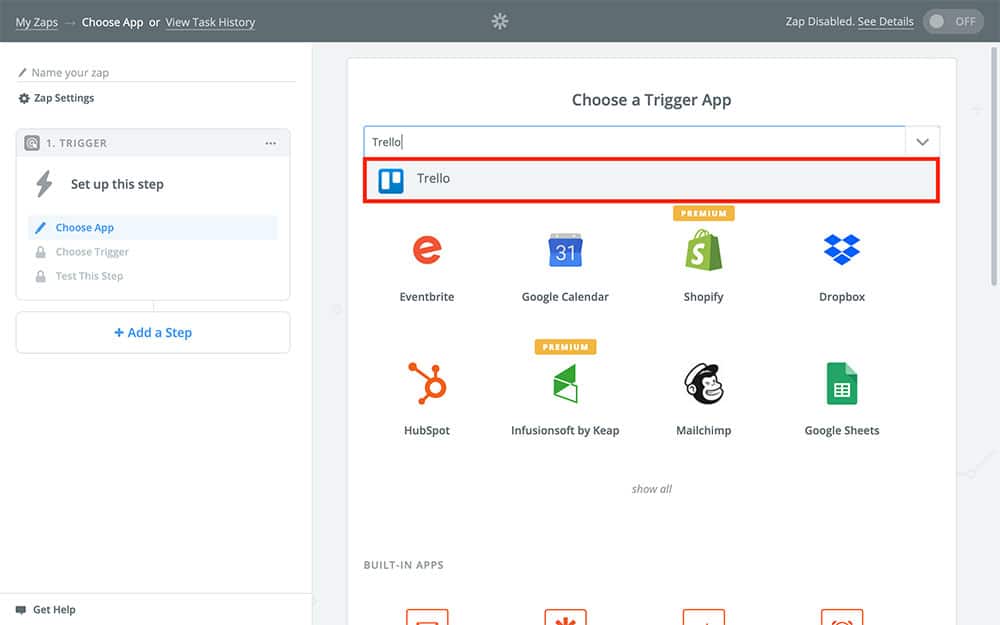
In the search field at the top of the page, type “Trello,” and select it when it appears:
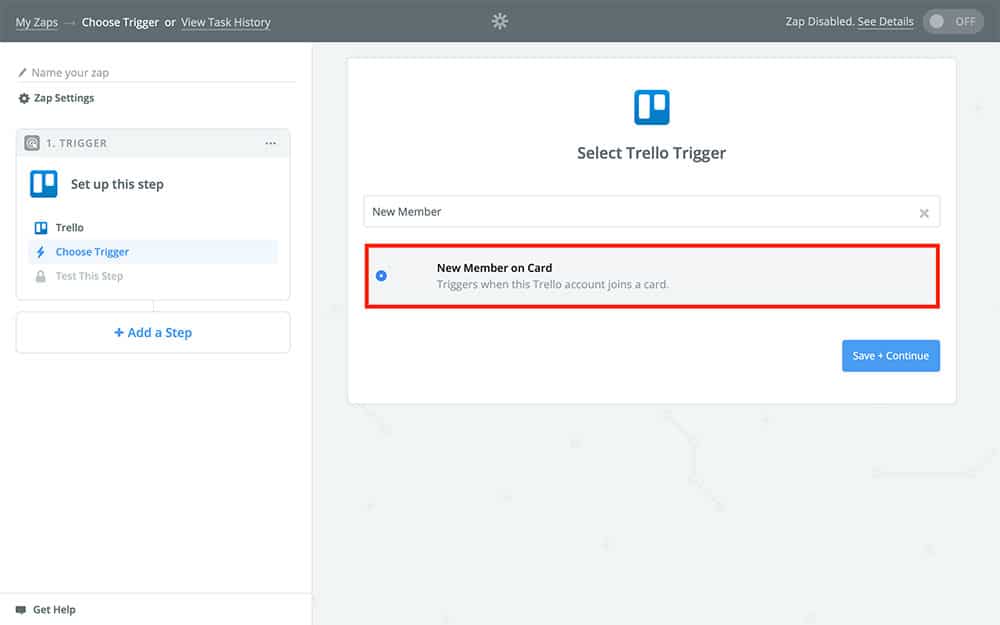
After that, select Continue. On the next page, you’re going to choose the Trello event that triggers this Zap. In our case, we want this Zap to run every time a Trello member is added to a Trello card. You probably won’t see this option listed, however, so go ahead and type “New Member,” into the search field and select New Member on Card when it appears:
After that, you’re going to need to connect your Trello account to Zapier. If you’ve never done this before, click the Connect an Account button and follow the on-screen prompts. If you have used Trello with Zapier before, however, you should see it already listed as an option, like this:

Next, you’re going to choose the Trello board you want to use with this Zap:
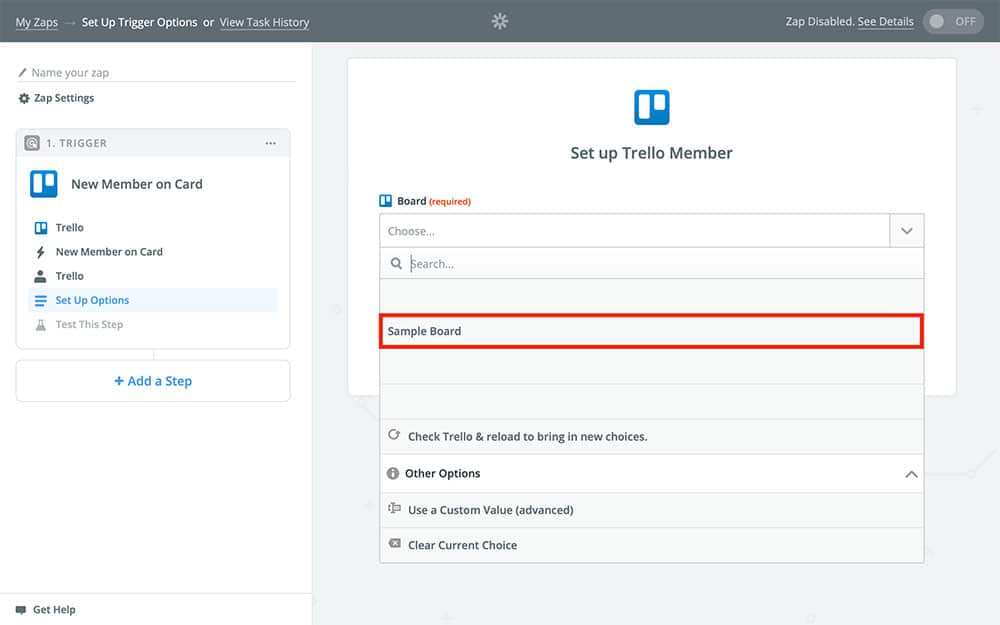
Keep in mind that whichever board you choose, any time someone is added to a Trello card on that board your team will receive a notification via this Zap. The board you choose should be the one used by the Trello team receiving the notification.
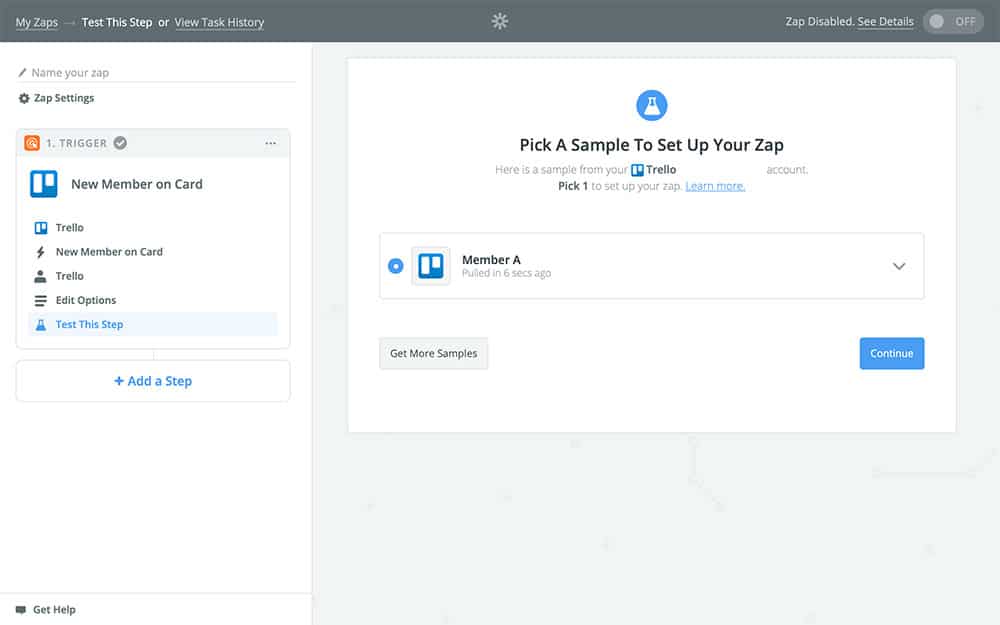
After that, you’re going to choose a sample for your Zap. Your sample is just a random Trello member that is going to be used to fill in the rest of the Zap, so don’t worry over which member you use too much:
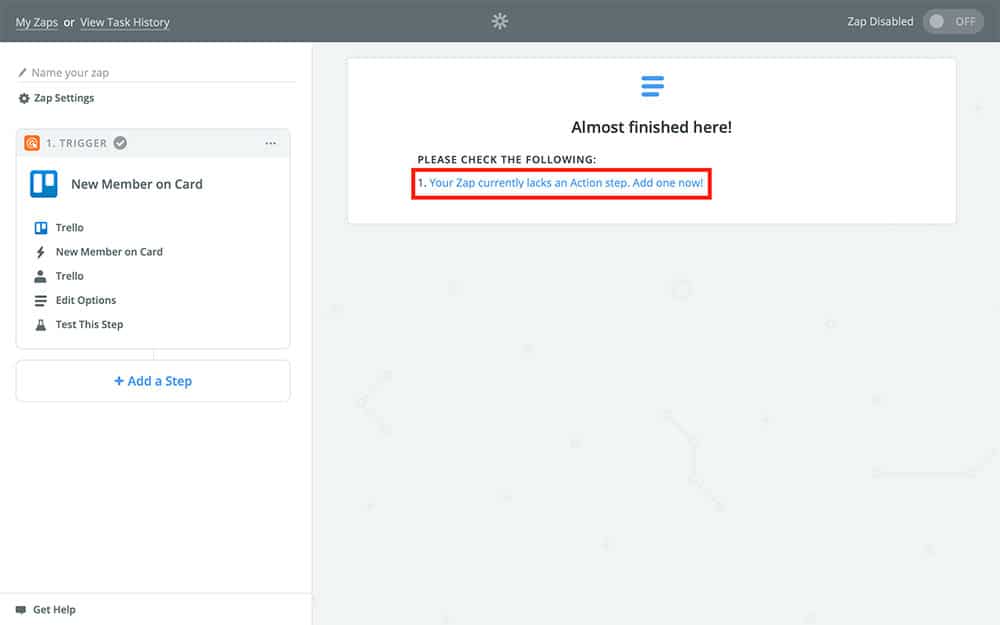
After that, Zapier is going to ask you if you want to add an Action step – which we do! Just click the blue text to add the next step:
Step 4: Create Your DialMyCalls Action
Now it’s time to create your DialMyCalls Action. Your Zap’s Action is what your Zap is actually going to do when it runs. You can add as many Actions as you like, though in our case we only need one.
You should be looking at the Action app selection screen:
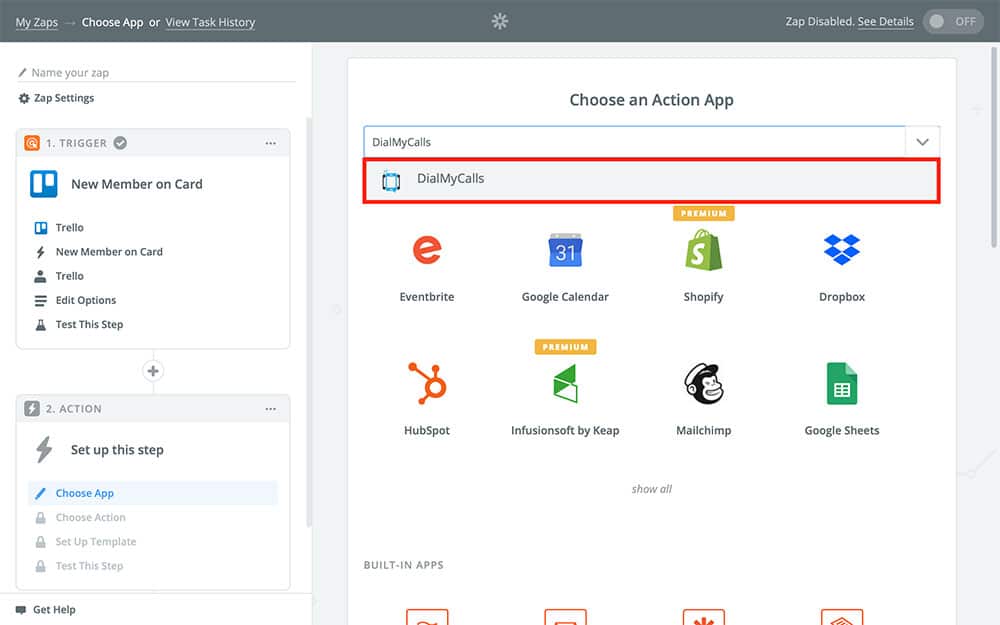
Like before, type “DialMyCalls,” into the search field, select it when it appears, and Continue.
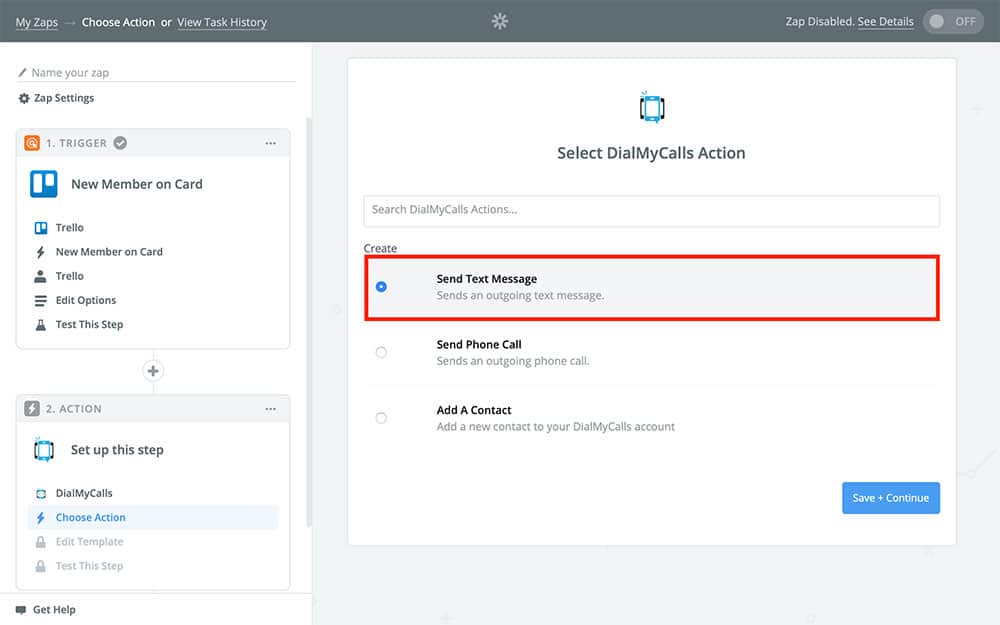
On the next page, you’re going to choose what DialMyCalls does when this Zap runs. In this case, we want to send a text message – so, go ahead and choose that from the available options:
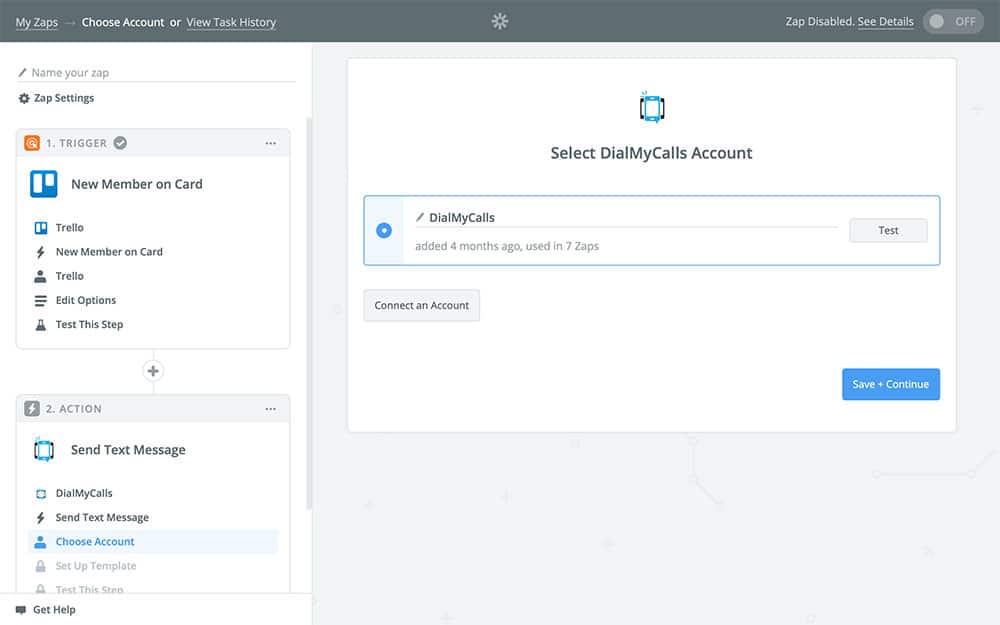
After that, you’re going to connect your DialMyCalls account to Zapier. If you’ve already done this, you should see it listed as an available option. Otherwise, choose Connect an Account and follow the onscreen instructions:
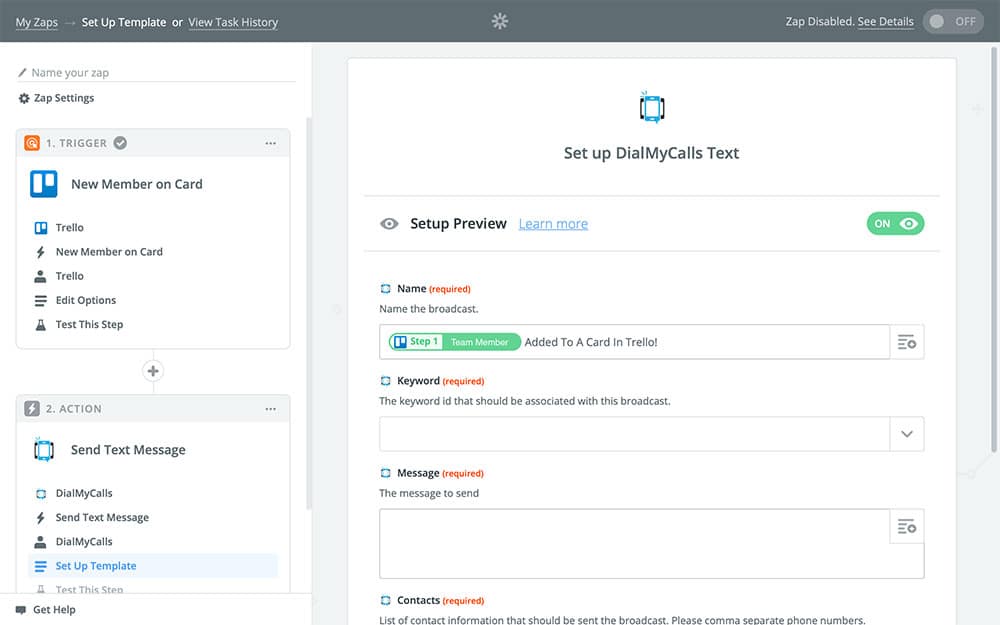
Next, you should find yourself faced with the Action template:
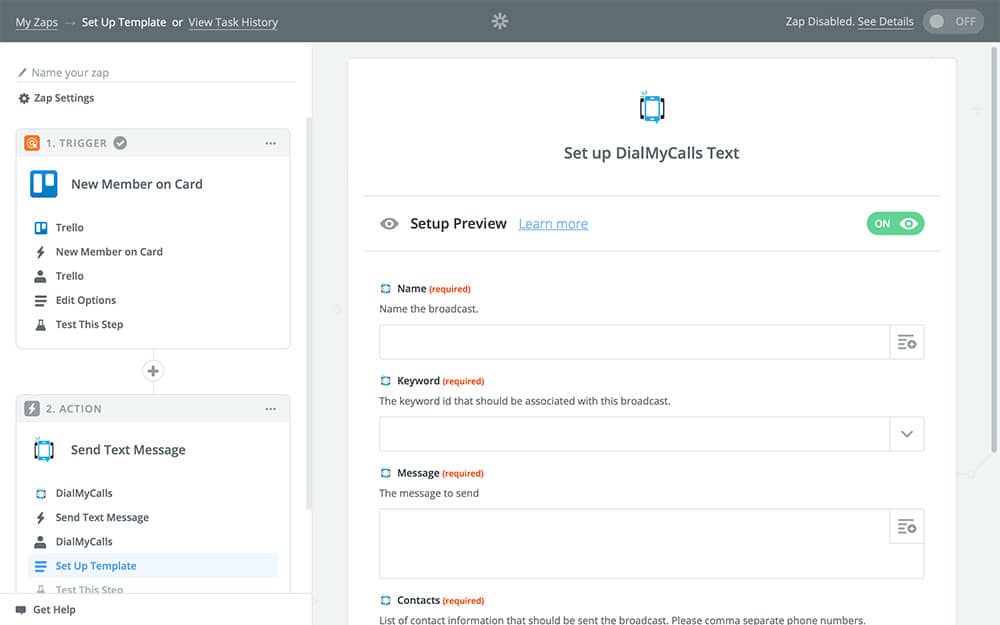
This is where we’re going to specify exactly how that text message your sending looks. The first field, Name, is going to be the name of the message you’re sending. You can name it something like, “Team Member Added To Trello Card,” and all of your notifications sent via this Zap will be called that. For something a little more unique, though, you can use the Full Name variable from the dropdown menu so that each notification will be named after the member being added to a Trello card, like so:
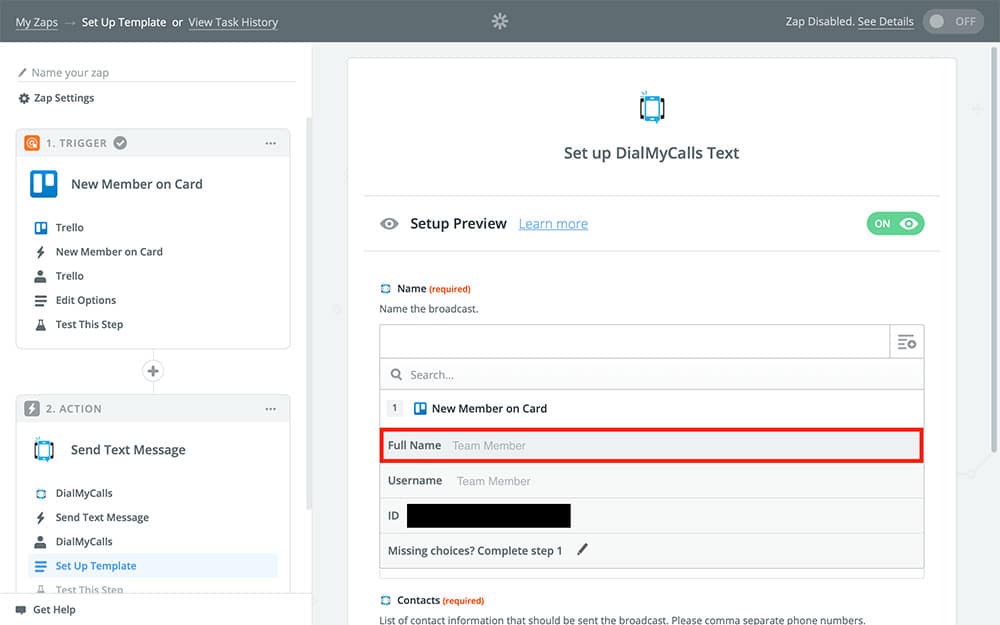
The part in the green bubble is your variable, which will change every time this Zap runs depending on the Trello member that is added to a new card – pretty neat!
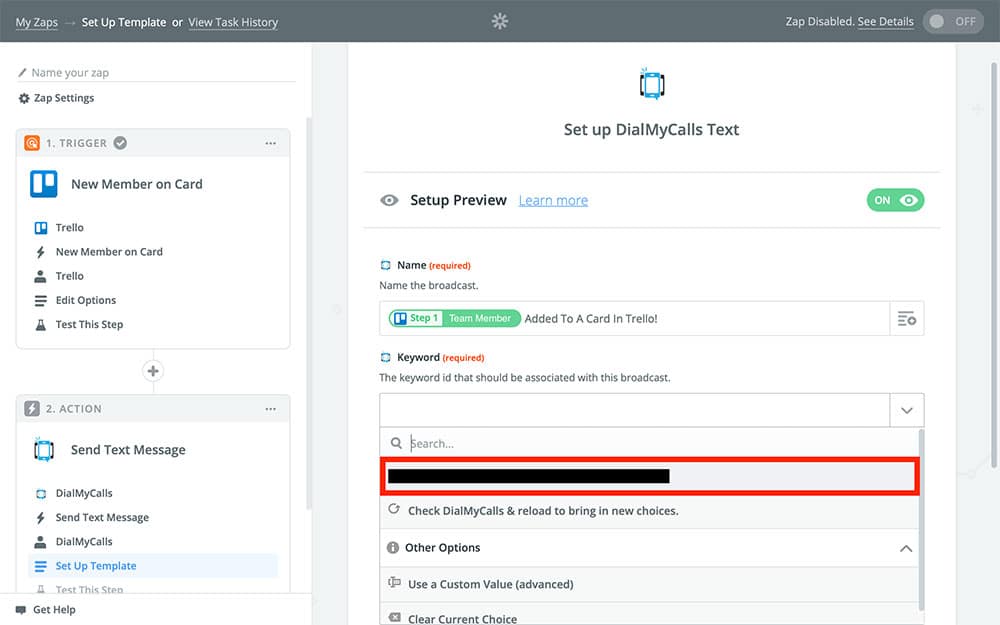
Next, you’re going to select your Keyword. This is what will appear in the “From,” portion of your text message. You can create custom Keywords on DialMyCalls:
Next, you’re going to create the message that you want to send with each notification. Just like with the Name portion of the message, you can fill this in without any variables, but it means that every notification will look exactly the same. We recommend using variables from the dropdown menu so that each notification is unique and more informative:
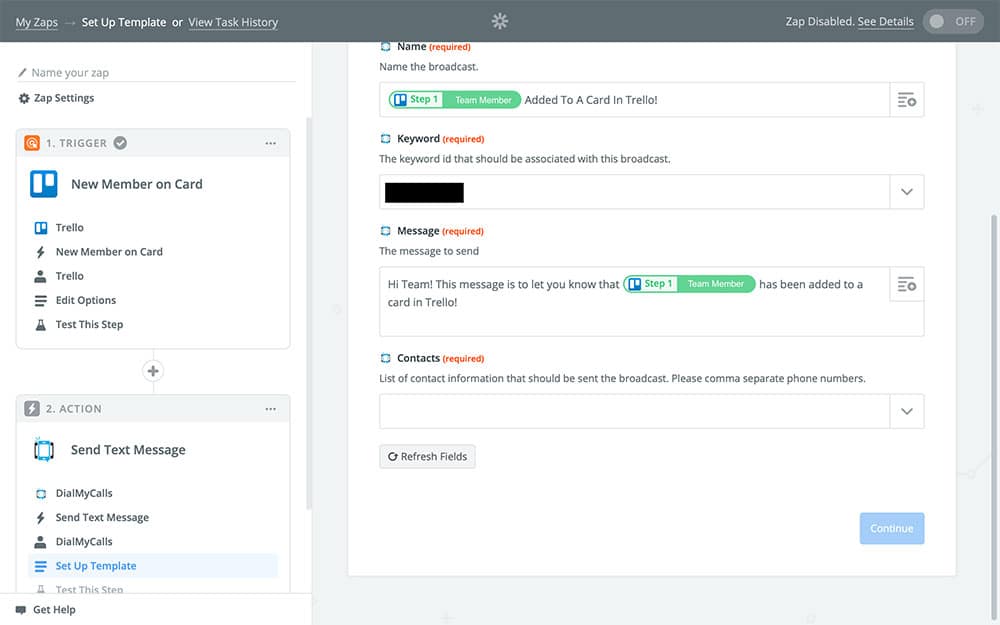
Remember, it’s ok that the name in the green bubble is the same as your sample – it’s just a placeholder and will still change each time this Zap runs!
The last field your going to fill in is the Contacts field. You’re going to need to add each contact you want to send a notification to one at a time, which is where the group we created in the first step comes in handy. If you only choose one contact, they’re the only person who is going to receive these notifications. So make sure you include the phone numbers of every member of your team, or at least the ones you want to be notified. And remember that if you add new members to your Trello team, you’ll need to add their numbers to this Zap as well for them to be notified.
After you’ve done that and you’re happy with your Action template, you can Continue to the last few steps!
Directly after that, Zapier will ask you if you want to test this Zap. You can if you like, but keep in mind that doing so will send a text notification to your Trello team with the sample you chose in the beginning. If you don’t want to do to this, feel free to choose Skip Test:

You’re now at the final part – naming your Zap and turning it on!
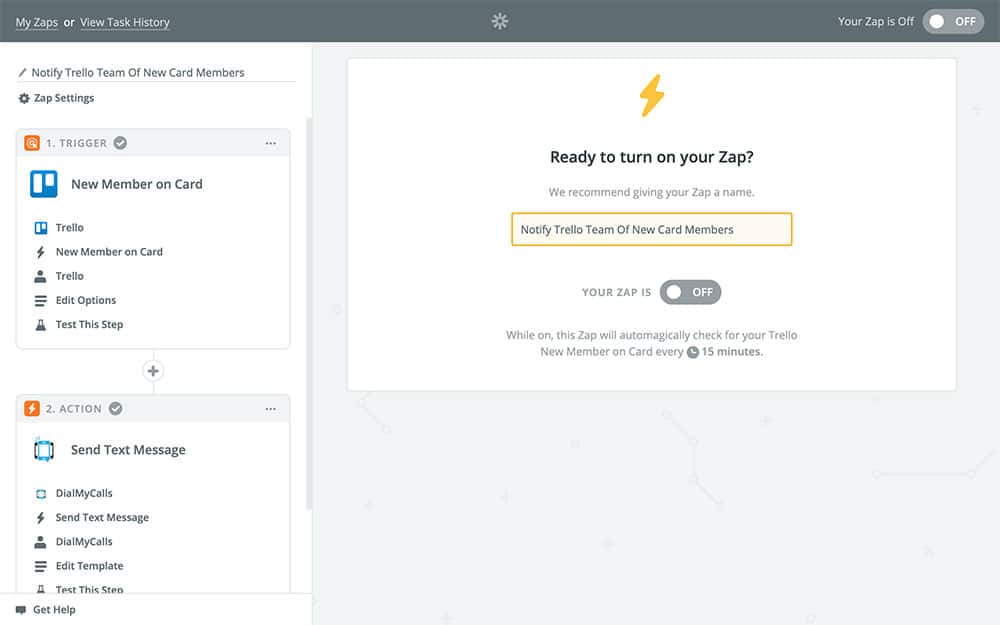
Keep in mind that once you turn this Zap on, your Trello team is going to start receiving notifications for all new members added to Trello cards until you turn this Zap off again.
DialMyCalls + Trello Integration Conclusion
Here’s a quick recap of everything we did:
- Created a contacts group in DialMyCalls for our Trello team
- Created a Zap with Trello as our Trigger
- Set our Zap to run every time a new member is added to a Trello card
- Told our Zap to send out a text message notification to our Trello team letting them know which member was added to a Trello card
With your DialMyCalls + Trello Zap activated, it’ll be much easier to let members of your team know when they’ve been assigned new projects and the rest of the team know who’s working on what. You can send notifications for other Trello events as well, which would allow you to keep everyone in the loop on everything important, automatically!
This Trello Integration is only a sample of what can be accomplished through Zapier. Don’t hesitate to explore what else the service has to offer, and get creative with your automations!